online poker

Omnomicon

say it with me now, “om nom nom”

Subscribe to Omnomicon
May-20-2009

daily nom #18

Posted by admin under daily noms

I do most of my pictures with white backgrounds on white plates, mostly because I’m just plain not good at colour-matching. But I am actively trying to add to my plate repertoire, and what do you know, this 50-cent Goodwill find worked out perfectly to showcase this jalapeno cream cheese.

Plating.

May-6-2009

daily nom #8

Posted by aleta under daily noms

Is it just me, or do intact jalapeno seeds kind of look like those old lady swim caps?

daily nom #8

May-4-2009

how to make hot sauce!

Posted by aleta under how to make...

Alrighty, kiddos! Today we’re making hot sauce. Yusssss! I did a bit of research, paired it with existing knowledge, and came up with this little spot of education.

Turns out that making hot sauce is a pretty inexact art, which makes it very easy to customize to your own liking. Different methods include aging, fermentation, starting with a mash, and then what I picture here, which requires thinking ahead a scant 2 hours instead of 3 years. With my lacking “planning ahead” skills, this is the only method that could possibly prove useful to me. Also, this makes a very thoughtful but inexpensive gift for most dudes.

Even “quick method” hot sauce is versatile. You can add ground spices, different mixes of peppers, unique vinegars, and create different textures all according to your preference. I went with a very simple recipe that uses jalapenos, as they are the most readily available hot pepper in my area, roasted garlic because it’s delicious, and red wine vinegar to give it some personality. My aim was a sauce with the simplicity, texture and versatility of Tabasco Sauce, but different because why else would you make your own, am I right?

Hot hot hot.

To begin with, we need to lay down some food safety rules. This is not the kind of food safety where we worry that we might undercook the egg the 1 time out of 20,000 that it contains salmonella. No no, we’re talking the kind of sure fire situation where “you’re doing it wrong” quickly becomes “fuck, my eyes!” so you want to be a little careful.

Here’s some totally excellent, completely free advice.

free advice.

Vinyl, unpowdered gloves which can be found by the hundred at your local drug store. I use these any time I cut a hot pepper ever since that time I had to dunk my nose in yogurt after a mistouch mishap. They’re cheap and disposable and well worth the investment. Without gloves, I find that fieriness has made its way under fingernails, on eyelids, in the corner of my mouth . . . pretty much anywhere I ever get a little itch. You’ll find yourself far less likely to itch with the gloves on, and when you’re done your nail beds won’t burn either. Be sure to be wearing these when you clean the knives and cutting board you use, and clean these well. End advice.

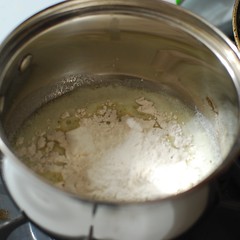
Now that we have that boring bit out of the way, we roast garlic, which takes about 45 minutes. I don’t think I have to tell you that roasted garlic is always better than garlic of any other kind.

Roasted.

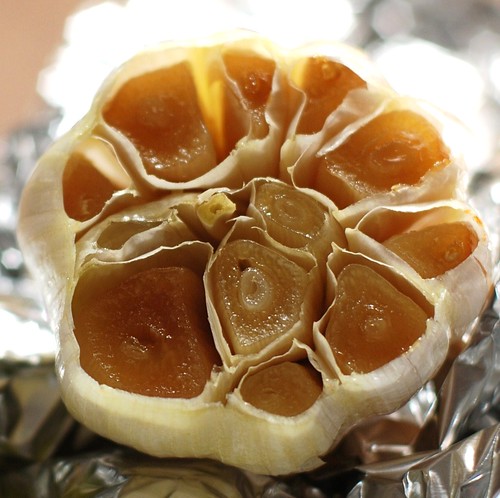
It makes your house smell good and your breath smell bad. Interesting dichotomy, garlic.

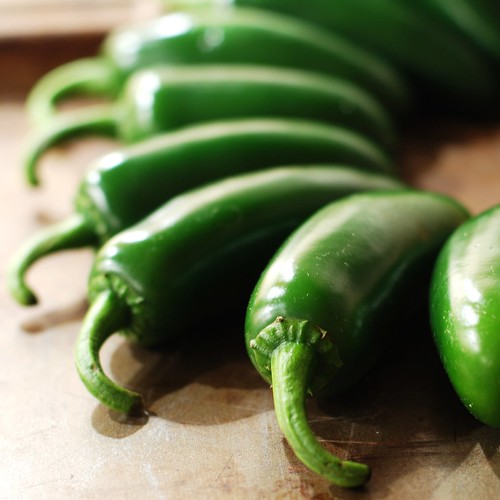
Now crank on up to broil and burn up some jalapenos! Five to ten minutes each side under the broiler should do the trick, but what you’re really looking for is the skin to blister, turn black, and pull away from the body of the pepper ever-so-slightly.

Burnt, but the good kind like you want.

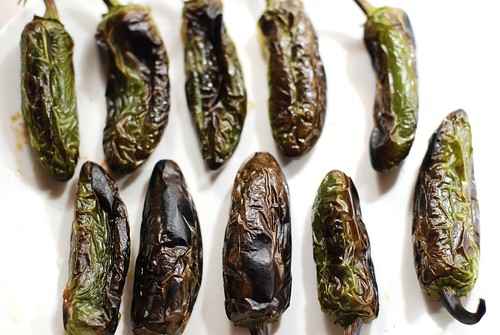
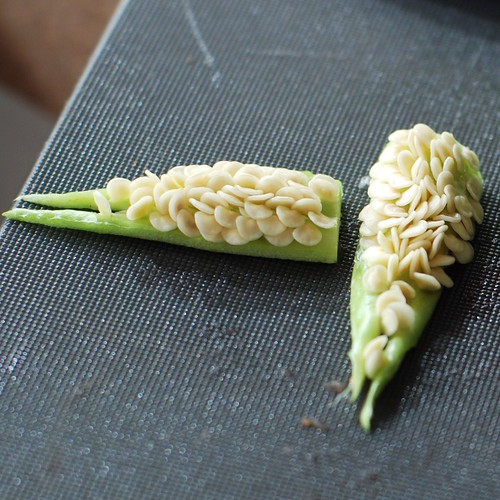
Roasting the jalapeno brings out a little more flavour in addition to deepening the efficacy of its spiciness, and is worth the effort. After doing so, don your gloves, peel the skin, remove the seeds, and artfully arrange with the garlic head in a florally-reminiscent display of Springtime enthusiasm.

Spicy little flower.

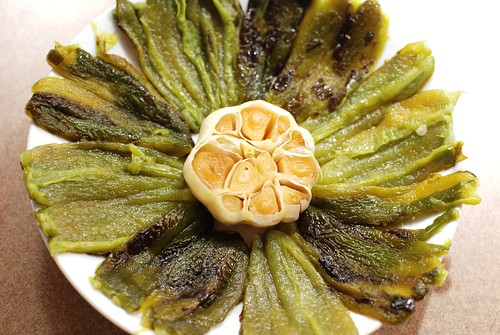
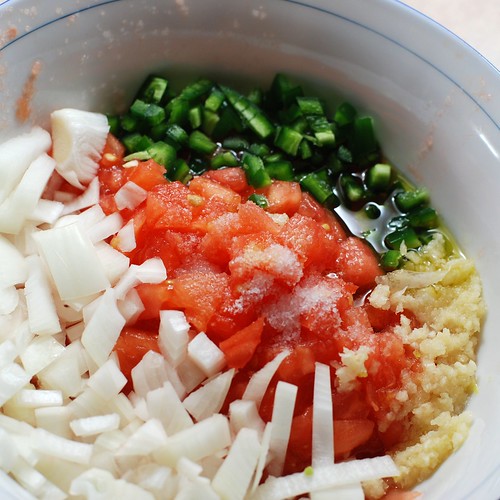
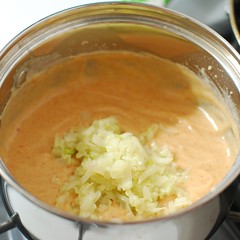
Okay, you don’t have to do that really, but it’s an option. What you do need to do is chop these veggies up and dump them in a pot with some vinegar.

The simmer commencement.

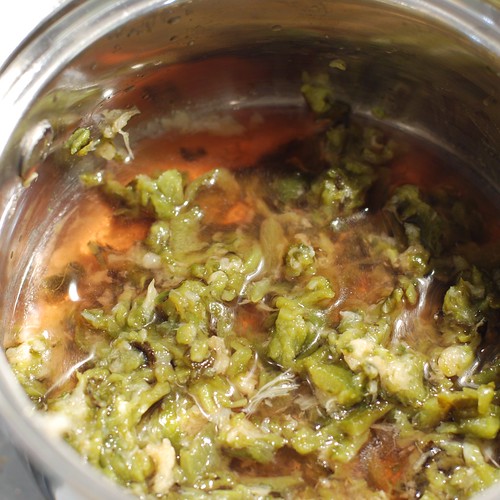
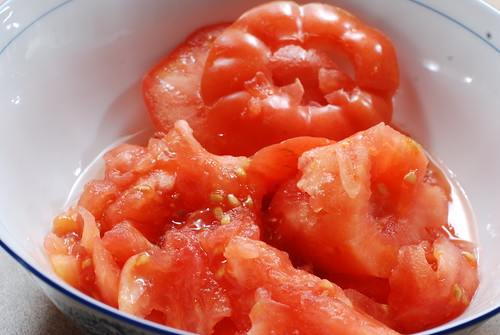
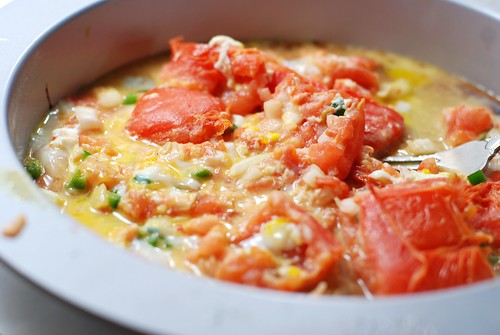
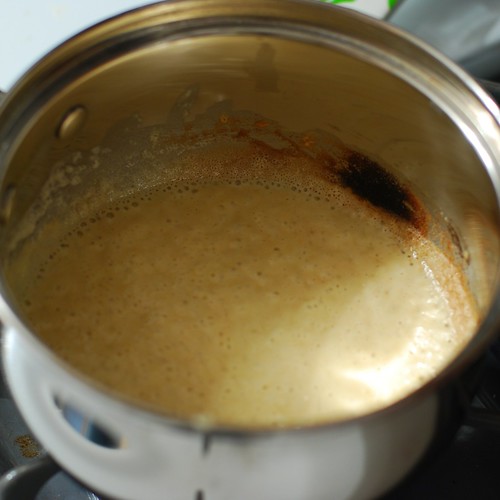
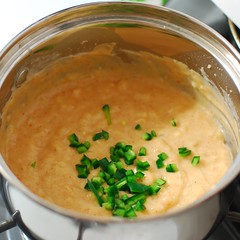
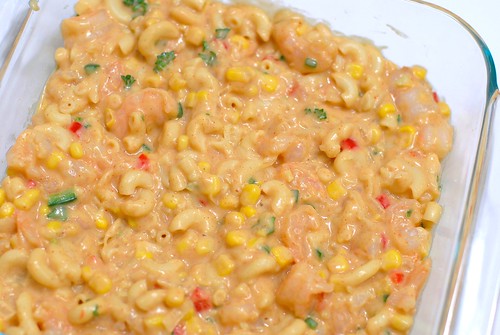
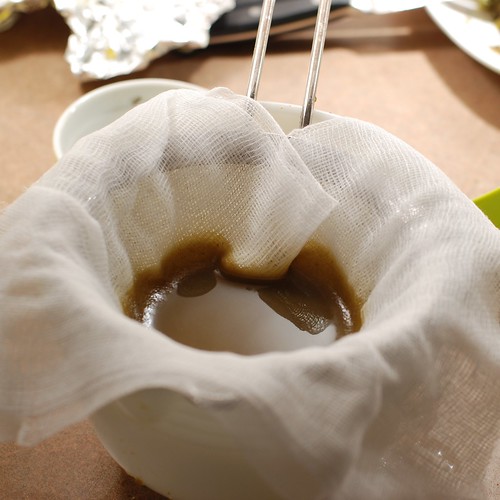
The story doesn’t change much for the next hour, while the mix simmers slowly with the cook’s eye upon its liquidity. If it gets too chunky, add more vinegar. In all, I used 1.5 – 2 cups of vinegar. And here’s the result.

Hot stew!

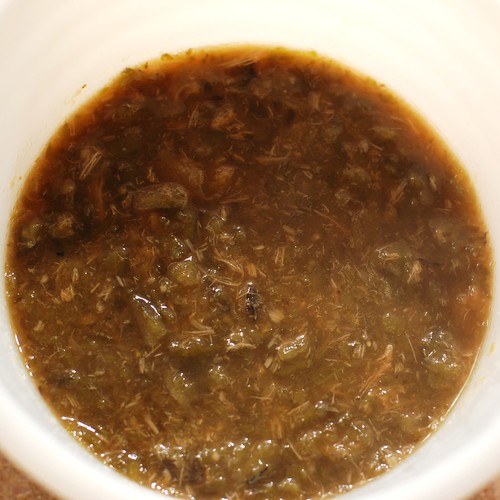
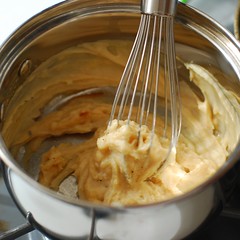
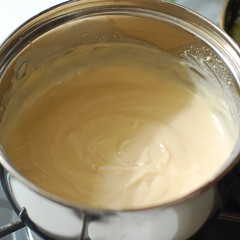
Strain as much as you like, if at all. I strained with cheesecloth in a mesh strainer 3 times for the texture pictured.

Chunk free.

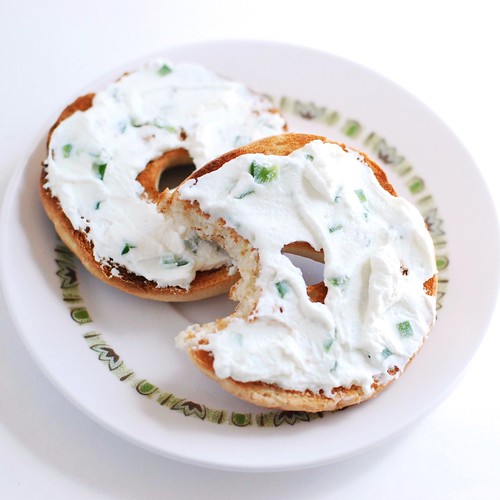
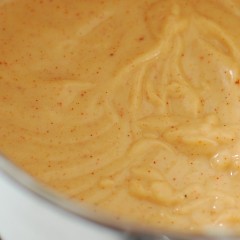
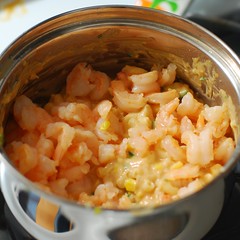
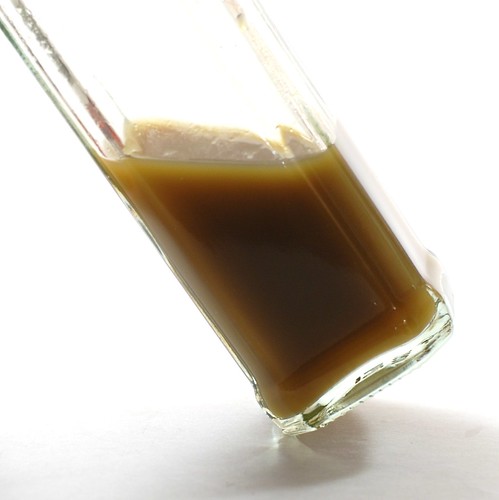
And here’s our final product. The flavour is mild (about Tabasco strength), but pronounced. It comes on quickly, then recedes almost immediately, with practically no lingering. If any hot sauce enthusiasts happen to be reading, feel free to correct my terminology.

Jalapeno-garlic hot sauce.

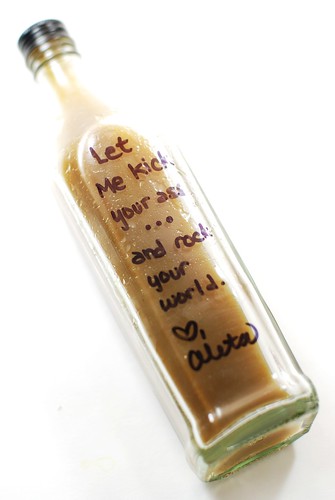
Oh, and what good is making your own hot sauce without a little sassy branding?

<3, Aleta

Variations

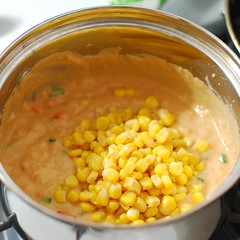
Think of this as more of a method than a recipe. You can effectively make any variety of amendments to the ingredients, add extra things and substitute others. This is just a jumping-off point. Here’s a sample list of ideas—think hot sauce fusion.

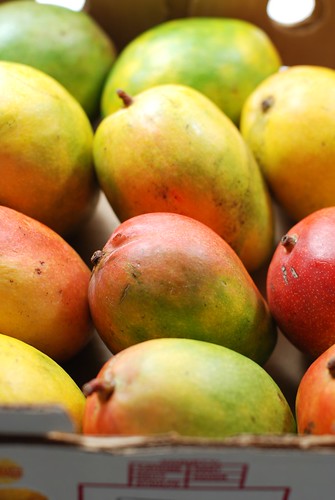
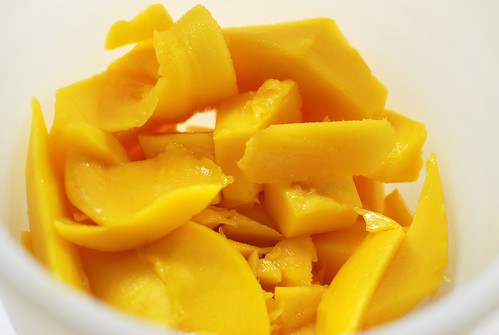
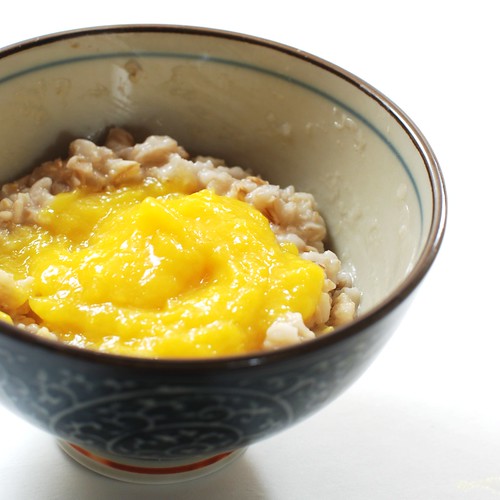
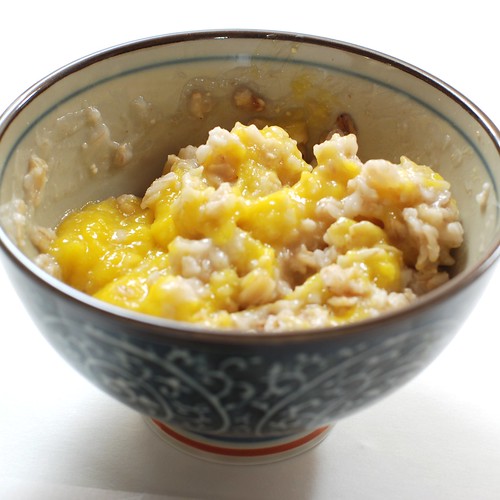
“Sweet But Not Innocent” > Habanero, mango, white vinegar
“Italian Stallion” > Basil, Italian peppers (mild), cherry peppers, tomato, balsamic vinegar
“The Asiatic” > Thai chili peppers, rice vinegar (mirin), dash soy sauce

So tell me, what would your signature hot sauce be? Make it interesting. Give it a cutesy name. Any neat packaging ideas? And if you follow through and make it, let me know, I promise I’m dying to hear about it.


Aleta’s Bad Breath Hot Sauce
brought to you by Omnomicon’s own singular ingenuity

1 head garlic
10 jalapeno peppers
1.5 c red wine vinegar
1/4 tsp sugar
1/8 tsp salt (two pinches? I did two pinches)

Roast the garlic by drizzling with 1 tsp oil, wrap tightly in foil, then bake at 325o for approximately 45 minutes. If you have a better way to roast garlic, then by all means, do it that way.

Char the jalapenos. Immediately after removing the garlic from the oven, flip the heat up to broil, then char each side of the jalapenos for 5-10 minutes. See pictures for reference, but the goal is black skin that is wrinkly because it has pulled away from the pepper.

Moving along, peel and de-seed the peppers, being sure to remove the light green veins to which the seeds cling. This prevents the seeds and veins’ bitterness from marring your lovely lovely batch. Pop the roasted garlic from its papery head, using a fork or toothpick, and chop, along with the cleaned peppers.

Dump peppers and garlic into a small pot with vinegar, sugar & salt. Bring to a boil, reduce heat, and lightly simmer, uncovered & on low, for about an hour. If the sauce begins to look too chunky, add more vinegar, but note that the more you do this, the more diluted the flavour will be. If it’s cooking down too quickly (like you want to add vinegar after the first 15 minutes), try lowering the heat further.

Strain a few times with a cheesecloth-lined mesh strainer into a small bottle. I used a Johnny Walker sampler for mine, and it looked just darling. For gift-giving purposes, nip bottles make excellent, cheap packaging, with the added bonus of a shot that first requires your sip. If strained, this should last a solid 3 months—I’d recommend refrigeration just to be safe.

Makes enough for one household over the course of 3 months, a few ounces or so. As a frame of reference for larger batches, my 10 jalapenos weighed about 10 oz.

I try pretty hard to feature original ideas for my food, and the cost is a lot of failure. Buckets of the stuff. Ugh. And as I move away from tried and true recipes toward completely new ones, it gets harder and harder to have a backlog of material if something doesn’t work out. This, coupled with my procrastinatorial nature, leads to a lot of fruitless nights.

Let’s discuss food philosophy a moment. Tastiness is tantamount. That’s one quality I can never bring myself to sacrifice. But the economist in me is always trying to balance out two other priorities: cool factor, calorie control & time to cook. Okay, three other priorities. Anyway, back to my point, sometimes something really REALLY satisfying and light doesn’t look like much of anything, and it’s worth it, because, well, it’s really REALLY tasty and hello skinny (like my homely Shrimp Surf ‘n Bake). Other times it’s just too heavenly NOT to share, and I cite as evidence the most amazing food Crisco can make (spoiler: it’s whoopie pies).

My recent neglect of calorie control has manifested itself in the form of an additional five solid pounds, a development that in itself is not a big deal, but I find that five pounds quickly becomes 40 for me, so my attention is important. To that end, I tried to return to my weight watching roots and had this great reinterpretation of Huevos Rancheros. I have exactly one problem with this recipe, and it makes it such that this will never work: eggs take for-freakin-EVER too bake inside a tomato. Forever. After 50 minutes of baking, the egg white was woefully inedible. I can’t justify spending any more time baking something just because it’s a neat way to do it.

Guts.

Guts salsa.

Tomatoes, stuff.

The beginning of the failure.

...

I’ll admit that this photo really looks quite tasty. And I’m sure it would be, too, if it didn’t so cavalierly scoff at safe food handling practices. It’s tough to illustrate the slimy clear uncooked egg white smeared all over this dish, but I assure you it’s there.

 It would be a yummy mess if it didn't violate safe handling practices.

This cake pan, where I threw all the salmonella-laden refuse, shows a clearer picture of the dinner’s inedibility.

Discard bin.

There might be some merit to cooking the salsa properly, then frying an egg and serving it in a roasted tomato shell like that, but I felt the tomato flavour was just way too pronounced and difficult to overcome with what I threw into the salsa there. I did try making a tomato tube (instead of a tomato cup), throwing the egg at the bottom and salsa on top, but after 30 minutes it became clear that the egg white was rising and doing its whole “stubbornly not cooking” thing.

So that’s what I did last night. All I have to offer in terms of actionable food is not so much a recipe as it is an idea: fruited oatmeal is never as sweet as it should be and always seems to require additional sugar to balance the tartness. So I made a mango puree—one mango seems to do it for about 1 cup dried oatmeal, or four servings. I’ve dubbed it “Mangoatmeal,” because it’s vegan and I wanted to give it a name that made it sound decidedly non-vegan and even possibly cannibalistic. Also, because that was just the most obvious portmanteau.

Some visual notes.

Mangobox!

My mango will never be elegant.

Let the sun shine . . .

If I called it "Mangoatmeal," would that imply it is not, in fact, vegan?

Eh, I'm not vegan anyway. Mangoatmeal it is.

Hopefully this weekend I will be cooking up a storm so I have something to report other than “my cooking skills cannot keep up with my creativity.” I have to say, though, I actually find most of my failed creations to be quite amusing. They say you learn more from your failures, and it’s true. Luckily I’m also quite adept at laughing at my own folly; it genuinely amuses me. So no need for consolation. I got a good laugh and a good lesson out of this deal.

I decided that our household was long overdue for a good old fashioned surf and turf. Well I guess *kind of*. Our meal was old fashioned in that there was shrimp and there was steak, but I came upon a neat idea in this old 4-H fundraiser cookbook I found in a second hand store.

Heya good lookin.

The problem with vintage recipes is that they’re always bland and more often than not, they’re unapologetically gross as well. The shrimp bake recipe, upon inspection, is not a gross one (create a roux, add some milk, sprinkle some sparse spices in there, pair shrimp with macaroni), but it was . . . lacking. So I did a little magic in terms of additions and here’s what I came up with.

First, we make a roux. While the word is definitely a fancy-pants French one, it’s actually quite simple: melt some butter, pop in a bit o’ flour, whisk until nice and golden and yummy-smelling. For something so very simple, butter and flour smells awfully nice simmering on your stove.

Melty buttery.Roux step two! Flour.
Golden flour.
Don’t mind that scald mark, it was there to begin with. Ugh. My stupid dirty pans strike again!

The original recipe called for milk alone, but since I had buttermilk leftover from making butter, I substituted buttermilk for half of the milk. This added a zingy tang to the flavour, that coupled with a little bit of mustard powder, quite well imitates the cheese flavour in macaroni and cheese, without actually incorporating any cheese. I don’t know that the butter and flour method is exactly healthier, it’s just an interesting coincidence, probably heightened by the fact that basically macaroni + creaminess is always associated in my mind with mac n cheese (or “mackin’ cheese,” if you’re pimp enough).

Buttermilking it up.And now some milk.

And now, one by one, we add the flavourful parts. I won’t make you scroll for the next five minutes; here’s the consolidated view. I trust you all, as adults, to understand how to add one ingredient at a time here. [Editor’s aside: Apologies to the kiddos, here’s an explanation: add these ingredients one at a time. Thereyago!]

The spicy little detailsThis is what those onions were for.
Jalapeno!Corn!
And what is a macaroni casserole without macaroni?Shrimp time!

They are, in order: spices (paprika, mustard, salt), onions & garlic (sauteed lightly in butter first), jalapenos (1/2, diced finely, no seeds), corn (from a can, hey I like it that way best), macaroni (cooked), shrimp (explanation below).

Spice fearers, have no fear! There is very little jalapeno here relative to all else, and this dish is definitely not spicy, it just has this mild and comforting warmth to it. Spice lovers may wish to kick it up the proverbial notch by including the entirety of a jalapeno.

Now if you are fluent in italics, you saw the part about the onion and garlic being sauteed, no? Well obviously I did that first. And then in the same pan, while the macaroni was patiently taking in its first few minutes in the mix, I just added my raw, thawed, shelled, drained shrimp to whatever fat was left in the pan and lightly sauteed them. I’m talking like, *a* minutes here. I toyed with the idea of putting the shrimp in raw, since I knew fully cooked shrimp would get very tough after 35 minutes in the oven, but compromised on this consistency.

Lightly sauteing the shrimps.

Following my lead should result in the same delectable results I enjoyed.

Now it’s casserolin’ time! Use a glass or ceramic baking dish with about 64 square inches. In this case, I used an 8×8.

Shrimp and macaroni "Surf Bake"

At some point of the mixing of things, I included a tablespoon of jarred pimientos. It gives the dish a little bit of a Southwestern-looking flair, but didn’t add much taste, and it’s a little deceitful since this isn’t at all Southwestern, so I’ll be leaving them out in the future. The few sprigs of fresh parsley, however, did fresh things to my casserole (it’s okay, the casserole liked it).

Add some breadcrumbs, a little baking time, and voila! Surf and turf. This dish is really really REALLY good, but its unphotogenicness will probably scare some of you away, and Tastespotting probably won’t accept my submission. And I’m okay with that. Because if one, even one of you makes and enjoys this incredible dish, my foodie missionary work is done, and I shall surely dream of angels.

Shrimp and macaroni "Surf Bake"

Shrimp and Macaroni “Surf Bake”
serves 4 as a side

1 c cooked macaroni, just underdone (2 oz pre-cook)
1/2 finely diced onion
4 cloves minced or pressed garlic (less to taste)
4 tbsp flour (1/2 stick total, divided: 1 tbsp for sauteeing onions, 3 tbsp for roux)
3 tbsp butter
1/2 c buttermilk (substituting milk will be a-ok)
1/2 c milk
1/2 tsp paprika
1/2 tsp dry, powdered mustard
1/2 tsp salt
2 tbsp finely chopped parsley
1/2 finely diced jalapeno (seeded, whole jalapeno for the brave)
1/2 c corn (canned, frozen, fresh, you pick! I used canned)
8 oz small shrimp, thawed, raw, shelled, drained
2 tbsp breadcrumbs

First thing’s first: cook your macaroni a minute or two shy of the al dente recommendation on the package. While that’s on, sautee the onion and garlic in 1 tbsp butter. Dice the 1/2 jalapeno, finely chop the parsley, shell the shrimp and cut each in half.

Preheat oven to 375o.

Melt 3 tbsp butter in a medium saucepan over medium/high heat. Add flour, and whisk, continuously, until the mixture is a nice warm tan. If, at any point, this begins to smell like it’s burning, immediately turn down the heat, and you should be fine.

Take the roux off the burner. Add the buttermilk and milk (again, you can just use 1 cup of milk if you forgot the buttermilk) and whisk vigorously until smooth and unlumpy. Add paprika, mustard, salt, parsley, diced jalapeno, corn and mix thoroughly (the burner’s still off right here).

In the same pan you used to saute the onions and garlic, saute the shrimps for just a minute or two, until they have a little bit of colour, but before they’re fully cooked. Add to concoction.

Spread in an 8×8 casserole dish (glass or ceramic) and sprinkle the breadcrumbs atop it all. Bake for about 35 minutes. Serve with turf.

nutrition information for 1/4 batch: 325 calories, 3g fiber, 13g fat; 7 WW points