online poker

Omnomicon

say it with me now, “om nom nom”

Subscribe to Omnomicon

Archive for the ‘family cookbook’ Category

Everyone knows those people who rants and raves about their Italian/German/Czechoslovakian/Whatever grandmother, her incredible cooking, and the totally amazing recipes that have been handed down for generations. Sadly, I have little to counter with. While the French French are celebrated the world over for their epicurean heritage, the French Canadian are not. Case and point: French Canadians eat frog legs, though on second thought, the French French eat snails, but they have the sense to do it with a lot more panache. My family hails (on both sides, originally) from farms outside of Three Rivers, that I cannot imagine were particularly profitable, seeing as my ancestors cascaded down to work long-ass hours for practically nothing in textile mills in New Hampshire and Massachusetts. Our culinary traditions reflect this reality, and we eat pauper food.

I have two Memeres. The differences between the two are easy to list: Memere Dubois grew up on a Quebecois farm, the daughter of mill workers; Memere LeBlanc grew up in Maynard MA, the daughter of a butcher. Memere LeBlanc has replaced her complete Pfaltzgraff set three times; Memere Dubois uses her oven to store boxes of Little Debbie. While they both can, by memory, trace roots back to Quebec, you can see how perhaps maybe their perspective on food might vary. Ever so slightly.

Okay, a lot.

But they, and everyone else in my family for that matter, can agree that Pork Pie is excellent, must be served at Christmas, and is properly consumed only with ketchup.

While Memere Dubois is a lot closer to the heritage, Memere LeBlanc is clearly the cook, which made it difficult to determine what recipe to use. Memere Dubois always buys frozen pies from some little old lady in Pinardville, and these have potato in them, which makes sense seeing as it’s a nice cheap filler. But Memere LeBlanc’s preferred recipe, naturally, called for two pounds of unadulterated pork. I decided to go with this version because it is based on an actual family recipe (the potato-pie version was definitely NOT the one Memere LeBlanc knew from memory), and pork is only $2.99 a lb, so really, it is modern-day pauper food, and thereby even more appropriate.

This is the recipe as written, though by the time this was handed to me, I already had the same pie in the oven. Boggle your mind on THAT, (or don’t…Memere gave me the recipe over the phone).

Today's recipe.

That size is a mite too small to read, but if you had crazy vision, you could see that it calls for pork butts ground twice, which is frankly unsurprising from someone who grew up around lots of meat. The tool I’d procured to follow this exacting direction really didn’t work out, so I had to settle with regular old supermarket ground pork. And the trick, she was done. Along with an onion, that pork is pretty much the only significant ingredient.

That's uh...most of the ingredient list, actually.

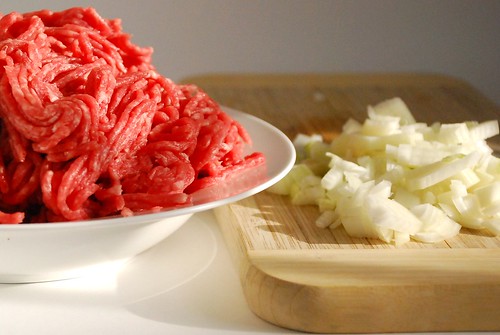
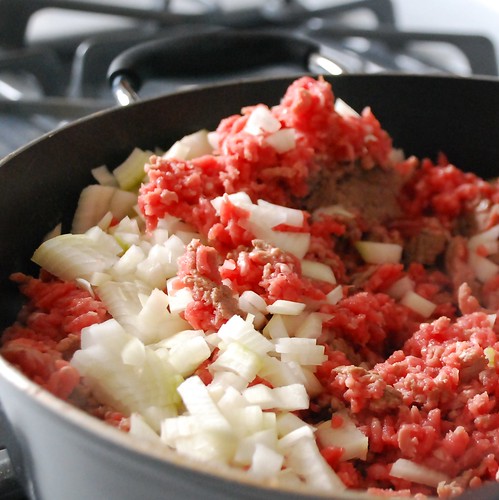
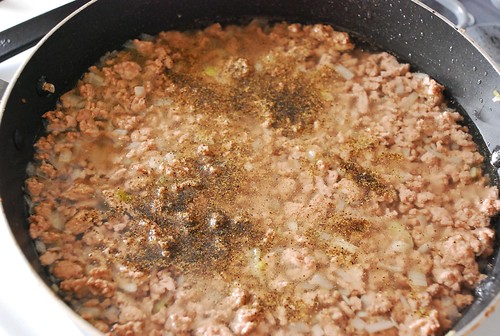
Saute ’em up.

MEAT MOUNTAIN.

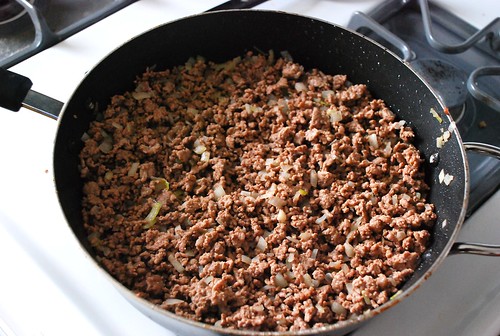
End up with this.

A skillet, a beautiful thing.

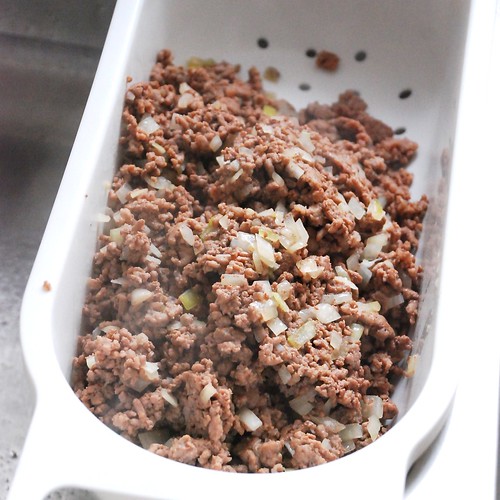
Drain off the grease. Since I won’t be saving the fat for the War Production Board effort, the easiest method I’ve found is using a sieve—it is MUCH more convenient than spooning the stuff out one teaspoon at a time. I have this convenient sieve that sits in my sink.

That misty stuff is steam.

Hhokay, so. Here we hev our meat now covered by ze water.

Wading.

And then you simmer that business for an hour, mixing it up frequently to try to break up all the meat wads. If you change your mind and want to make goetta instead (which is German but somehow Memere Dubois grew up on the stuff), you can boil for an additional hour. No word on when you add the oatmeal, however.

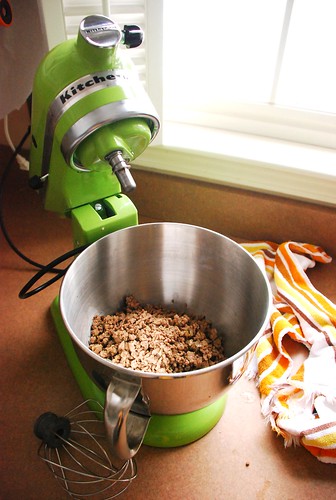
Another strain and now we’re going to use your treasured stand mixer. This will accomplish three things:

  1. It will break up the meat into uniform little granules.
  2. It will mix up the spices and milk with the pork.
  3. It will cool the mix much more quickly than letting it sit out.

Best use of my stand mixer yet.It's not frosting.

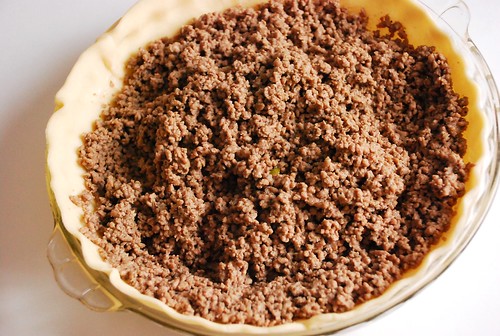
Finally, after like, an hour and a half, you’re ready to start assembling a pie! Go you! I’ve discovered that refrigerated pre-made pie crust comes out tasting just as good as homemade and also doesn’t make me want to shoot myself in the face, so I’m pretty much never making a pie crust by hand ever again. Just sayin is all.

Finally, we're getting to the pie part.

For some reason, pork pies are always topped the same way: a crust with about a 1″ hole in the middle to allow venting. Knowing that I wasn’t going to be able to pull it off freehand, I found a trick for cutting the hole.
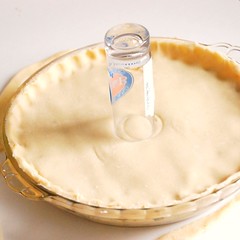
A hole trick.Done and done, my friend.
(you’ll notice I can’t even position a glass in the middle of the pie on my first try, which is exactly the reason why freehanding it was such a terrible idea)

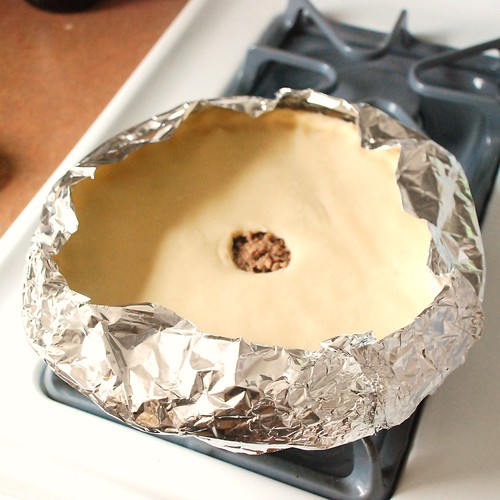
Then I attempted to protect the edges of the crust with aluminum foil.

Yeah, it got too toasty anyway.

It got a little toastier than I would have liked anyway. But at least the edges weren’t burnt, those are the best part!

Pork Pie!

And of course, as any Charbonneau, Levesque or Savoie will shout at you, you have to at least try it with ketchup. Even if you don’t think you’ll like it, that’s the right way to eat it.

With ketchup. The right way.

French Canadian Pork Pie
Coming to you straight from Memere LeBlanc’s memory

2 lbs pork butts, ground twice (plain old ground pork seems to work as well)
1 small onion, finely diced
1 tsp salt
1 tsp ground black pepper
2-3.5 c water
1/2 tsp sage powder
1/4 c milk
pinch nutmeg
pinch allspice
another 1/2 tsp ground black pepper
pie crust for a covered pie (refrigerated, frozen or your own—you decide!)

Brown pork and onions in a large skillet, breaking up meat as much as possible as it cooks. Drain grease, return to pan, and add just enough water to cover the top of the pork (this has varied for me from 2 c to 3.5 c). Simmer, uncovered, 1 hour, making sure to stir regularly (keep on breaking up the meat with your spatula). Do not let the meat dry out, though it does not need to be covered in water the whole time.

Preheat oven to 400o. Drain meat and onions again, toss into a bowl and beat with remaining ingredients (don’t forget the extra 1/2 tsp pepper!) until almost cooled. This will take the 5-10 minutes you’ll need to prepare your double pie crust, so if you happen to have a stand mixer, it’ll come in handy.

Bake for almost an hour, or until the top looks done. Let cool 5-10 minutes before serving with a side of ketchup.

The end!

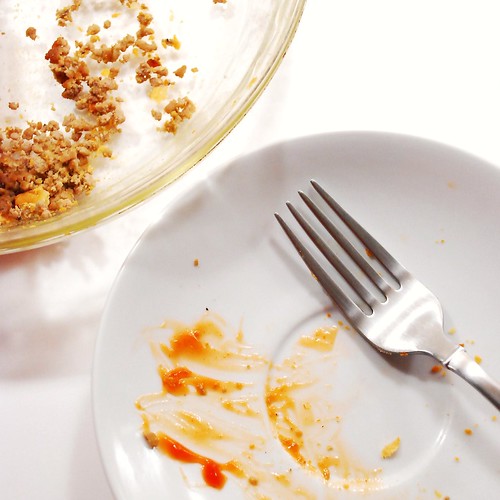
Done et up.

nutrition summary: 180 calories, 11g fat, 0g fiber; ~7 weight watchers points

ENLIGHTENING FEEDBACK


mizike agrees with me, which is enough to be edited in, BUT he also gave me the name of this pie.

Nothing says christmas in Quebec like Tourtiere. Serve it with a side of poutine and a bowl of split pea soup for the maximum french-canadianness possible in one meal.

The Wiki on Tourtière is enlightening and dead-on, we just always called it pork pie. My family never did the poutine thing, but split pea soup is ALWAYS on the stove just after Mom and Dad have made a ham. I salute you, mizike, fellow Franco!


Also, I totally earned some cool points from Adam, and just wanted to point out that I am always accepting cool points. Not that I need them or anything. I may even give them to charity.

Now I’m going to tell you: my mother’s whoopie pie recipe is SO GOOD that I will often tell people that I don’t like whoopie pies at all, because I have yet to find another recipe that I actually like. Other people’s whoopie pies are too cakey, or too cookie-like, or (as is usually the case) the filling is pure frosting, which is WAY too sweet and totally the wrong texture altogether. My mom’s whoopie pies were famous in our circles, and she generously provided them whenever demanded, particularly when visiting my Uncle and Aunt in Maine for Thanksgiving and Christmas. I ate more whoopie pies in my childhood than cupcakes, brownies or cookies combined; they were a true and strong family tradition.

Antonia, a faithful reader, pointed to a NYTimes article about the Whoopie Pie and well hey, I’m not usually up to snuff on anything topical, and since I have an authentic family recipe on hand, I am suddenly compelled to showcase my (rather specialized) expertise!

A proper whoopie pie is not merely some cloying abomination of sugar and fat. No no, it is delicate in its way, the sweetness ever-present and yet subdued. Please do not compare them to a Devil Dog or Moon Pie. Please do not make them with cake mix and tub frosting. A whoopie pie is a very specific delicacy and there are rules.

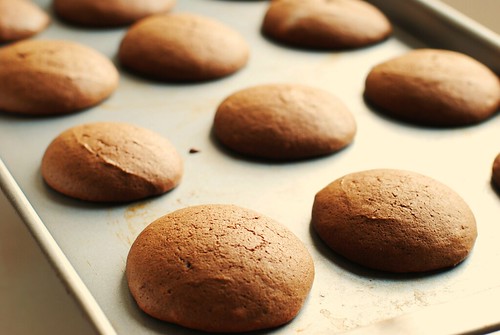
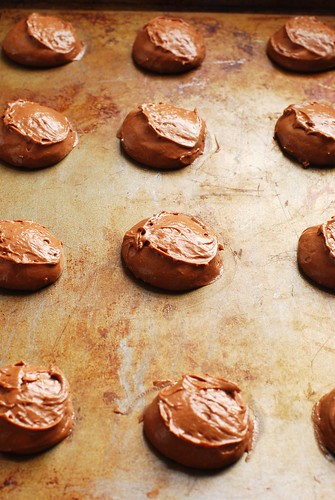
The proper texture.

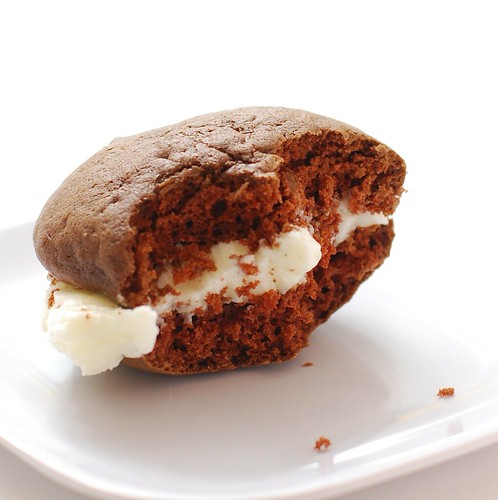
A proper whoopie pie “cookie” is a medium-brown shade, fairly dry (not all oily and moist like a Little Debbie’s snack), but still somewhat densely cakelike, maybe a vein or two where the scoop let go of the batter. They crack ever so slightly, but sometimes they don’t and maybe that has something to do with the barometric pressure. I dunno, they still taste right and seem to have the right texture, so aesthetics aside, it’s fine either way.
Okay, so maybe the filling is an abomination of fat and sugar.
The proper whoopie pie filling is made with Crisco (which, apparently, no longer contains trans fats), butter, whole milk, sugar, a tiny smidge of flour and a regular portion of vanilla. Did you notice that it has no Fluff in it? That’s because Fluff is for fluffernutters, not whoopie pies. You will also notice that the filling is not a frosting, but a creme. While eating, one will lose all the filling out the sides and must open the pie, collect up the creme that has splooshed out back onto the bottom piece, then recreate the sandwich, only to do it all again in the next bite or two. This is the proper way to eat a whoopie pie.

This process presented many lovely photo ops. Let’s take a look!

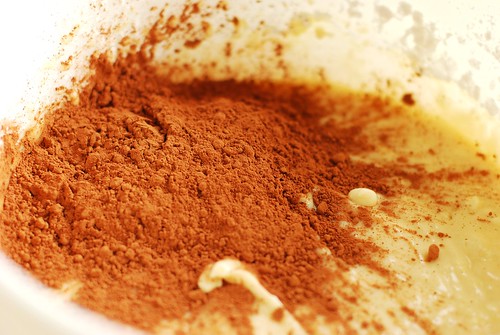
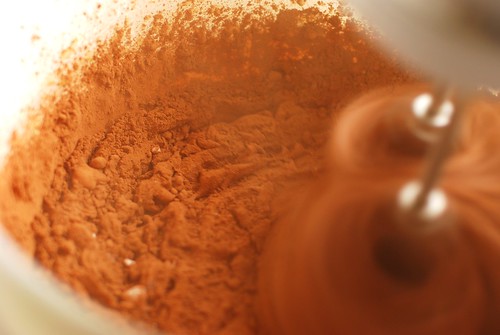
Where the chocolate comes in.

This one reminds me of a dusty construction site.

Cocoa construction site.

Ungreased cookie sheet...

The cookies can be removed from the cookie sheet almost immediately, but you really need to use a metal spatula and carefully scrap them off. I like the texture underneath, it gets a little crispy as it cools and it is so so satisfying to snack on the odd unmatched whoopie pie cookie before they’re frosted.

The underside.

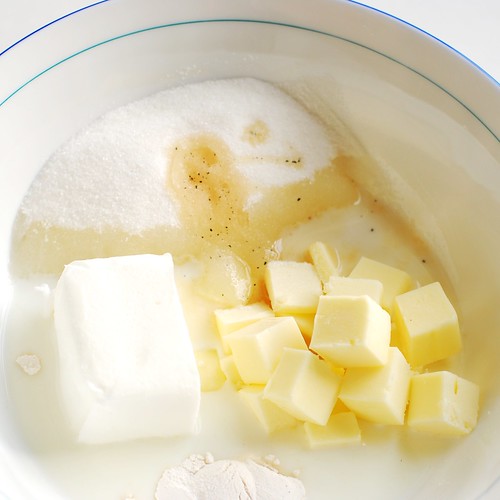
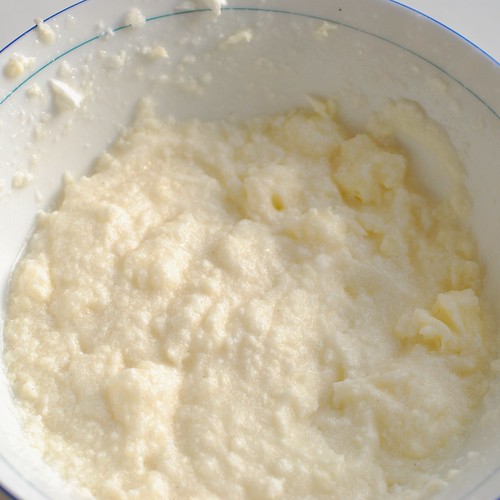
The creme takes a convenient 10 minutes to make, which you can most likely complete between the time the first batch of cookies goes into and comes out of the oven. I’ve found it nearly impossible to make the creme without an electric mixer (stand or hand, your choice), and sometimes it takes longer than others. For the first several minutes of mixing, your creme will look like this: kinda gross.

Porridge?

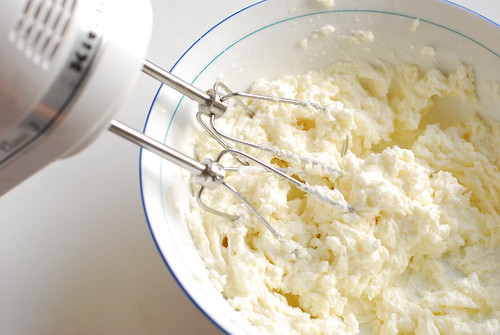
And then you’ll hear a cherub giggle, and an angel wing will brush against your shoulder as suddenly the creme whips up into this glorious appearance. The texture is extremely creamy, but still looks like this.

As if by magic.

After a little assembly . . .
Mom's perfect whoopie pies.

Since I started making my own food, I’ve lived on these for days at a time. Not particularly healthy nor affluent days, but certainly enjoyable ones.

Well of COURSE I ate some as I went along.


Mom’s Famous Whoopie Pies
makes about 14 after batter & cookie sampling
brought to you by very fortunate family ties.

Blend Add
1/4 c Crisco 2 c flour
1 c milk 1/4 c + 1 tbsp cocoa
1 c sugar 1.5 tsp baking soda
1 egg 1 tsp salt
1 tsp vanilla  

Drop by the small tablespoonful onto an ungreased cookie sheet—a tablespoon-sized bakery scoop works best. Bake exactly 8 minutes at 375o, see if a toothpick comes out clean, and if it doesn’t, bake another 2 minutes (10 total). Upon extraction from the oven, remove from pan immediately to wire rack to cool.


And now the creme filling (reminder: it’s not frosting, guys)

1/2 c margarine or butter (room temp is best)
1/2 c Crisco (my mother is insistent that this MUST be Crisco and CANNOT be generic shortening, nor substituted in any way . . . but if you do get it to work with a substitution, please let me know!)
1 c sugar
1 tbsp  flour
1 tsp vanilla
1/2 c warm whole milk (20 seconds in the microwave should do it)

Beat with a mixer (stand or hand, your choice) for-freakin-ever. It will start out just like, well, lumps of Crisco floating in milk, then bits will get smaller and smaller, then it’ll slosh around for a little bit, and, much like the butter making process, you’ll be wondering if this will ever become anything or if you maybe messed it up somehow. Suddenly, about five minutes later, your mix will look weird for a second, and within moments your slushy mess will turn into a glorious white creme, smooth and perfect in a way rarely seen outside the confines of uber-processed food with chemicals you can’t pronounce that are not even available to the consumer in their pure form.


Assembly

As soon as the whoopie cookies are cool, match each whoopie with its closest brother in size—even if yours didn’t all come out the same size, evenly matched whoopies will look much much nicer. Spread some filling on the flat side of one, then place the second on top. Repeat. This does not need to be done immediately before serving, as the filling tends to maintain its consistency surprisingly well, and some (like my mom) would argue that a day-old whoopie pie is even better than fresh. I like them all.

No need to refrigerate, sealed plastic or plastic wrap will keep them fresh.

. . . and that’s it. Congratulations! You just made the best whoopie pies known to man.


Not like it’s diet food or anything, but these are not quite as totally terrible as I thought they’d be!
Nutrition Summary (for 1 whoopie pie of yield 15): 330 calories, 17g fat, 1g fiber; 8 Weight Watchers Points

Hey guys, real quick: Omnomicon now has a Facebook page and is also twittering about on Twitter. I’m not quite sure why, but I thought being better socially-networked might be to the benefit of the site. Okay, back to our regularly scheduled recipes.

The first time I had Chicken Cordon Bleu, I was somewhere around 10 years old and my Memere had taken me out for my birthday. I probably ordered mozzarella sticks as an appetizer, because that was my thing, when extremely Quebecois-accented Memere recommended Chicken Bleu, I think mostly as an educational ploy to teach me more French. “O, da Chicken Cordon Bleu! Do you know what dat means? Blue Ribbon Chicken! Huh?! Huh?! Ha!”

Chicken Cordon Bleu doesn’t seem to have a whole lot in the way of history, but according to the nominal amount of research I did on the subject, what we call Chicken Bleu is wholly American and apparently started getting mentioned in newspapers as an airline food around 1960.

Whatever, it’s really frickin good.

Chicken Bleu is simple, cheap, easy and amazingly satisfying without sitting in your stomach like a lump of lead for the following several hours. After a year of being extremely food-conscious, I was surprised to find that I still absolutely love this dish. I wouldn’t call it subtly-flavoured, but it does taste far more sophisticated than the concept would sound.

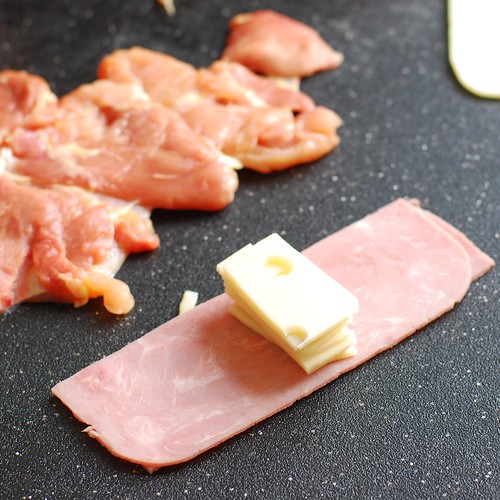
The formula is simple: swiss, ham, chicken, treat it kind of like a turducken. Most recipes call for breast, but I thought the boneless skinless thigh meat would be a bit more flavourful and tender. You are, as always, free to use your discretion on the matter.

Ham. Swiss. Chicken.

I just used the cheap deli ham and Swiss because um, it works just fine and there’s no reason to spend a lot of money on fancy ham, if such a thing even exists. That said, I do prefer better deli supplies when I’m eating it cold.

Keep on rollin on.

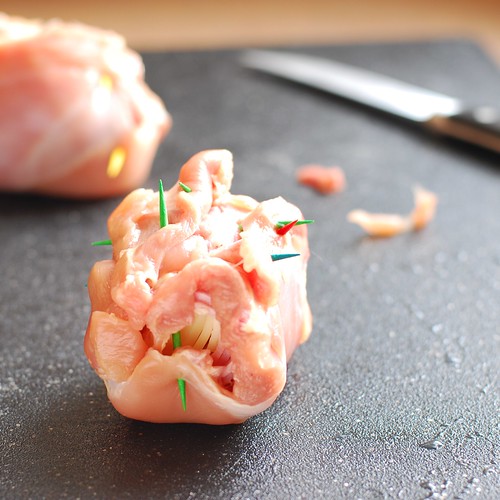
I used toothpicks like safety pins to keep this thing together and “mend” any holes I made in the meat while I was pounding it out. But I have to point out that you really don’t want to use the coloured ones you see here because they will stain your meat, which in addition to being kind of a culinary faux pas is just grossly unappetizing.

Meat purse.

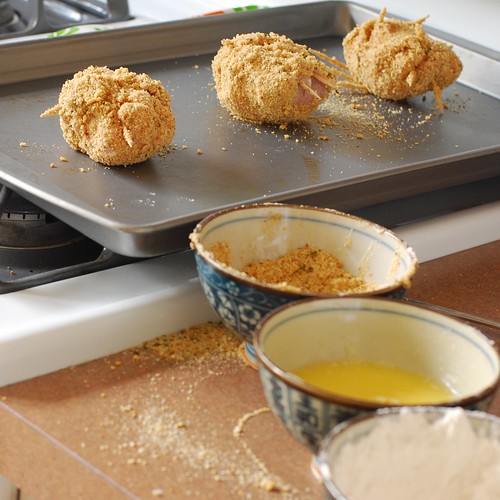
Next up: flour, egg wash, breadcrumbs.

Assembly line.

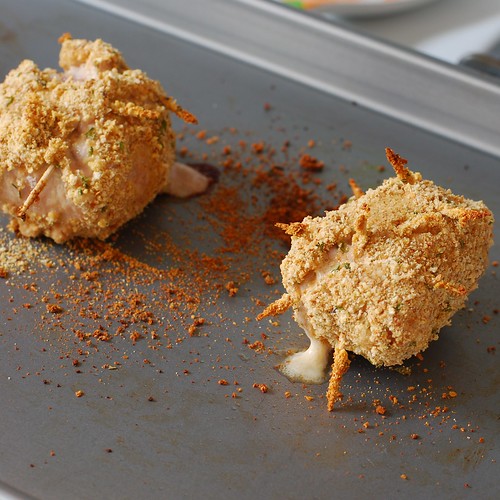
Twenty-five minutes is the *perfect* amount of time to bake this—the chicken is cooked but tender and the cheese is melty without being scorching. Also, because of the toothpicks, these come out looking like you fried alive something vicious.

Ovenfresh chicken bleu.

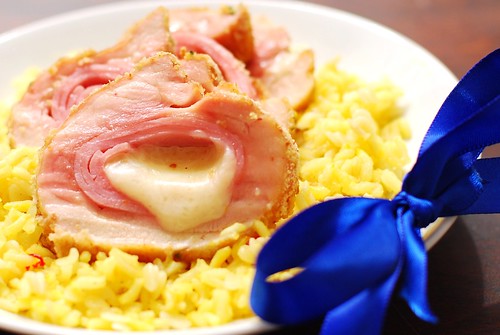
Was Memere right or what? Yum!
Chicken cordon bleu.

Chicken Cordon Bleu
4 servings

4 boneless skinless chicken thighs or 1/2 breasts (chicken breasts are HUGE these days!)
4 slices deli ham (or prosciutto or capicola)
4 slices deli Swiss cheese (or provolone or mozzarella)
1 egg
1/4 c water
1/2 c all purpose flour
1/2 c seasoned bread crumbs
Several plain toothpicks

If your chicken breast is a little thick, you’ll want to butterfly it and tenderize with a mallet. You can try to do the same if you’re going the chicken thigh route, but it’s not likely to help you very much, so you might as well save yourself the frustration.

Cut the Swiss cheese into eight rectangles and stack. Slice the ham in half lengthwise, stack both pieces, then roll around the stack of cheese. Now create a little “meat purse” out of your chicken around the ham and cheese, and tack it up with toothpicks. Remember, no colours here unless you want polka dot chickens! The chicken will be cooked leaky-side up so that the cheese has less of an opportunity of gushing out of your creation all over the pan.

Set up three bowls for breading the chicken. The first holds flour for dusting the chicken balls; the second will have a beaten egg and 1/4 c water whisked together for an egg wash. The last will have some seasoned bread crumbs. Dip the chickens in the flour, the egg wash, then the bread crumbs. Place, toothpick side up, on lightly greased cookie sheet.

Bake 25 minutes exactly in a 350o oven. Serve with rice pilaf.
 
 
Nutrition Summary: 260 calories, 0g fiber, 13.5g fat; 5.5 Weight Watchers Points


BONUS RECIPE


I thought this might be a good opportunity to try out making rice pilaf from scratch. I really like the stuff from the box, and it’s what most restaurants serve for rice pilaf too. Theirs tastes so much “better,” though, because they use twice the butter called for on the box, and while that sounds like complete conspiracy theory conjecture, I did learn it at the restaurant where I waitressed that one time, and have noticed it everywhere I’ve eaten pilaf since.

Turns out that making your own pilaf is pretty easy (it’s mostly just getting the ratio of rice to orzo correct), but way more time consuming and you can just add whatever seasonings you would put in your own version to the box stuff. I’ve included the recipe as a bonus for those interested.

Chicken cordon bleu.

Rice Pilaf

2.5 c water
1 c long grain rice (brown or white, your choice)
1 tbsp chicken base (from what I can tell this is pretty much the only flavouring in boxed pilaf)
1 tbsp butter
saffron (pictured, or whatever other spices you want in your pilaf)
1/4 c orzo

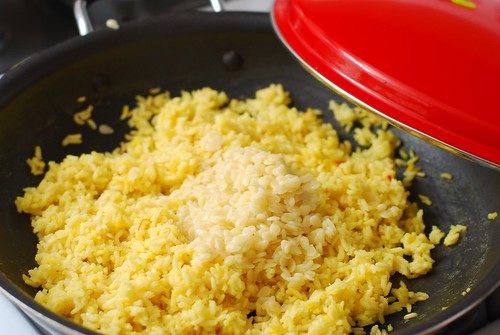
Bring the water to a boil in a deep pan. Doing it this way instead of in a pot makes your pilaf less likely to turn out mushy. Once boiling, add chicken base, butter and seasonings, and stir until fully dissolved. Add the rice, give a stir, then put a lid on the pan. Check the rice for doneness at 20 minutes, 30 minutes and 35 minutes, but it should take about 40-45 minutes overall.

Once you’ve got the rice going, make the 1/4 c orzo according to the box instructions.

Once the rice is tender and fluffy and done, stir in the orzo. Enjoy!

Nutrition Summary: 225 calories, 1g fiber, 8g fat; 4.5 Weight Watchers Points

One time I tried to make fudge. From scratch. I followed my Memere’s advice and selected a dry, beautiful, sunny day (apparently fudge is THAT sensitive to moisture), and I even invested in a candy thermometer. I ended up with a grainy, lumpy, nasty mess. The next day my roommate made fudge in the microwave with a lump of marshmallow Fluff. Of course hers was perfect.

I don’t use the Never Fail recipe, but Five Minute Fudge is another workaround that comes out great every time. I’m not a big fan of chocolate, and I will eat just enough to make sure it came out, so I haven’t tried to do this from scratch. But I did get a marvelous idea last night as I drifted off to sleep.

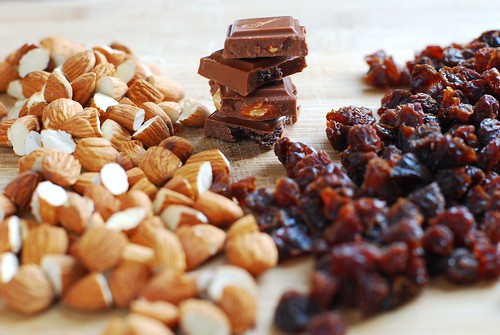
Have you ever had one of these?

The inspiration.

If you have, you know that it is the best way to eat chocolate. I set out to recreate it in fudge form. It is necessary to chop the almonds in half, but leave the raisins whole. This seems to preserve the consistency the chocolate possesses.

Preparations underway.

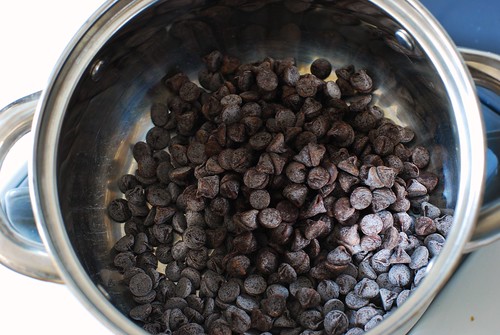
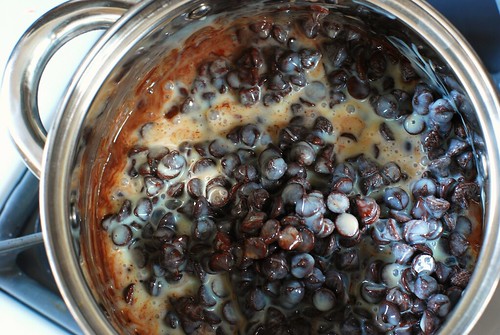
Then we melt our ingredients. First, three cups of chocolate chips.

It begins.

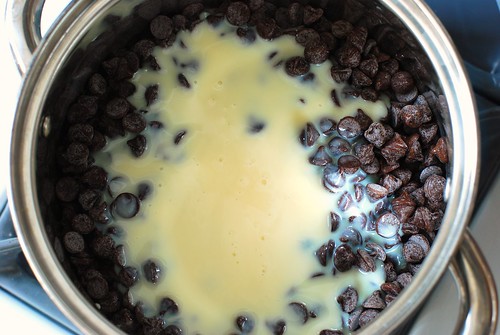
Now ooze your condensed milk and vanilla extract in there.

DSC_0744

Melting . . .

Melting . . .

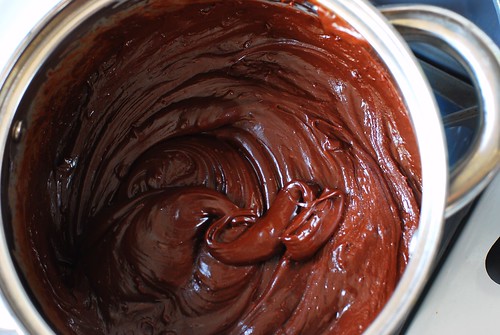
. . . and in just a few minutes of stirring, you have fudge!

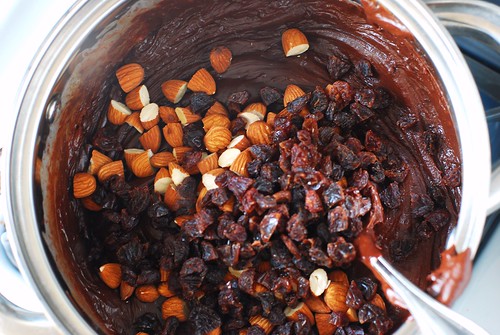
Ready for additions.

Now we make like Cadbury.

Stirring in.

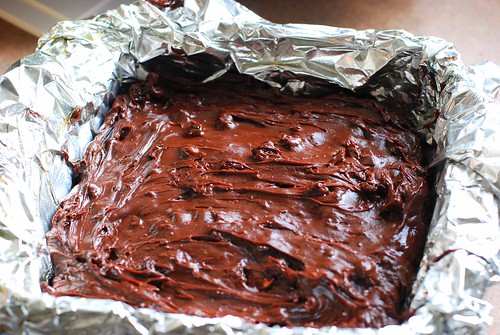
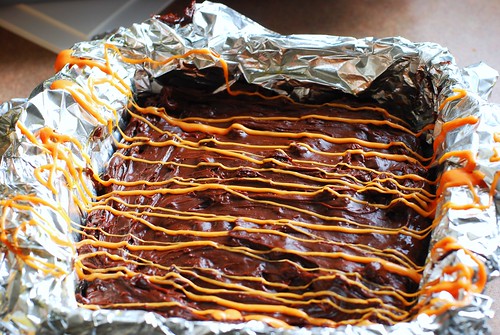
And voila! Lumpy fudge. I like to lightly spray the foil so the fudge releases easily when it comes time.

Lumpy!

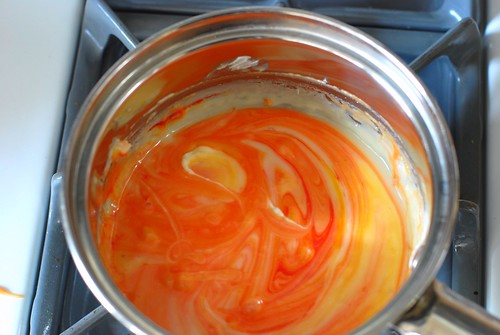
Hmm . . . now this is the texture we’d expect, but it’s a little . . . unrefined-looking. Fortunately, while the main feature was doing its melting thang, I was also melting some vanilla chips with a little bit of the condensed milk, with more condensed milk than the fudge so that it’ll be more cooperative. And since Halloween’s upcoming, let’s make it a theme.

Meanwhile, in another pot . . .

Oh man, that reminds me of a joke. Why did Snoop Dogg carry an umbrella?

Fo’ drizzle.

Oooo!

Let that chill, harden, and cut with a nice sharp warm knife.

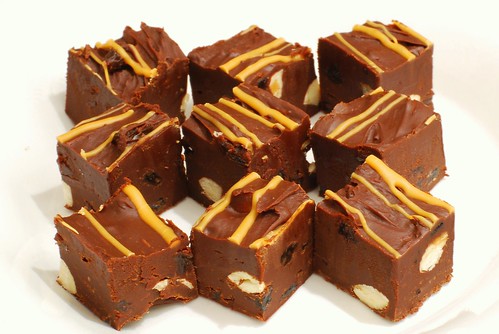
And now, fudge!

Cadbury’s Fruit & Nut Fudge
built on the premise of Nikki’s Five Minute Fudge

1 – 14oz can of sweetened condensed milk
3 cups milk chocolate chips (since the Fruit & Nut bar is a very milky chocolate)
1.5 tsp vanilla
Dash salt
1/2 c almonds, chopped in half
1/2 c raisins

Fo’ drizzle (optional):
1/4 c white chocolate chips
1/4 c more sweetened condensed milk

Foiled line an 8×8 pan, and spray lightly with cooking spray.

Melt your milk, your chips and vanilla in a pot on stove top. Remove from heat, stir in nuts and raisins, then pour into foil-lined pan.

If you’re drizzling, let the pan cool on your counter for a few moments while you mix the white chocolate chips with your extra condensed milk. Let cool just a minute, then pour into a plastic bag, cut a hole in the bottom, and drizzle from foil to foil.

Chill 2 to 3 hours. Put your longest non-serated cuttin’ knife in a glass of warm water, wipe dry, then slice. Re-heat your knife via the water whenever the going gets less smooth.

It’s getting chilly, isn’t it, friends? Time to bust out the belly-warming goodness of winter veggies and heavier fare.

This is yet another recipe belonging to the Family Cookbook. My Memere Rita INSISTS that she has the best beef stew recipe. Once my father made the mistake of mentioning “well, Doris [my mother] has a pretty good recipe herself,” my memere was in complete disbelief. No no, her soup was clearly the best, and none would compare.

I’m not sure how long ago this battle raged, but when my mother requested recipes of the Mater Familias, this one was sent, no doubt to prove a point. Now I love my mother dearly, and her beef stew is excellent, so I was a little defensive about the whole situation and didn’t want to like this stew. It contains veggies I’d never used before, but I went outside my comfort zone and, ironically, ended up with a new comfort food.

The broth is sweet owing to these mysterious turnips and parsnips, standard fare in many households, but not the one in which I grew up. I thought the recipe could use a bit more colour, so I threw in some celery. And oh my, if you serve this to a friend with some Tuscan bread, you may very well earn a friend for life.

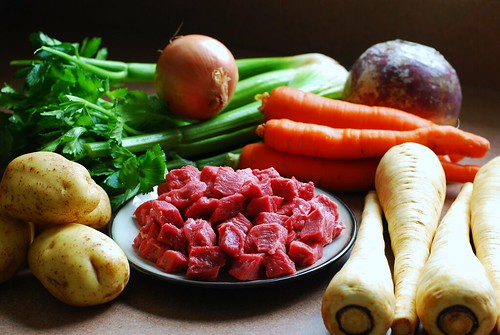
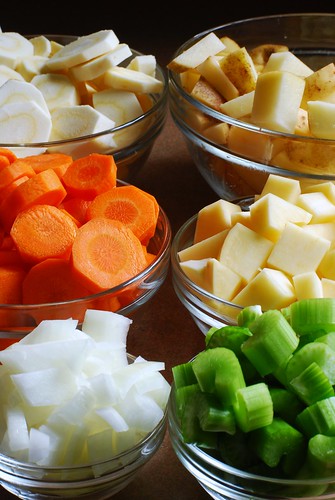
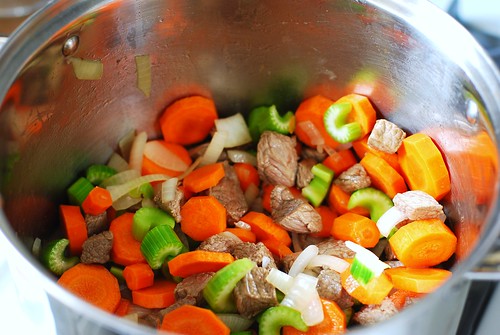
Here we go! Don’t tell Memere I let the veggies get that close to the meat before it was cooked okay? Thanks dude, I appreciate that.

Roots!

Now we do the choppy chop.

Chop chop.

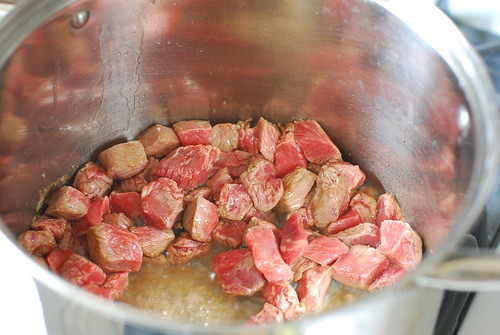
First step is to sear the beef. Memere wisely used the oil and butter method, in which you use two tablespoons of each. I try to keep my recipes lower cal wherever possible, but I am a meat LOVER and searing your meat on high in oil and butter is hands-down the best way to do it. For stew, it is no different.

Where's the beef?

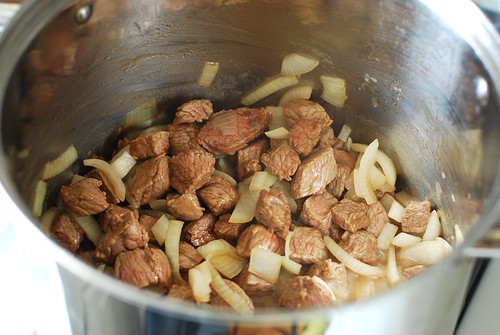
At this point, I sauteed the onions and almost broke down and just dug in the way it is. Because there is no more amazing combination in my world than steak and onions.

Onions first.

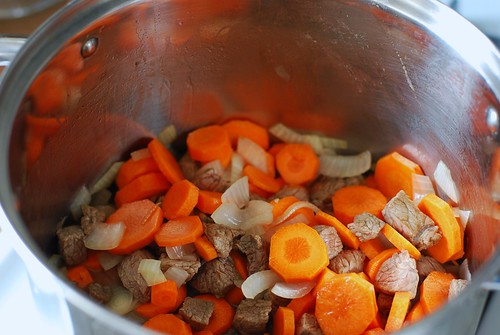
Now we’re gonna start with our other veggies. Each is added one at a time in league with a cup or two of water. At first I was a little frustrated at the vagueness of this. “One to two cups?! Memere, just tell me how many cups already!” I think the idea is to make sure that all your veggies are at least partly in the water with each addition. Oh, and every time you add something, let it return to a boil before adding the next.

Carrots

Next carrots.

Celery

Now celery.

Turnips

And turnips.

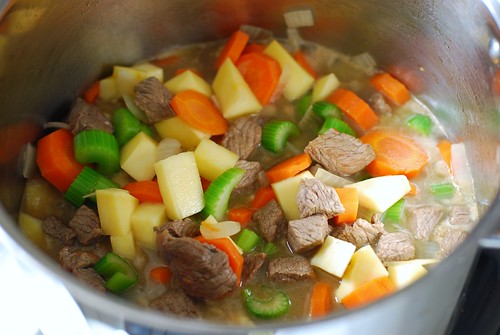
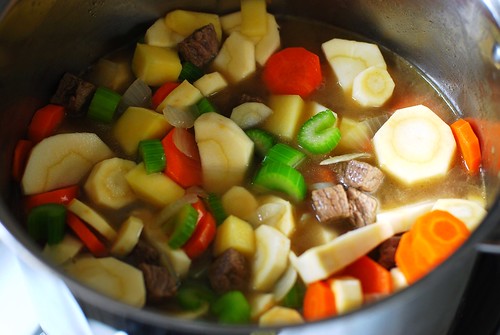
Parsnips

And parsnips.

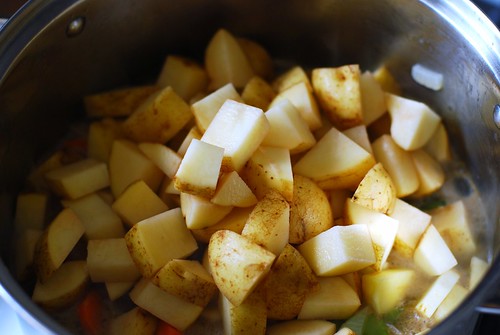
And potatoes!

And finally, potatoes.

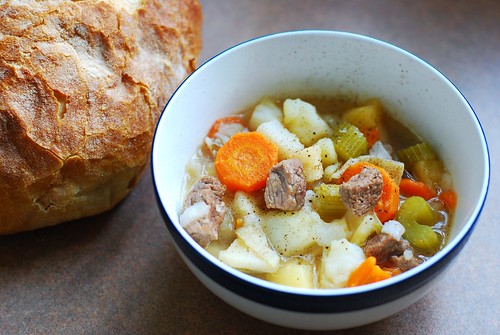
Now you let this bad larry simmer for a little while and you end up with this little number here.

Warm your bones.

Wrap yourself in a blanket on the couch and enjoy!

Memere Rita’s “Back to My Roots” Beef Stew

2 tbsp oil
2 tbsp butter
1.5 lbs sirloin beef, lean cut, cut into 1/2″ cubes
1 yellow onion, chopped
4-5 carrots, peeled & sliced
4 ribs celery, sliced (editor’s addition, optional)
1 purple tap turnip, peeled & diced (I googled this term, and I think she means the small turnip. I could only find a large, so I used half of it)
4-5 parsnips, peeled & sliced
4-5 potatoes, peeled & diced

Let oil and butter get HOT on the stove, then sear beef for about two minutes. Reduce heat, add chopped onion and sautee to caramelize.

Now add each vegetable in turn with 1-2 cups hot water (just enough to cover most of the vegetables). After each addition, allow the pot to return to a boil:

Carrots
Celery
Turnips
Parsnips
Potatoes

After the potatoes, give it a good stir. I wouldn’t recommend stirring it again after it’s simmered, or your veggies will kind of fall apart in a mushy mess. Let simmer, uncovered, 30-50 minutes. Season to taste (and salt is an excellent idea here).

Serves 8 exhausted, growing farm boys. Reheats well.

This is the next recipe in my Family Cookbook series. This one comes from my little sister Sarah, but is actually one of my all-time favourites. When I got my first apartment in college, I also got my very first cookbook from UNH Health Services, and what do you know, it’s now online. Get the entire thing here: Good Eats! Quick & Easy Food for Busy College Students.

I love this cookbook because it’s very health-conscious in addition to focusing on budget. I would recommend it to anyone who has never really cooked for themselves, and I myself use recipes from it regularly. I’d have to say it’s the only cookbook from which I’ve made most of the recipes.

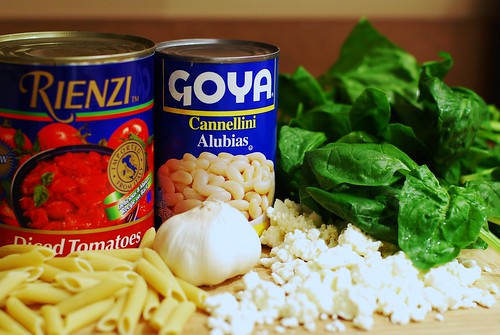
This one in particular is just wonderful. I’m still amazed at how such a simple concoction can bring joy into my life over and over again without making me fat (and oh my god it has so much fiber in it). And it only takes about 20 minutes to make. It is also extremely amendable: you can add chicken, leave out the feta, leave out the pasta, throw in other veggies you have. But really, all you need is a can of tomatoes, a can of cannellini beans, garlic, 10 oz of fresh spinach and some pasta.

Come with me . . .

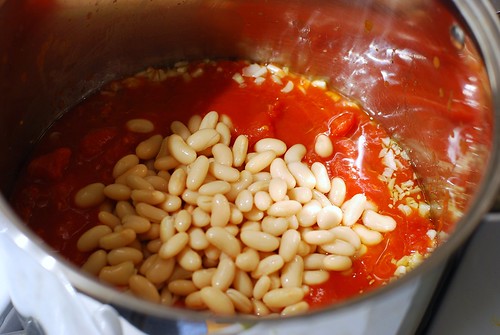
Sautee your garlic on low then throw in your canned stuff. The tomatoes ought not be drained, but the cannellini need to be rinsed.

Beans and maters.

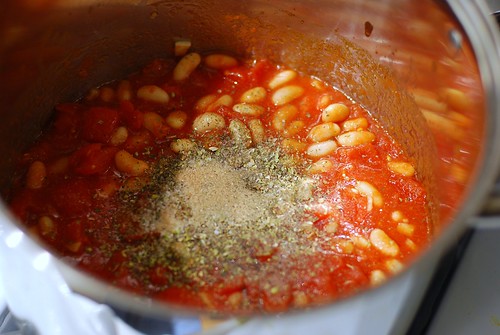
And if you didn’t use the Italian seasoned tomatoes, generously empty your spice cabinet in there (basil, oregano, kosher salt, pepper). Even if you did use the Italian stuff, you’re going to want some salt in there.

Oh heck, throw a whole buncha spices in there!

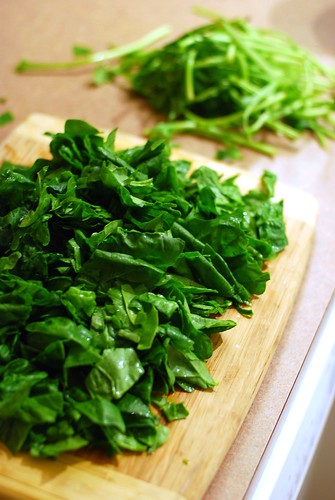
While that’s simmering, you have plenty of time to break the stems off your spinach and rinse it. And unless you used baby spinach, you really want to break off those stems, you’ll thank yourself later on.

Spinach, stemless.

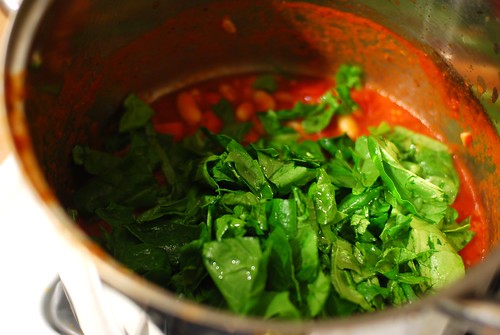
Now it’s been about ten minutes, and you want to throw your spinach in there.

Throw your spinach on.

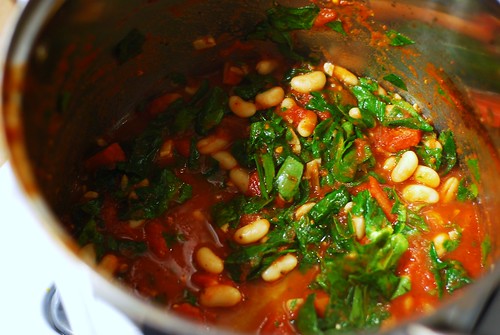
Stir that up just until the spinach wilts. In fact, the less cooked the spinach is, the better this is going to taste, so leave it on low while you stir that in. It should only take a minute or so to be done.

Cook *just* til it wilts.

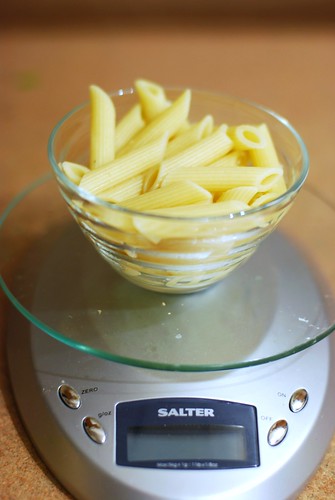
You *were* cooking your pasta all the while, correct? I also include this shot as a measure of what 2 oz of penne (1 serving) looks like cooked. As a frame of reference, that bowl is exactly a cup. Needless to say, it will not be 2 oz once it’s cooked.

1 serving penne, 2 oz.

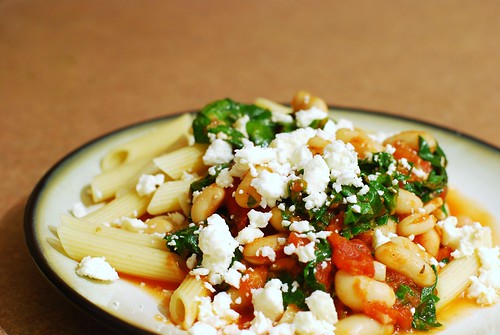
Now top with feta, if you’re doing that, and voila! A twenty-minute dinner that’s incredible in every way. I usually leave out the feta, but since B’Garah loves her cheese, I had to include it for the picture. It also makes the shot a little more attractive.

Money shot!

And that’s all she wrote.

Mediterranean Pasta
Adapted from the UNH Good Eats! Cookbook

1 tbsp olive oil
4 cloves garlic, minced or finely chopped
1-28 oz can diced tomatoes (use whole peeled if you’re leaving out the pasta)
1-14 oz can cannellini (also called white kidney beans and similar to Navy or Great Northern Beans)
1 tbsp dried basil leaves
1 tbsp dried oregano leaves
1 tbsp kosher salt
black pepper to taste
10 oz fresh spinach, stems removed
4-8 oz cooked penne (I like the Smart Taste brand best)

First, set your water to boil, and cook pasta when it’s there (which will be at some point in the middle of all this).

Sautee the garlic in the oil in a nice big pot on low for about a minute. Enter tomatoes, beans and spices. Bring to a boil, then reduce heat and let simmer, uncovered, for ten minutes while you de-stem your spinach. Now throw in the spinach and stir until it’s just wilted.

Serve atop pasta (this is a very small amount of pasta called for, there will be considerably more sauce than pasta), with feta if so desired.

Serves 4.

NOTES:
* Use a big pot because the spinach starts out really fluffy and this will give you space to stir without getting the spinach all over your stove.
* Don’t start heating your oil until the garlic is minced/chopped and ready to go, or you’ll end up with nasty bitter burnt garlic.
* Consider serving sans pasta. In this case, use the whole peeled tomatoes.
* It really doesn’t need the feta and it doesn’t need much pasta either. Honest. The spinach gets this buttery texture to it that eliminates the need for extra fat/flavour.

Heya cats and kittens! Remember when I said I was doing that family cookbook? Well, I finally got crackin, kicking it off with a recipe from my first cousin Nikki. And hey, while I’m at it I’m going to share my secret for making blueberries more pronounced in my recipes.

Nikki is maybe 6-7 years older than me (like all my cousins, my parents are both the youngest of four), and was there the day that I smashed all of my front teeth on the bike. I was 6 and have had to have lots of dental surgery since, so it’s not the fondest memory, but definitely the most memorable! She’s a very sweet gal, and I’m sad I haven’t seen her in several years owing to some missionary work she’s doing in some other country to which I’ve never been.

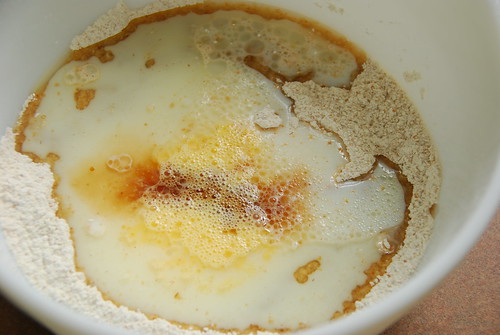
One of the first steps is to make a well in the middle of the dry ingredients.

Make a well in the center.

As you can see here, my "make a well in the middle of the dry ingredients" skills are wanting.

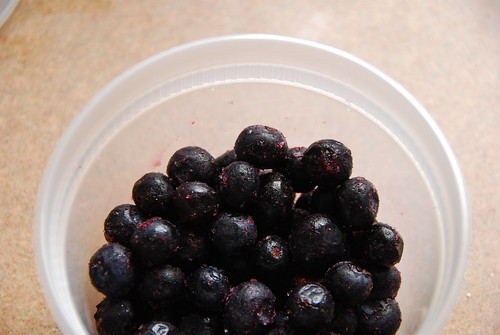
Moving right along, I decided to use frozen blueberries for my muffins, as blueberry season is over and I’m kinda broke at the moment.

Berrays.

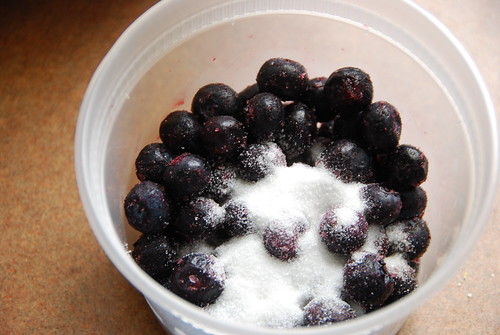
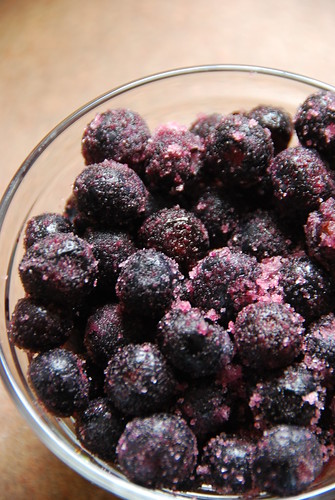
And now, folks, is the moment in which I share my super secret blueberry method. Put your blueberries in a container for which you have a tight-fitting lid, and scoop about 2 tsp of sugar on there (per cup of blueberries).

Sugar.

Now put your lid on and shake it, shake it good. You want to coat the blueberries with the sugar. If you’re using fresh berries, I recommend shaking them with a tiny amount of water first so the sugar can stick. You’ll be left with beautiful crystallized-lookin blueberries.

Crystallizin.

Look how pretty! I feel like recipes that call for berries are always really sweet, but the berries themselves are actually pretty tart. While this is refreshing when eating them fresh by the handful, in the context of the recipes they feel, to me, a little bit like an interruption in the flavour. While the sugar-shake method doesn’t eradicate this entirely, it seems to help with a smoother flavour transition. Yes, I just made up that phrase.

Next! Gently stir ingredients and remember, just until moist. Lumpy batter will always be lighter. Then fold in the berries.

Hey batter batter.

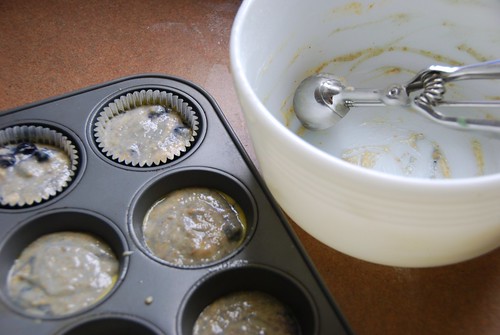
Now the recipe says to use paper liners, but I only caught the part about liners (general category), and I don’t like liners for my muffins at all because it gives the bottoms an excuse to get soggy as they cool. The result is a pan of batter, some of which is in foil wrappers, the rest of which are in none. I wanted to be able to present the muffins as written, and though I failed, the liners attest to my best intentions. Also, note how I got my grubby little fingers in the bowl before I even took the shot. Mmmmm, batter!

Oh oh and I almost forgot! I read a really good idea somewhere (that I forgot while making the muffins): save some blueberries to put right on top of the muffins just before you put them in the oven. This will better distribute the berries all around (instead of just sunk at the bottom).

Licked clean.

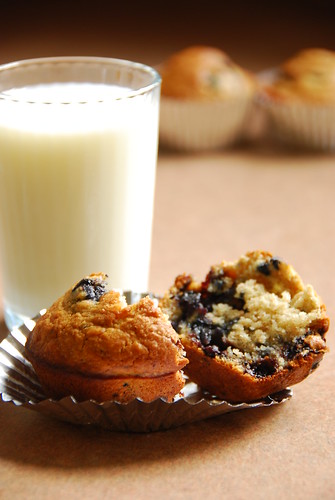
Now for the last shot. I took like a bajillion trying to show the muffins as appetizingly as possible, and survey seems to say that this shot is best. And of course I like it because I’m a slave to low f-stops.

Muffin invasion.

But since I had to crop to a square, this one ended up in the book.

Torn.

So there you have it! The first of my paternal family’s recipe collection.

Nikki’s Low Sugar Berry Muffins

1 3/4 cups sifted flour
1/4 cup sugar
2 1/2 tsp baking power
3/4 tsp salt
1 well-beaten egg
1 tsp vanilla
1/3 cup vegetable oil or melted shortening
3/4 cup milk
1 cup berries

Preheat oven 400 degrees.

Directions:

Sift dry ingredients in bowl and make a well in center. Add in wet ingredients and stir until moist. Fold in fruit and nuts, if desired, to taste.

Fill paper lined muffin pan 3/4 full. Bake 35 minutes.

Yield: 12 Muffins