online poker

Omnomicon

say it with me now, “om nom nom”

Subscribe to Omnomicon

Archive for the ‘recipe+fusion’ Category

Revealing my disinterest in ice cream always draws a lot of incredulity on the behalf of the listener. Sometimes the reaction is decidedly offended, as though ice cream were treasured family moment I just figuratively dismissed with a bored wave of my hand. Other times it’s complete confusion. What did you just say? What do you mean, you “don’t like ice cream?” You must like some kind of ice cream. And it’s not like I hate the stuff, it’s just that I don’t care much for it, and if I’m going to down a thousand calories in the span of 10 minutes, I’d rather it be noodles I drag from takeout carton to pursed lips with some bamboo sticks.

But every now and again, I have this crazy craving for a banana split. And you know, I’m a simple girl in that respect: banana, vanilla ice cream, walnuts, chocolate bits, butterscotch and of course, a maraschino cherry. With this in mind I present a take on blondies that is a little lighter than usual and reminiscent of a banana split.

Butter. Sugar. The usual.

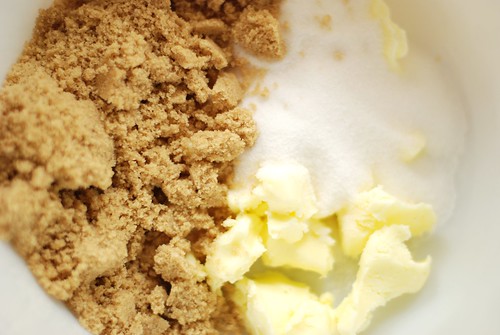
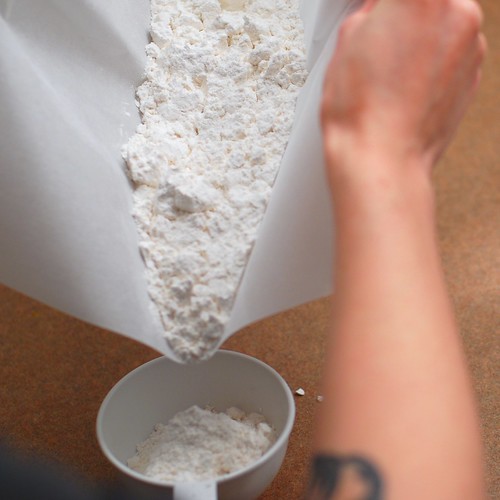
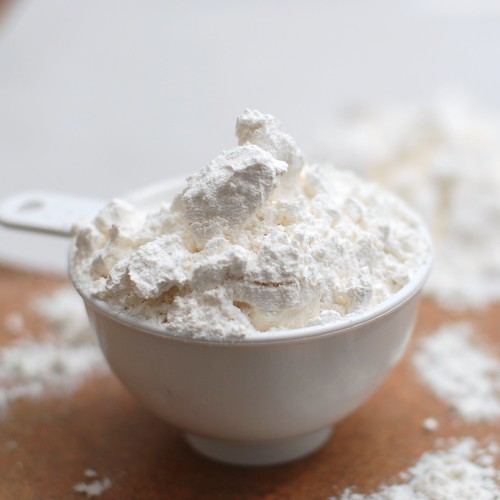
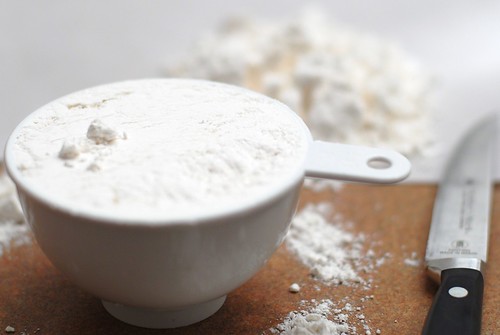
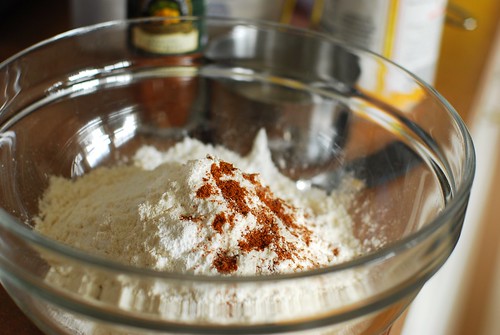
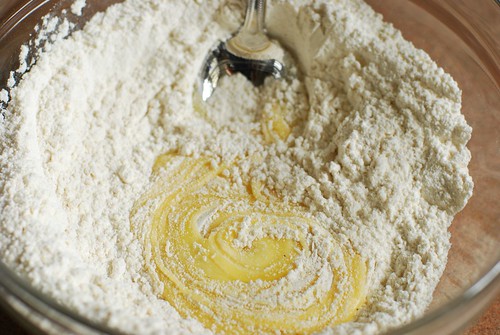
I’d like to use this opportunity to let you know, in case you didn’t, that a kitchen scale is a wise investment because then you don’t have to pack brown sugar, which is one of those things that just seems to completely interrupt the flow of my baking process. Similarly, you don’t have to sift your flour in order to measure it only to sift it again into the mixing bowl. And your scale has other uses that will no doubt come up in future recipes as I loudly bang the “really, just get a kitchen scale already” drum.

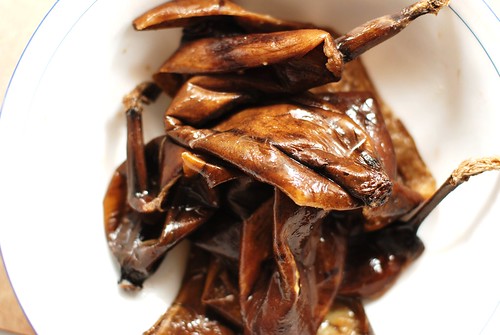
I thought that these bananas looked rather . . . conversational.

Conversational.

By now we all know to use very ripe bananas in our baking, and by necessity I often end up freezing them too, in an attempt to salvage that lone straggler at the end of the week. This is a convenient circumstance, as freezing then thawing the fruit bursts cells and brings out as much flavour as is possible from it. At least, that’s my understanding, but the actual fact that pre-frozen fruit is better for baking, for whatever reason this is the case, is confirmed by on Mr. Alton Brown who was rambling on in his weird way about it one Sunday afternoon a couple years ago as I nursed a hangover on the couch.

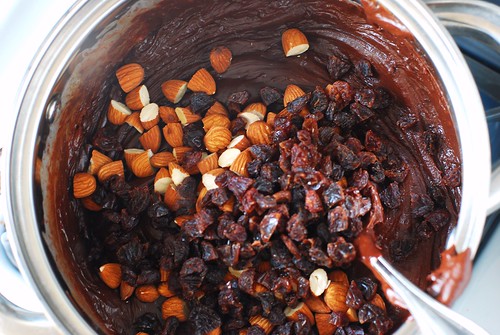
Wheat germ is one of those things I haven’t experimented with very much, but it has an unobtrusive nuttiness that avoids being too earthy. Of course, I’ve only had opportunity to pair it with quite a bit of sugar, so maybe this is different in other contexts. Also, walnuts and chocolate chips.

GERM! EWWW! Jk, it's the good kind.

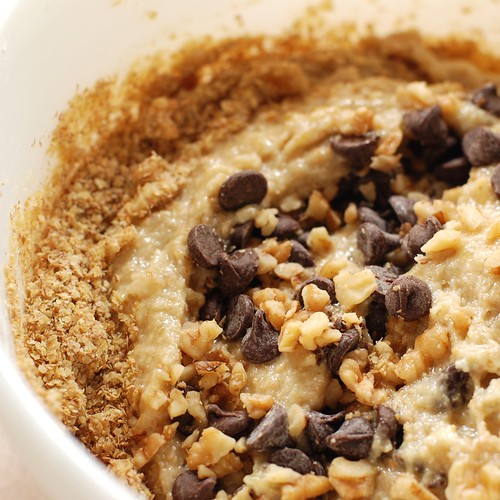
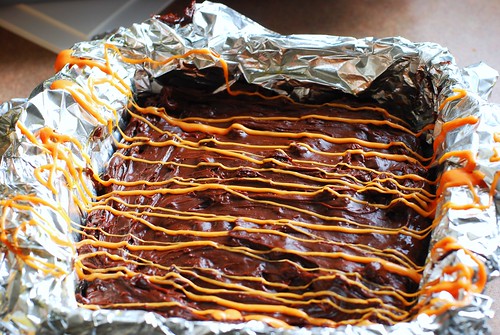
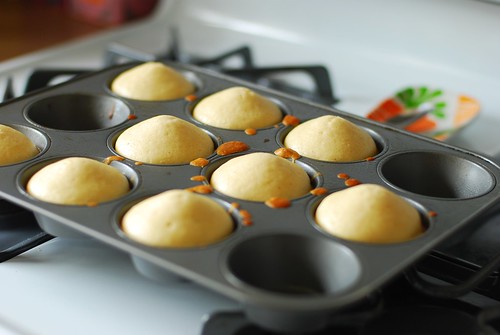
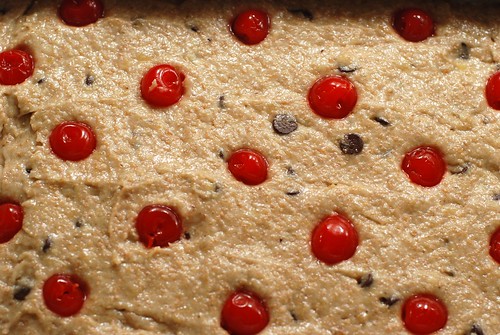
I polka dotted the top with some maraschino cherries. Because they really do scream ice cream, and it was the cutest thing I could think for a garnish.
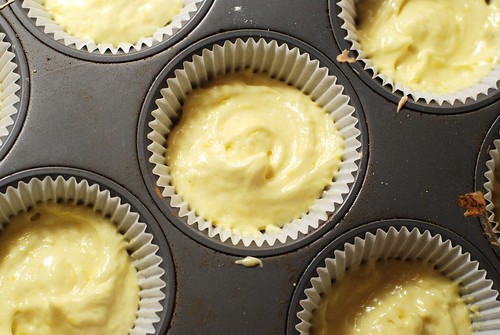
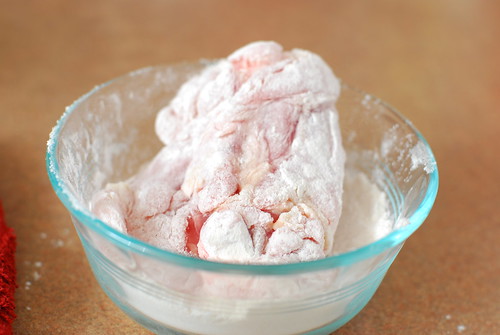
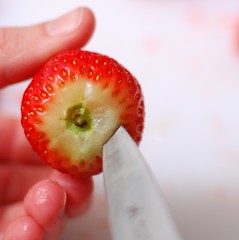
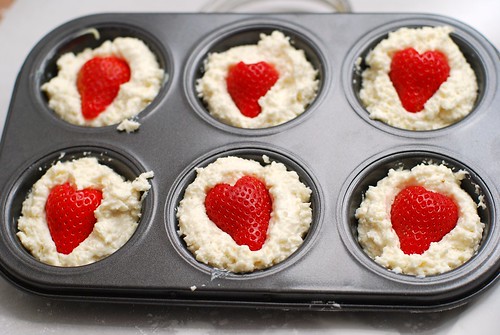
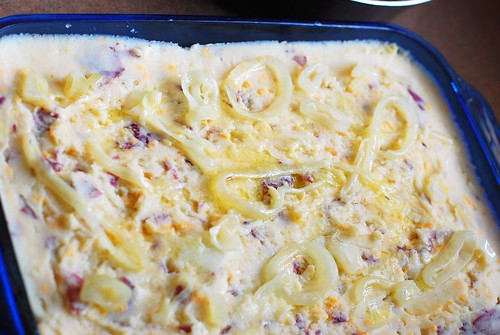
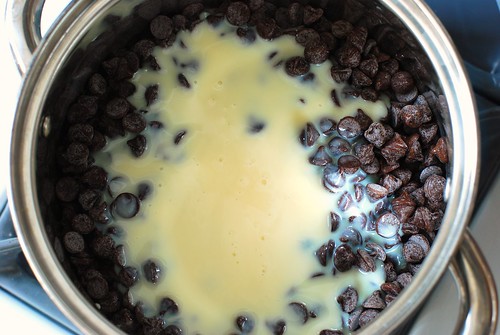
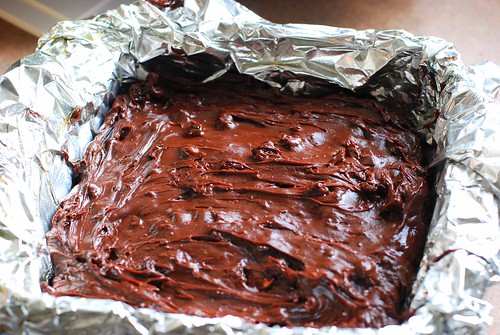
Before:
Polka dot cherries.

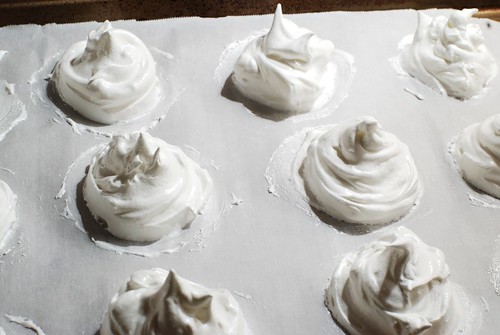
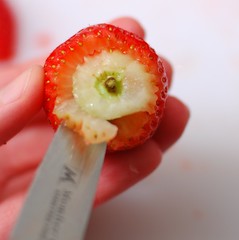
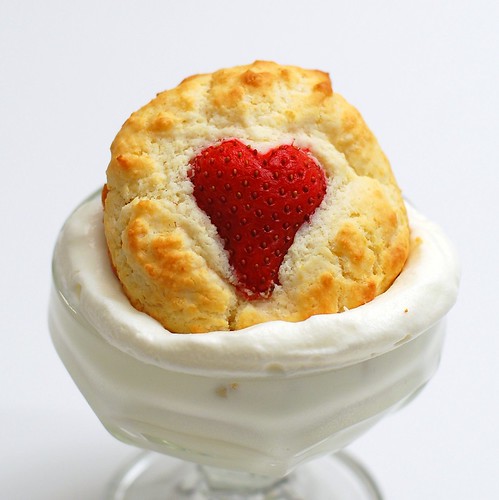
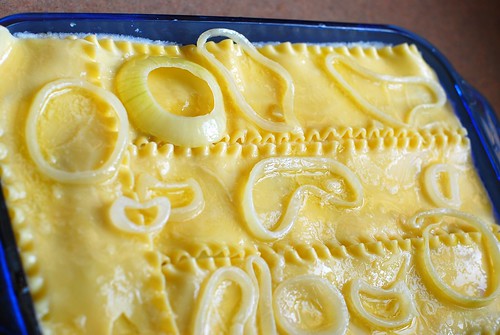
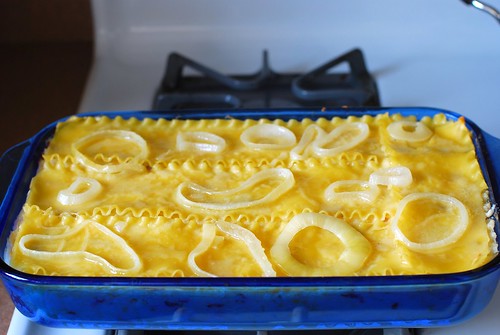
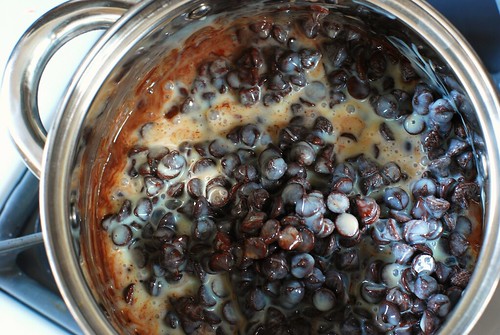
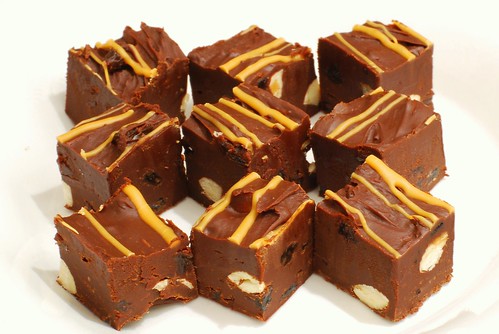
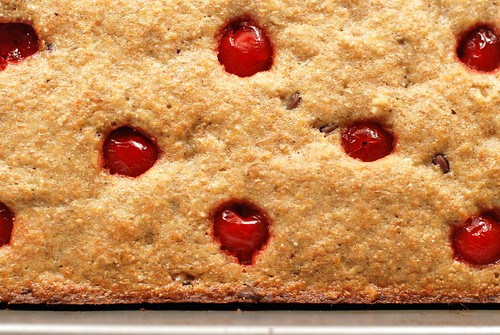
After (all gummy from baking, yum!):
DSC_3532

I find that full-on brownie size (more than 3″ on a side!) is just way too big, and really, after the first half I’m eating it because I don’t really want to hold onto the rest. With this in mind, I cut to the chase and halved the usual size. Triangles seem to make the split look more deliberate and less “shit, too many people showed up.”

Blonde triangles.

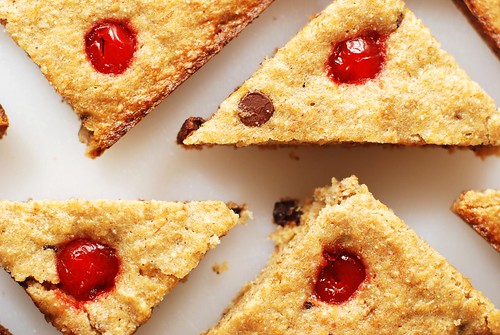
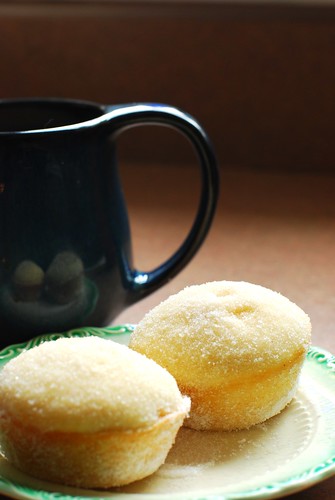
These had just the perfect brownie-imitative texture. They weren’t too cakey, but had a lovely rise to them, avoiding the heavy greasiness of some blondie recipes. Of course, sacrificing that greasiness also sacrifices that amazing chewy crustiness, but the edges on these things are still quite satisfying.

Perfect consistency.

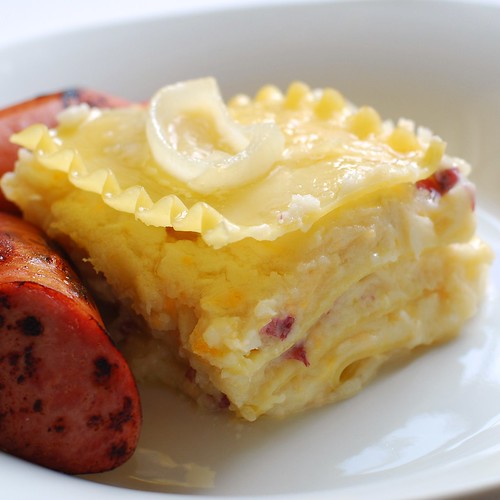
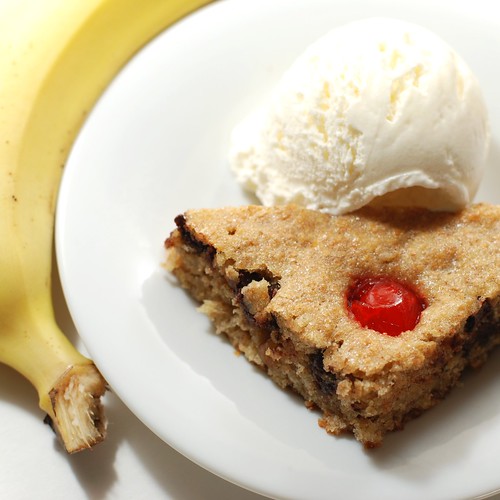
And while the intention was to have a bar that really embraced a banana split all on its own, I would be seriously remiss if I had not tried it with a simple vanilla ice cream.

Banana split blondie!


Banana Split Blondies

1/2 c butter (1 stick), softened
2/3 c sugar
2/3 c light brown sugar (147g)
2 tsp vanilla
4 very ripe bananas (previously frozen is best), mashed
1 egg
1 c whole wheat flour (125g)
1 c white flour (125g)
1 tsp baking powder
1/2 c wheat germ (optional)
1/2 c chocolate chips
1/2 c chopped walnuts
24 maraschino cherries, drained

Preheat oven to 350o.

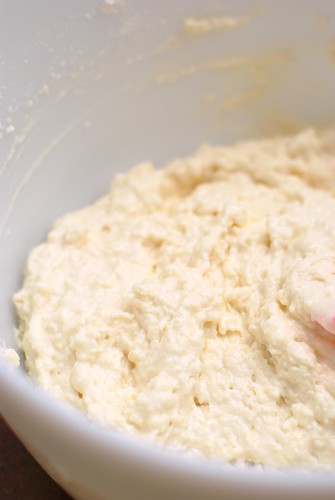
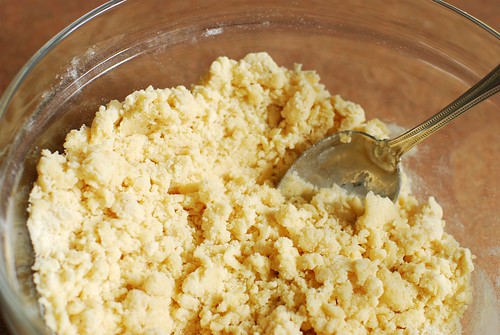
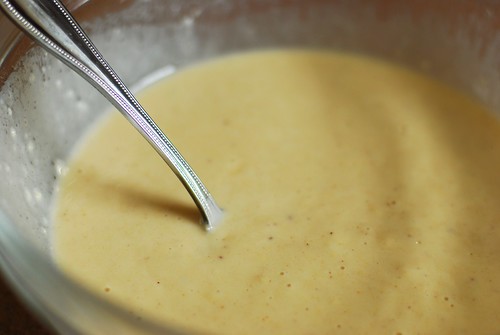
Cream butter & sugars, add vanilla, bananas and egg. Sift wheat & white flours along with the baking powder into the mix, then combine. Stir in wheat germ, chocolate chips and walnuts.

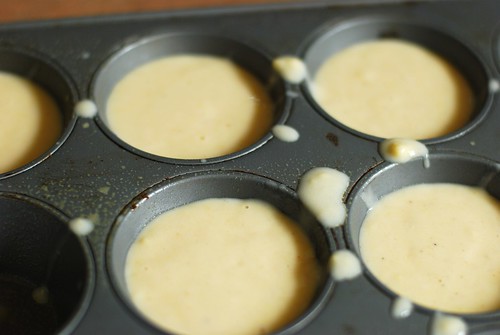
Spread into well-greased 9×13 metal baking pan—a glass pan will bake differently, so be aware. Dot with staggered maraschino cherries, three to a row, eight to a column.

Bake 35 minutes, and allow to cool completely before cutting. To get the triangle thing going on, first cut into a 3×4 grid (12 pieces), then cut each rectangle diagonally so each piece has one cherry.

The refuse.

nutrition summary: (1 of 24 bars) 174 calories, 7g fat, 1g fiber; about 4 weight watchers points

Amazing idea last week: lemon meringue cupcakes. I could make a lemony cake part, then bake a meringue right on top! No need to frost, super easy recipe! I mean look at these. Ladies, how cute would it be to show up at the next get-together with a cheerful tray of these? And guys, how funny would it be to challenge societal gender roles with this kind of delicious underlining your defiance?

Lemon meringue cupcakes.

And to boot, these are 165 calories apiece. Not health food, but far lighter than one would expect from such a tall cupcake.

While the above does appear to be what I described, it is not. No, this recipe has undergone about ten revisions, and unfortunately, that is not fantastic hyperbole. I don’t have pictures of the process, but it boils down to the fact that the pH of the batter is important, and turns out meringue will not hold its shape if baked upon a proper cupcake. And if you bake lemon curd atop a cupcake, the whole thing will taste weirdly sulfuric for some reason. So the final recipe is more involved than I wanted it to be, but the cuteness factor paired with the actual deliciousness is well worth the effort, which in itself is effectively the same as making cupcakes and frosting from scratch, except two frostings. Which is admittedly not the same thing at all.

There are a few “specialty” tools required for this recipe. Nothing too specialized—you should be able to find in your grocery store—but I generally avoid these things because in the past I always tried to work around them: a hand mixer, parchment paper, cake flour, food scale. The mixer is really just for the meringue, the parchment paper for baking the meringue, the scale for measuring the cake flour, and the cake flour because All-Purpose Flour is a misnomer, as it is not good for cakes. I think this recipe is lenient enough to allow you to substitute all purpose flour for cake, but can’t be held accountable for the resulting texture. In the worst case your texture is off, but you will still end up with something yummy if not presentable.

Start with the curd so it has time to chill while all that other stuff is going on. Have you ever had this stuff? I saw it all over left-coast food blogs back when Meyer lemons were in season, but since citrus is um, never in season in Massachusetts, I hadn’t really any good occasion to create a curd until now. And it’s a surprisingly quick (5 minute) ordeal with HUGE payoffs. I could spoon this into my mouth all day, and I hear people put it on toast and things like that. I don’t need to remind you that I put it on cupcakes. By itself, it’s a delightful frosting too!

Curd food.

This isn’t a bad time to go over how to zest a lemon. The white rind is bitter, while the nice sunny yellow part is what offers the bright lemony flavour, so grating away at the skin until you hit the poor lemon’s pulp is exactly NOT the way to do it. My strategy is to shoot for exactly one pass over each bit of the lemon’s surface exactly once. Remember, this is not a sheep-shearing contest, so there’s no need to get every little bit of yellow off the lemon. Just zip your micrograter or zester right along and don’t spend too much time on it.

How to zest a lemon.

Also, isn’t that lemon HUGE? My god, it’s like Monsanto’s answer to the lumpy F-cup boob job.

Speaking of lemons, for both the curd and the batter, I recommend straining your fresh lemon juice. I find that when I leave lemon seeds in my desserts, people never seem to go back for seconds.

It's a strain.

The batter has this subtle speckle of lemon rind yellow. Gorgeous.

Future cupcakes of america.

While that’s in the oven, we make our way to the third part: meringue. This is what it should look (roughly) like right before you start adding the sugar.

Meringue. Luscious.

Now we need a way for the meringues will fit the cupcakes. I use the liners as a guide and trace out circles on the BACK of the parchment paper upon which I shall bake the meringues.

Circles

Then I spoon the meringue onto each dot and smooth it out to the circumference of the paper circle, then around in a spiral to make that nice swirly peak. To do so, I washed my hands very thoroughly, then used something kicking around to smooth and swirl. I can’t remember what right now, but it definitely wasn’t my finger if that’s what your thinking. I mean, if I DID use my finger, I did wash my hands very thoroughly, but I wouldn’t use my finger because that would be very uncouth.

Swirly peaks.

And now that everything’s all squared away and set, let’s assemble!

Putting it together.

I cannot get over how successfully adorable these are.

Lemon meringue cupcakes.

And luscious too.

Lemon meringue cupcakes.

Lemon Meringue Cupcakes
an original recipe, in three acts


Prologue
Heat oven to 350o


Act One: Lemon Curd
2 eggs
1 lemon: zest of & juice of (about 2 tsp & 3 tbsp, respectively)
2 tbsp sugar
1/4 c butter (4 tbsp), chopped

Whisk eggs, lemon zest & juice and sugar in a small saucepan, no heat. Add the butter bits, then bring to a boil over medium heat, whisking all the while. After three minutes or so, you’ll begin to see the bottom of the pan here and there as you whisk, and the mixture will almost instantly thicken. Remove from heat and chill in fridge until needed.


Act Two: Cupcakes
2 egg yolks

1/4 c sugar
1/4 c butter (room-temp is best)
1 lemon: zest of

1/2 c sifted cake flour, or 64g if you’re able to weigh (best method). Feel free to try all-purpose and let me know how it goes!
1/2 tsp baking soda

1/2 tsp vanilla
1 lemon: juice of

Beat egg yolks. Add sugar, butter and zest, and mix until creamed. Sift flour and baking soda, then mix until combined. Lastly, add 1/2 tsp vanilla and strain 1 lemon’s worth of juice, then stir to combine. Nimbly scoop batter into 12 cupcake liners (quicker is better). Bake for 15 minutes.


Act Three: Meringue

Beat on high until stiff peaks form (about 3-4 minutes):
2 egg whites
1/2 tsp cream of tartar
1/4 tsp vanilla
pinch cornstarch

Add in a continuous stream, beating on high all the while:
1/2 c sugar

On a piece of parchment, use a cupcake liner as a stencil to draw 12 circles. Flip liner so the drawing is face down (in contact with the cookie sheet), then spoon 1/12 of the meringue into each area.

Wash your hands thoroughly. Use the circles as a guide for what the meringues should be sized, then using a finger, swipe around the glob of meringue to give it a shape. You’ll have to play around with this, as it will be slightly different for everyone, but what works for me is to pat down the meringue to roughly the intended size, then swipe around with a damp finger to make it as circular as possible. Then I spiral inward, and once at the center, lift finger to create a peak.

Bake at 350o for 15 minutes. Do not open the oven while baking, unless you smell something burning or something. Remove from oven to wire rack, let cool 1 minute, then with a metal spatula, pop each meringue from the parchment so it does not stick there while it cools completely (which you must do before moving onto the next step).


Assembly

Spread about a tablespoon of lemon curd upon each cupcake, then top with a meringue. Ta da! Lemon Meringue Cupcake! Store in an airtight container, and for extra crisp meringues, don’t top cupcakes until ready to serve.

The end!


nutrition summary: (for 1 of 12 cupcakes) 165 calories, 9g fat, 0g fiber; about 3 weight watchers points

I am pleased to announce Omnomicon’s very first giveaway! And not bad for a first, if I say so myself.

It all started with a dear reader, noinamg, sending me the following email.

i would like to pose you a challenge if i may

i would like something to do with my Route 11 Mama Zuma’s Habanero (the red bag ones)
they are so spicy that even one chip is like hell in your mouth. since i cannot actually eat these, do you have a suggestion for a dish to use them in somehow?

Well, man, I do believe I can oblige, courtesy of the fine folks at Route 11.

Mama Zuma's Revenge.

This chick is badass. Wickedly badass. Also, a total babe.

Mama zuma herself.

I guess the word they’re going for here is really “hot,” and though hot chicks rarely have anything to do with habaneros, they certainly can’t hurt sales, right? These are like really good bbq chips, except particularly tongue-burning. They’re almost diet friendly in that you have to take a little bit of break between chips.

Mama zuma's.

Really hot potato chips with an actual flavour to boot. It’s a good thing.

So here’s the giveaway: I will be sending out two bags of Mama Zuma’s Habanero Chips to two randomly-chosen readers. Would you like to win some? Leave a comment before 6pm EST Friday, March 6th describing what you would do with your Mama Zuma’s. (American readers only–apologies to my foreign friends, but I’m sending these out on my own dollar and funds are low).

Will you be enjoying them crunched into your tuna fish sammich? I can’t be the only one who does that. Perhaps slipping some to your Indian friend who keeps bragging about how white people don’t know what truly spicy food is. Or maybe even giving my recipe below a polite little shot. At the very least, it has a topical and interesting title.

Noinmang, you’re on. We’re making Mama Zuma’s Red Hot Gams.

First de-skin, de-fat, rinse and pat dry some chicken thighs to give yourself a nice fresh non-slimy surface. As I happen to be in possession of a veritable plethora of kitchen towels, I reserve one specifically for these kinds of things.

The gams.

Next we’re going to flour, butter, then chippy the thighs and in that order. It helps conserve resources by using bowls that just barely fit a single thigh, particularly the chips. I found that one 2 oz bag of Mama Zuma’s crumbled up to *just* enough for four thighs.

Floured thighs.

Next is a dunk in butter to make the chips stick, and then the crumbled chips.

Chippy!

Now we bake for a bit. In the meantime, let’s prepare a little something in case the chicken’s still too much. It’s a pretty simple yogurt/cucumber/parsley concoction that might also work well as a lighter alternative to blue cheese dressing for your buffalo wings. Essentially, the only prep here is in a food processor.

Parsley, cucumber.

And ohhhhh man. What a meal this made.

Mama zuma's red hot gams.

Mama Zuma’s Red Hot Gams

4 chicken thighs (bone in our out, your choice)
2 oz Mama Zuma’s Revenge Habanero Potato Chips (one bag) [in a real pinch you can use your favourite brand of hot potato chips, or even plain ones if you’re not into the spicy thing]
3 tbsp butter, melted (no worries, you won’t be using all of it)
1/4 c flour

Preheat oven to 375o.

Remove the skin and trim the fat from the chicken thighs, unless they came skinned and boneless. Now rinse the thighs and pat dry.

Crumble the Mama Zuma’s in the bag until a rough but not fine consistency.

For “breading” the chicken, using the smallest bowls you have that will fit the thighs is the best way to economize your ingredients. First flour the chicken on both sides, dip quickly in butter and let drip dry a few moments before grinding the chicken into the chip crumbles. Really grind it in there, and on both sides; you want the chips to be all pokey into the surface, as they’ll stay better that way.

Place chicken on a cookie sheet and pat in any remaining chip crumbs, since they’re already contaminated and preciously delicious.

Bake for 35-40 minutes, or until the meat reaches an internal temperature of 165. Serve with . . .

Aleta’s Mama Zuma Antidote: Cucumber Chill-Out Sauce

1/2 c yogurt
about 2 tbsp loosely packed parsley leaves
1″ of cucumber, peeled and chopped
1 tsp lemon juice
pinch of salt

Put all that stuff up there into a food processor and process for a minute or so, until the cucumber is ground. Add an extra 1″ of cucumber, dice, to the finished sauce, if desired.

Don’t forget to leave your comment if’n you’d like to give Mama Zuma’s a try! Contest closes Friday at 6pm EST.

So I know diet diner food isn’t a great sell for everybody, and frankly, I think baking takes far prettier pictures. That said, I have, for Valentine’s Day, a visual gift for all y’all. Strawberry shortcake is a beautiful thing all on its own, but for dessert for two, it can be improved upon.

Generally, in place of shortcake, I make some sweet biscuits, slice ’em open and throw some sugary strawberries and whipped topping on there. However, I’ve been reading aaalllll about different flours and decided to try out the theory that the low protein levels in cake flour makes for a more perfect crumb.

OH MY GOD, I will never go back to all-purpose flour. All-purpose flour varies from region to region and season to season, so while in theory it can make for a seasonal flair, there’s something to be said for fabulous consistency. This recipe makes a tender, delicious, and all-around omnommy shortcake biscuit.

Enter strawberries.

Strawberries.

They’re out of season, but available in most stores. Do yourself a favour and throw out any that aren’t red inside. White strawberries are blech, ugh, and above all else, yucky.

Here’s how to measure your flour perfectly. First, sift onto a flexible cutting board or, as seen here, parchment paper.

Flour!

Funnel the flour into the measuring cup. Oh hey, bitch has tattoos, check that out.

Measuring . . .

Overfill the cup with flour, and DO NOT shake to level it off–this repacks the flour and undoes all your fancy sifting.

Abundance.

Instead, kinda slice off the top with a knife into the sink, or back into your flour bag/box if you can manage it. It’s messy, but it’s the best way.

Cut!

Use a pastry blender or two knives to blend the butter into the flour until it kinda disappears in there. Then add some heavy cream, light cream, or fat free half and half. This is a batter rather than a dough, so no folding out is required, and it will be goopy.

Pre-shortcake.

And hey, back to the strawberries! Except this time they’re seasonally-themed.

I <3 strawberries.

Select the pointiest berries to create the hearts. Then remove the stem and carve out the little stem-pit there. Also, this berry was a poor example, as there was a lot of white under that stem.

Pointy berry.Shink!Scrooch!

Cut the strawberries in half length-wise, then carve a little V out of the top. To further carve out the heart-shape, slice from the already-sliced side and round out the edges. This takes a little bit of practice, and I really didn’t know how to show it in photos (sorry!). Really, though, the strawberries are going to be pushed into the batter anyway, so the edges really don’t have to be all that perfect. They just take better pre-baked photos that way. And that’s how to make strawberry hearts.

V . . . not consummate, sadly.<3.

Scoop two heaving tablespoons of batter into each spot of your muffin pan, then press one of the strawberry hearts into each.

Oh look, it's all my love.

Then bake to perfection. And hey, don’t serve yours this way . . . you need to serve it with sugared strawberries. Really. Trust me. This just took the best picture.

Much love.

Strawberry Heart Shortcake Cupcakes
makes 8 cakes

1 lb fresh strawberries.
2c sifted cake flour (if using all-purpose flour, which is not recommended, reduce to 1.75c sifted)
1 tbsp baking powder
3 tbsp sugar (1 tbsp for the shortcake, 2 for the strawberry topping)
1/2 tsp salt
6 tbsp cold butter
3/4 c light or heavy cream, half and half, or fat-free half and half
Whipped cream, whipped topping, or cream-in-a-can

Rinse the berries, reserving 8-10 small to medium ones with pointy tips. These will be your hearts. Heat the oven to 450.

Slice remaining strawberries into quarters and toss with 2 tbsp sugar to coat. Set aside.

Sift flour on a flexible cutting board or parchment paper. Gently pour into measuring cup, then level off with a knife. I’ll repeat it again just in case you missed it the first time: do not level off by shaking or tapping the measuring cup. You’ll get dry nasty muffins, and nobody wants that.

Sift the sifted flour AGAIN, this time with baking powder, salt and sugar. Cut up the butter, which should have been in your fridge all this time, a little bit to get the blending going. Dump into the flour, then use a pastry blender or two knives to blend together. You’re done when there are no remaining chunks of butter in there. Add in the cream or half and half all at once, then mix until all ingredients are moistened.

Let that sit a bit while you create your strawberry hearts. Pull off stems, carve out the pit with a paring knife, then slice in half. Shape each half into a heart by carving a V at the notch (where the stem used to be). Since the berries will be pushed into the dough, the edges don’t need to make a perfect heart, but the V at the top is pivotal.

Bake for 12 minutes. Remove from oven, let cool a minute or two in the pan, then transfer to wire rack to cool. Serve to your dearest love with the sugared strawberries and whipped cream.

Love, Aleta.

Love,
Aleta

Just like your half-Polish, half-Italian grandmother used to make!

Everyone who’s ever had pierogies loves them. Unless they don’t like potato, cheese, pasta or butter, in which case they are clearly mad. I have yet to make pierogies, but I have a little ace up my sleeve called pierogi lasagna. It’s very easy, if time consuming.

Recovering carbophiles may wish to avert their eyes, lest they become entangled in the enticing mesh of potatoes and pasta. On the other hand, this dish is relatively low fat (remember, the butter is being distributed among 12 servings, and I found that fat free cheddar did the trick quite adequately), and they sit like a brick in your stomach, so you’re not likely to want more than one piece of the stuff.

We begin, predictably, with potatoes. These are some of the most beautiful reds I’ve seen in a long time.

Red potatoes.

The skin was so lovely, in fact, that I left it on. That’s my usual preference anyway, though.

Red potatoes: mashed.

Stir in some cheddar and sour cream. I left out the butter, for now.

Red potatoes: with cheddar.

Sautee a sliced onion in a 1.5 sticks of butter. This is why there was no butter in the potatoes.

Onion: sauteed.

Now we begin the lasagna part of all this. Spread a little onion-butter on the bottom of a 9×13 baking dish.

9x13 baking dish: buttered.

Lay down some noodles.

Noodles.

Spread potatoes little by little. It helps to drop a dollop, then spoon it out, working row by row along the noodles.

Potatoes.

And then some onions and butter on top of that.

Onions.

Repeat that a few times, then top with noodles and the rest of the butter and onions. There should be more of this stuff on top than in any of the layers.

The top!

Bake for 20 minutes and you get this.

Pierogi casserole, baked.

Use your baking time as an opportunity to fry up some kielbasa. Enjoy the hell out of it.

Mmmmmm.

Pierogi Lasagna

1 lb lasagna noodles
4 lbs red or white potatoes
1/4 c sour cream (optional)
1/2 c milk
2 c shredded cheddar cheese
3/4 c butter (1.5 sticks)
1 onion, sliced in rings

Cook the noodles. Chop potatoes into 1″ cubes, place in pot of cold water (enough to cover), and allow to come to a boil. Continue boil until potatoes are soft enough to yield to a fork stab. Drain, mash, blend with a mixer. Toss in the optional sour cream and milk, mix some more. Add salt to taste. Stir in cheddar.

Melt all the butter over medium-high heat, then sautee onion until the rings no longer hold their shape.

Preheat oven to 375. Grease the bottom of a 9×13 baking dish with some of the onion-butter. Lay noodles on the bottom of the dish, then spread the potatoes, a dollop at a time, along the length of each noodle. Once done, smooth the potatoes, then spread about a quarter of the onion on top, and drizzle a small amount of butter as well. Repeat this twice (or more if your dish can accommodate), then top with noodles and the remainder of the onions and butter.

Pop in the oven for 20 minutes. Allow to cool 10 minutes before cutting and serving.

One time I tried to make fudge. From scratch. I followed my Memere’s advice and selected a dry, beautiful, sunny day (apparently fudge is THAT sensitive to moisture), and I even invested in a candy thermometer. I ended up with a grainy, lumpy, nasty mess. The next day my roommate made fudge in the microwave with a lump of marshmallow Fluff. Of course hers was perfect.

I don’t use the Never Fail recipe, but Five Minute Fudge is another workaround that comes out great every time. I’m not a big fan of chocolate, and I will eat just enough to make sure it came out, so I haven’t tried to do this from scratch. But I did get a marvelous idea last night as I drifted off to sleep.

Have you ever had one of these?

The inspiration.

If you have, you know that it is the best way to eat chocolate. I set out to recreate it in fudge form. It is necessary to chop the almonds in half, but leave the raisins whole. This seems to preserve the consistency the chocolate possesses.

Preparations underway.

Then we melt our ingredients. First, three cups of chocolate chips.

It begins.

Now ooze your condensed milk and vanilla extract in there.

DSC_0744

Melting . . .

Melting . . .

. . . and in just a few minutes of stirring, you have fudge!

Ready for additions.

Now we make like Cadbury.

Stirring in.

And voila! Lumpy fudge. I like to lightly spray the foil so the fudge releases easily when it comes time.

Lumpy!

Hmm . . . now this is the texture we’d expect, but it’s a little . . . unrefined-looking. Fortunately, while the main feature was doing its melting thang, I was also melting some vanilla chips with a little bit of the condensed milk, with more condensed milk than the fudge so that it’ll be more cooperative. And since Halloween’s upcoming, let’s make it a theme.

Meanwhile, in another pot . . .

Oh man, that reminds me of a joke. Why did Snoop Dogg carry an umbrella?

Fo’ drizzle.

Oooo!

Let that chill, harden, and cut with a nice sharp warm knife.

And now, fudge!

Cadbury’s Fruit & Nut Fudge
built on the premise of Nikki’s Five Minute Fudge

1 – 14oz can of sweetened condensed milk
3 cups milk chocolate chips (since the Fruit & Nut bar is a very milky chocolate)
1.5 tsp vanilla
Dash salt
1/2 c almonds, chopped in half
1/2 c raisins

Fo’ drizzle (optional):
1/4 c white chocolate chips
1/4 c more sweetened condensed milk

Foiled line an 8×8 pan, and spray lightly with cooking spray.

Melt your milk, your chips and vanilla in a pot on stove top. Remove from heat, stir in nuts and raisins, then pour into foil-lined pan.

If you’re drizzling, let the pan cool on your counter for a few moments while you mix the white chocolate chips with your extra condensed milk. Let cool just a minute, then pour into a plastic bag, cut a hole in the bottom, and drizzle from foil to foil.

Chill 2 to 3 hours. Put your longest non-serated cuttin’ knife in a glass of warm water, wipe dry, then slice. Re-heat your knife via the water whenever the going gets less smooth.

So I generally stay away from baking recipes as they are very tempting and I can’t eat much of them, but I continually read Baking Bites as a vicarious way of enjoying baking. Nicole posted a recipe yesterday that I really couldn’t pull myself back from, and as my self control has improved to the point where I can enjoy one of something, I decided to replicate her recipe for Sugar Donut Muffins.

These are lighter than making doughnuts at home, as they are not deep fried, but they do have nutrition information that’s just barely lower fat than a Dunkie’s Sugar Raised Donut, so they’re not exactly health food. At the same time, these are delicate and divine, and will appeal to the snobbiest of food snobs (like me). They remind me of nothing so much as the sugar donuts you find in Chinese buffets. Classy, I know!

I followed the recipe to the letter for once, and the only change I recommend is waiting to brush the tops with butter until five minutes later, or leaving it out altogether. When it came time to eat these, the tops were a little soggy.

It’s go time! Check out this sugar and egg sludge I made! The texture was really cool, but unfortunately difficult to capture in photo form. So you’ll just have to make ’em to see.

Egg + sugar

The tiniest amount of nutmeg goes a long way with these.

Some dry stuff.

Swirl.

The batter starts as a dough . . .

Crumbles.

. . . then quickly goes back to being a batter.

More wet stuff.

Sloppily fill your clean, greased muffin pan that looks dirty no matter how many times you scrub it. Remember, no liners! These things still need an outside treatment.

Splats!

After baking, these babies are so smooth, they almost look more like cupcakes than muffins. But they’re neither, they’re really doughnuts, promise.

Soft little pillows.

Now take the muffins into your veiny old lady hands and roll them in sugar.

Dab dab.

It’s a satisfying part of the process. Perhaps the most.

Ta da!

The one advantage here as opposed to hitting up the Dunkie’s drive-through is that you can enjoy these with a fresh cup of unburnt coffee.

Serve with coffee, of course!

Many thanks to Nicole at Baking Bites for posting a recipe I couldn’t resist. And I find myself resisting temptations CONSTANTLY, so it’s high praise.

When I was a kid we visited my Uncle Doug with some frequency, and he only owned two movies from what I can remember. The first was The Good, the Bad, and the Ugly, which didn’t appeal to me for more than five minutes at a time, and the second was Fried Green Tomatoes. Yes, it is a chick flick, but it’s also a dark period film, and at the time that shit was directly up my alley. Oh, who are we kidding, it’s still up my alley.

In college, I took a food lit class and this was also on the required reading. Turns out in the book there’s a little bit more of a lesbian bent. Who knew? Whatever the case, I digress. It all comes down to I saw green tomatoes at work, and decided to try something new. In addition to the food itself, check out the results of my fancy little light box!

Look at these babies. Just beautiful, the color.

edited - fried green tomatoes

Green being my favourite colour, this was practically a religious experience visually.

edited - fried green tomatoes

This isn’t sandart, it’s just the underwhelming breading for these things.

edited - fried green tomatoes

And here they are, fried green tomatoes!

edited - fried green tomatoes

These were really just okay, which surprises me in a way, considering how much oil went into them, but not in other ways, like it’s a southern dish. I could see these being excellent with seasoned breadcrumbs, but I’m not a big fan of cornmeal without something punching it up a bit, and needless to say, the tsp of paprika really didn’t cut it. That said, I made an attempt to salvage this experiment.

edited - fried green tomatoes

Yep, you can make anything into a pretty good sammich. This one features arugula, cheddar, red onion, and mayo. My research tells me that green tomatoes are indeed just red tomatoes that haven’t had a chance to ripen yet. I thought maybe they were some kind of varietal. Maybe I’ll try fried heirloom tomatoes one of these days.

If you are interested in making your own, here’s a recipe from Epicurious.