online poker

Omnomicon

say it with me now, “om nom nom”

Subscribe to Omnomicon

The holidays are finally over. For the last two months you’ve put as much deliciously rich foods and mediocre cookie plates as can fit in your mouth at any one time. Upon returning to work, you’ve discovered that your work slacks are a little tight, and you’re considering eschewing your creative and unique New Year’s resolution in favor of the old “lose 20 lbs” standby, because while cable knitting looks really cool, who has time to make anything big enough to be useful?

No worries, everyone else is feeling it too.

Now that family commitments have been satisfied and friends are finally back from where-do-your-parents-live-again, it’s the perfect time to get everyone together for a party to celebrate the end of the bustling season and the beginning of two miserable months before March even begins to tempt you with hints of Spring. What better way than to flavor trip?

Miraculin is really nothing new to dedicated foodies, who probably read This NYTimes Article last year, or considered purchasing some from ThinkGeek. If you are not a dedicated foodie, or do not read the New York Times, good for you! Here’s a simple breakdown of the deal:

Oh hai thar, miraculin tablets!

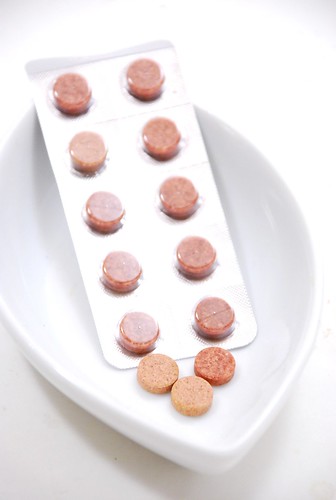
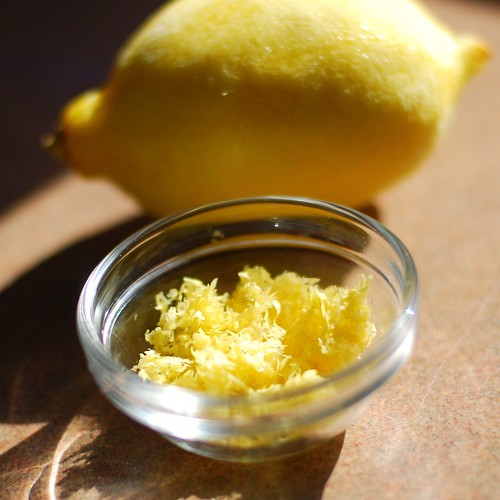
Miraculin is a chemical derived from the Miracle Fruit of exotic West Africa. It “tricks your tastebuds into thinking sour and bitter foods are sweet.” I can’t imagine that exact sentence hasn’t been used like, a bajilion times, so I put it in quotes, even though I’m not entirely sure who I’m quoting. The experience lasts 20-40 minutes, during which time lemons taste like sweet lemonade, Tabasco has a chocolatey overtone, and sweets taste the same as ever. It is legal in the United States and most other countries, and is not a drug in the sense that your mind is not affected, just your tastebuds. I’m not sure how Mormons might feel about that, so please speak up if you happen to know. There has been talk of using it as an aid to diabetics, in a fashion similar to Stevia, but the process in the US has been held up by red tape, and I suspect that the lingering after-effect stymies the actual practicality of this idea.

Flavor tripping makes a great alternative to the standard “drink beer until we’re drunk” model of throwing a party, and gives an easy (and relatively inexpensive) focus—each serving costs about a dollar, and citrus fruit should be flooding in from Florida any day now. And it’s good clean fun!

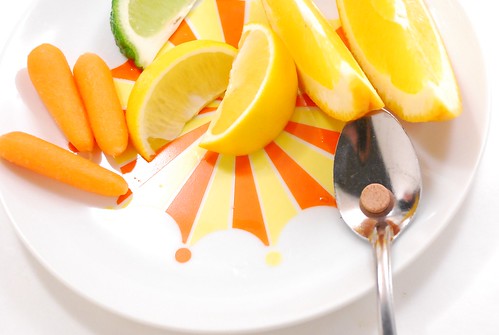
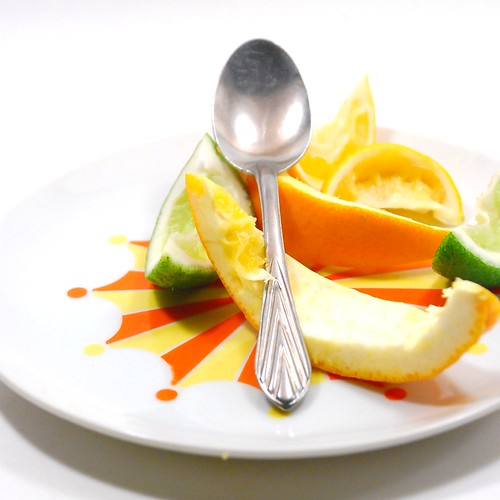
But what makes it especially relevant to this time of year is that diet thing. Instead of feeding guests brownies and cookies,* it’s fruit, and tasty enough sneak a few vitamins into someone’s day. Even after the effects have worn off, the lemons and limes can be used for drink garnish, and don’t be surprised if you see a cohort unpeeling an orange or snacking on carrots later in the night.
*(Okay, you can still make your famous brownies, I understand)

Magic pill.

We had a flavor tripping component to our Halloween party a couple years back, and it went over very well. Everyone agreed that grapefruit are simply HEAVENLY on the stuff, and we sampled various sour beers and all but emptied my condiment shelves. I managed to convince 30 or 40 people to take the pill all at once, waited until it was in everyone’s mouth and announced “Haha, that was acid. Enjoy the light show, ladies and gentlemen!” I would not recommend making this joke around family or children, lest you instantly earn the scarlet letter of drug-addled hippy on the fast-track to self-destruction.

Here is pretty much the only relevant shot I have from that totally righteous party. Featuring myself as Lydia the Tattooed Lady, and Sarita as one hot secret service type.

Tasty lemons

On a completely unrelated side note, even a year out, and I’m still really proud of that costume, even if my entire torso was sticky for the first two weeks of November.

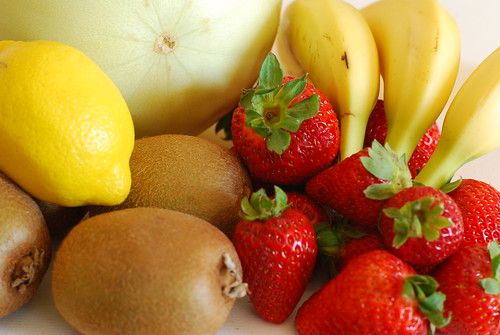
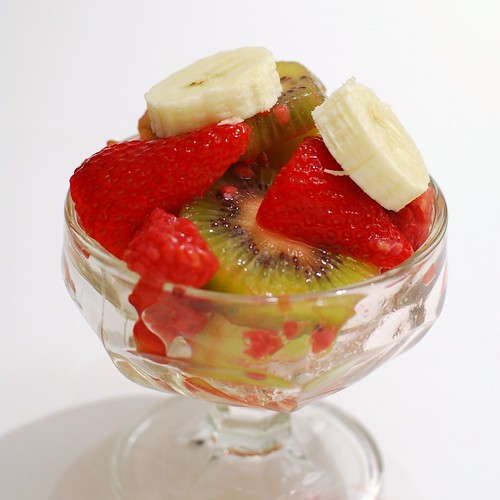
Moving right along, below is a list of items that we found especially interesting under the exotic hypnosis of the Miracle Fruit:

  • Lemons, naturally
  • Limes, and though I usually like sour foods anyway, this is the only time I have ever enjoyed a lime
  • Grapefruit, which tastes like a delicate blend of manna and angel’s breath, with notes of the flutter of a dove’s wings
  • Carrots, sweeter than you think!
  • Tabasco, and be careful not to eat too much because it is very delicious
  • Vinegar, which is a real trip
  • Guiness
  • Sour Beers

There were many other beers being a-sampled, but I only managed to try a couple. Make sure that everyone knows to coat their tongue as the tablet dissolves on it. I let it dissolve in the middle to tip of my tongue, which meant the lemons tasted wonderful until the juice made it down on the sides of my tongue and gave me a rude awakening.

Another warning: be careful if you’re prone to heartburn. While your mouth will be flooded with sweetness, you’re still swallowing a whole lotta citric acid (or vinegar, or spicy foods), so BEWARE.

It worked.

Do tell: have you tried the stuff, or are you of the “oh, I always wanted to try that” camp? What delights did you find in your cupboards?

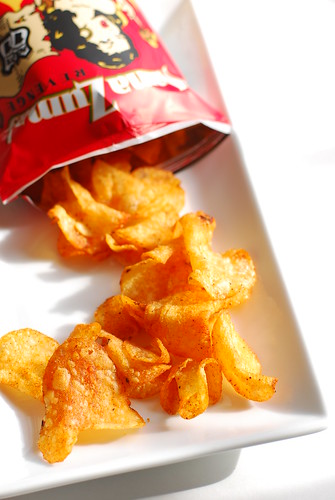
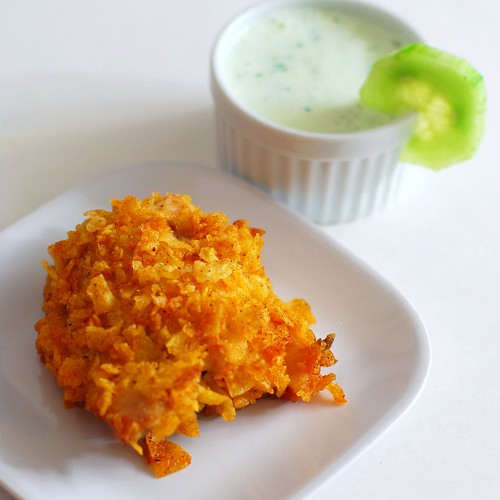
shameless plug: the dishes pictured are for sale on my Etsy site: Aleta’s Kitschen.

ENLIGHTENING FEEDBACK


Kalie, who I’m assuming is Mormon, answered a pivotal question I posed:
Mormons love it! We just can’t do the whole sour beers and Guiness thing!

Amazing idea last week: lemon meringue cupcakes. I could make a lemony cake part, then bake a meringue right on top! No need to frost, super easy recipe! I mean look at these. Ladies, how cute would it be to show up at the next get-together with a cheerful tray of these? And guys, how funny would it be to challenge societal gender roles with this kind of delicious underlining your defiance?

Lemon meringue cupcakes.

And to boot, these are 165 calories apiece. Not health food, but far lighter than one would expect from such a tall cupcake.

While the above does appear to be what I described, it is not. No, this recipe has undergone about ten revisions, and unfortunately, that is not fantastic hyperbole. I don’t have pictures of the process, but it boils down to the fact that the pH of the batter is important, and turns out meringue will not hold its shape if baked upon a proper cupcake. And if you bake lemon curd atop a cupcake, the whole thing will taste weirdly sulfuric for some reason. So the final recipe is more involved than I wanted it to be, but the cuteness factor paired with the actual deliciousness is well worth the effort, which in itself is effectively the same as making cupcakes and frosting from scratch, except two frostings. Which is admittedly not the same thing at all.

There are a few “specialty” tools required for this recipe. Nothing too specialized—you should be able to find in your grocery store—but I generally avoid these things because in the past I always tried to work around them: a hand mixer, parchment paper, cake flour, food scale. The mixer is really just for the meringue, the parchment paper for baking the meringue, the scale for measuring the cake flour, and the cake flour because All-Purpose Flour is a misnomer, as it is not good for cakes. I think this recipe is lenient enough to allow you to substitute all purpose flour for cake, but can’t be held accountable for the resulting texture. In the worst case your texture is off, but you will still end up with something yummy if not presentable.

Start with the curd so it has time to chill while all that other stuff is going on. Have you ever had this stuff? I saw it all over left-coast food blogs back when Meyer lemons were in season, but since citrus is um, never in season in Massachusetts, I hadn’t really any good occasion to create a curd until now. And it’s a surprisingly quick (5 minute) ordeal with HUGE payoffs. I could spoon this into my mouth all day, and I hear people put it on toast and things like that. I don’t need to remind you that I put it on cupcakes. By itself, it’s a delightful frosting too!

Curd food.

This isn’t a bad time to go over how to zest a lemon. The white rind is bitter, while the nice sunny yellow part is what offers the bright lemony flavour, so grating away at the skin until you hit the poor lemon’s pulp is exactly NOT the way to do it. My strategy is to shoot for exactly one pass over each bit of the lemon’s surface exactly once. Remember, this is not a sheep-shearing contest, so there’s no need to get every little bit of yellow off the lemon. Just zip your micrograter or zester right along and don’t spend too much time on it.

How to zest a lemon.

Also, isn’t that lemon HUGE? My god, it’s like Monsanto’s answer to the lumpy F-cup boob job.

Speaking of lemons, for both the curd and the batter, I recommend straining your fresh lemon juice. I find that when I leave lemon seeds in my desserts, people never seem to go back for seconds.

It's a strain.

The batter has this subtle speckle of lemon rind yellow. Gorgeous.

Future cupcakes of america.

While that’s in the oven, we make our way to the third part: meringue. This is what it should look (roughly) like right before you start adding the sugar.

Meringue. Luscious.

Now we need a way for the meringues will fit the cupcakes. I use the liners as a guide and trace out circles on the BACK of the parchment paper upon which I shall bake the meringues.

Circles

Then I spoon the meringue onto each dot and smooth it out to the circumference of the paper circle, then around in a spiral to make that nice swirly peak. To do so, I washed my hands very thoroughly, then used something kicking around to smooth and swirl. I can’t remember what right now, but it definitely wasn’t my finger if that’s what your thinking. I mean, if I DID use my finger, I did wash my hands very thoroughly, but I wouldn’t use my finger because that would be very uncouth.

Swirly peaks.

And now that everything’s all squared away and set, let’s assemble!

Putting it together.

I cannot get over how successfully adorable these are.

Lemon meringue cupcakes.

And luscious too.

Lemon meringue cupcakes.

Lemon Meringue Cupcakes
an original recipe, in three acts


Prologue
Heat oven to 350o


Act One: Lemon Curd
2 eggs
1 lemon: zest of & juice of (about 2 tsp & 3 tbsp, respectively)
2 tbsp sugar
1/4 c butter (4 tbsp), chopped

Whisk eggs, lemon zest & juice and sugar in a small saucepan, no heat. Add the butter bits, then bring to a boil over medium heat, whisking all the while. After three minutes or so, you’ll begin to see the bottom of the pan here and there as you whisk, and the mixture will almost instantly thicken. Remove from heat and chill in fridge until needed.


Act Two: Cupcakes
2 egg yolks

1/4 c sugar
1/4 c butter (room-temp is best)
1 lemon: zest of

1/2 c sifted cake flour, or 64g if you’re able to weigh (best method). Feel free to try all-purpose and let me know how it goes!
1/2 tsp baking soda

1/2 tsp vanilla
1 lemon: juice of

Beat egg yolks. Add sugar, butter and zest, and mix until creamed. Sift flour and baking soda, then mix until combined. Lastly, add 1/2 tsp vanilla and strain 1 lemon’s worth of juice, then stir to combine. Nimbly scoop batter into 12 cupcake liners (quicker is better). Bake for 15 minutes.


Act Three: Meringue

Beat on high until stiff peaks form (about 3-4 minutes):
2 egg whites
1/2 tsp cream of tartar
1/4 tsp vanilla
pinch cornstarch

Add in a continuous stream, beating on high all the while:
1/2 c sugar

On a piece of parchment, use a cupcake liner as a stencil to draw 12 circles. Flip liner so the drawing is face down (in contact with the cookie sheet), then spoon 1/12 of the meringue into each area.

Wash your hands thoroughly. Use the circles as a guide for what the meringues should be sized, then using a finger, swipe around the glob of meringue to give it a shape. You’ll have to play around with this, as it will be slightly different for everyone, but what works for me is to pat down the meringue to roughly the intended size, then swipe around with a damp finger to make it as circular as possible. Then I spiral inward, and once at the center, lift finger to create a peak.

Bake at 350o for 15 minutes. Do not open the oven while baking, unless you smell something burning or something. Remove from oven to wire rack, let cool 1 minute, then with a metal spatula, pop each meringue from the parchment so it does not stick there while it cools completely (which you must do before moving onto the next step).


Assembly

Spread about a tablespoon of lemon curd upon each cupcake, then top with a meringue. Ta da! Lemon Meringue Cupcake! Store in an airtight container, and for extra crisp meringues, don’t top cupcakes until ready to serve.

The end!


nutrition summary: (for 1 of 12 cupcakes) 165 calories, 9g fat, 0g fiber; about 3 weight watchers points

I am pleased to announce Omnomicon’s very first giveaway! And not bad for a first, if I say so myself.

It all started with a dear reader, noinamg, sending me the following email.

i would like to pose you a challenge if i may

i would like something to do with my Route 11 Mama Zuma’s Habanero (the red bag ones)
they are so spicy that even one chip is like hell in your mouth. since i cannot actually eat these, do you have a suggestion for a dish to use them in somehow?

Well, man, I do believe I can oblige, courtesy of the fine folks at Route 11.

Mama Zuma's Revenge.

This chick is badass. Wickedly badass. Also, a total babe.

Mama zuma herself.

I guess the word they’re going for here is really “hot,” and though hot chicks rarely have anything to do with habaneros, they certainly can’t hurt sales, right? These are like really good bbq chips, except particularly tongue-burning. They’re almost diet friendly in that you have to take a little bit of break between chips.

Mama zuma's.

Really hot potato chips with an actual flavour to boot. It’s a good thing.

So here’s the giveaway: I will be sending out two bags of Mama Zuma’s Habanero Chips to two randomly-chosen readers. Would you like to win some? Leave a comment before 6pm EST Friday, March 6th describing what you would do with your Mama Zuma’s. (American readers only–apologies to my foreign friends, but I’m sending these out on my own dollar and funds are low).

Will you be enjoying them crunched into your tuna fish sammich? I can’t be the only one who does that. Perhaps slipping some to your Indian friend who keeps bragging about how white people don’t know what truly spicy food is. Or maybe even giving my recipe below a polite little shot. At the very least, it has a topical and interesting title.

Noinmang, you’re on. We’re making Mama Zuma’s Red Hot Gams.

First de-skin, de-fat, rinse and pat dry some chicken thighs to give yourself a nice fresh non-slimy surface. As I happen to be in possession of a veritable plethora of kitchen towels, I reserve one specifically for these kinds of things.

The gams.

Next we’re going to flour, butter, then chippy the thighs and in that order. It helps conserve resources by using bowls that just barely fit a single thigh, particularly the chips. I found that one 2 oz bag of Mama Zuma’s crumbled up to *just* enough for four thighs.

Floured thighs.

Next is a dunk in butter to make the chips stick, and then the crumbled chips.

Chippy!

Now we bake for a bit. In the meantime, let’s prepare a little something in case the chicken’s still too much. It’s a pretty simple yogurt/cucumber/parsley concoction that might also work well as a lighter alternative to blue cheese dressing for your buffalo wings. Essentially, the only prep here is in a food processor.

Parsley, cucumber.

And ohhhhh man. What a meal this made.

Mama zuma's red hot gams.

Mama Zuma’s Red Hot Gams

4 chicken thighs (bone in our out, your choice)
2 oz Mama Zuma’s Revenge Habanero Potato Chips (one bag) [in a real pinch you can use your favourite brand of hot potato chips, or even plain ones if you’re not into the spicy thing]
3 tbsp butter, melted (no worries, you won’t be using all of it)
1/4 c flour

Preheat oven to 375o.

Remove the skin and trim the fat from the chicken thighs, unless they came skinned and boneless. Now rinse the thighs and pat dry.

Crumble the Mama Zuma’s in the bag until a rough but not fine consistency.

For “breading” the chicken, using the smallest bowls you have that will fit the thighs is the best way to economize your ingredients. First flour the chicken on both sides, dip quickly in butter and let drip dry a few moments before grinding the chicken into the chip crumbles. Really grind it in there, and on both sides; you want the chips to be all pokey into the surface, as they’ll stay better that way.

Place chicken on a cookie sheet and pat in any remaining chip crumbs, since they’re already contaminated and preciously delicious.

Bake for 35-40 minutes, or until the meat reaches an internal temperature of 165. Serve with . . .

Aleta’s Mama Zuma Antidote: Cucumber Chill-Out Sauce

1/2 c yogurt
about 2 tbsp loosely packed parsley leaves
1″ of cucumber, peeled and chopped
1 tsp lemon juice
pinch of salt

Put all that stuff up there into a food processor and process for a minute or so, until the cucumber is ground. Add an extra 1″ of cucumber, dice, to the finished sauce, if desired.

Don’t forget to leave your comment if’n you’d like to give Mama Zuma’s a try! Contest closes Friday at 6pm EST.

As much as I’ve tried to start eating more in season this year, there are always exceptions to the rule. Perhaps it was the density of the pierogi lasagna sitting in my tummy three days later, but something, at any rate, made me crave a light treat with no guilt involved.

Naturally, fruit salad was the answer. Of course, fruit salad is just whatever fruit you want in there, but I have special preferences. For one thing, I hate cantaloupe, it’s filler and that’s a fact. On the other hand, honeydew melon is pretty yummy and serves the same purpose. Citrus fruits don’t fare well, blueberries are too small (and expensive 90% of the year), grapes dominate your palate when they explode in your mouth, and apples are too crunchy.

So what fruits are appropriate? I’M GLAD YOU ASKED, HERE LET ME SHOW YOU.

Before.

Since the honeydew is filler, we’ll start there. I totally love using an ice cream scoop on these, it’s so satisfying somehow.

Ice cream scoop.

Now slice up some kiwis. They have a totally cool aesthetic.

Kiwis!

Now pair your green fruits.

The greens.

And for the special ingredient? I throw some frozen raspberries in there. They’re awesome because when they melt they coat the honeydew in a tart envelope of juicy deliciousness, and they go a lot further than fresh raspberries, which fall apart anyway. Since I’m already making this out-of-season, I have no regrets doing this.

Frozen raspberries.

Strawberries are also show-stoppingly beautiful. *Rowr*

Sliced strawberries.

You may have been wondering what the lemon was doing kicking around up there in the first shot. All like “Oh hey guys, having a salad? Mind if I crash it? Yeah, I’ll just be right here if you wanna talk or something. Cool.” In addition to preventing that brown crud on apples from forming (hello oxidation!) it also keeps your salad a little bit longer, and since we’re going for something tart anyway, it certainly can’t hurt. But even if you opt for a sweeter blend of things, you won’t notice the juice in there, promise.

Layers.

Isn’t that so pretty? Now fuck it all up with a good sound stir. I like to give the fruit some time to chill in the fridge to allow the raspberries to do their thing and the other fruit to do a little mingling (yes, you too, lemon). This has the unfortunate side effect of making my final shot way uglier than any of the previous. So save your inferior fruit salads for company, this is the one you can go home to, like an ugly wife.

As for the bananas, don’t mix them in with the other fruits. Just, don’t. They get gross and mushy and don’t store the same way as the other fruits. But right before you dig in, throw a few slices on there. It brings the whole thing together.

After.

Tart Fruit Salad now with raspberries!

1 honeydew melon
4 large kiwi fruit
about 6 oz frozen raspberries
1 lb strawberries
juice of one lemon (2-3 tbsp)
4 bananas

Slice all fruit but the bananas, toss them in a large bowl with the frozen raspberries and lemon juice. Chill 1 hour. Before serving, give it another stir and add sliced bananas to the top.

Eat with the confidence you gain from knowing it won’t go to your hips.

As a wee lass, my mother would, from time to time, break out the box of lemon poppy seed muffin mix and proceed to make muffins on a Saturday morning. I never really understood *why* this was a big deal, other than it had these weird black things in them. At the same time, I ate these with some relish and with two visitors arriving Saturday afternoon (including Dano’s banjo teacher), I got the bug to make some muffins. These popped into my head, though I wouldn’t be doing it with a mix.

I got the recipe from eat me, delicious, and it’s her take on Dorie Greenspan’s recipe. I agree with her preference for sour cream (density) and personally, I like butter in muffins instead of oil–the latter seem to end up soggy.

Armed with a lemon, some poppy seeds and fat free sour cream from Stop & Shop, I set out to create heavenly lemony delight. This is a really beautiful recipe, start to finish.

Zesty!

Fun step #1: blending the zest with the sugar with little pinches.

Finger the zest into the sugar.

Add some flour and leaven (this isn’t the pretty part yet, we’re getting there).

Flour and zest.

Wet stuff (shout out to fat free sour cream: Lookin good lady!).

Wet stuff.

Oh man, by now I’m impatient for the licking of the bowl ritual.

Mmmmm.

Enter poppy.

Enter seeds.

I bet you’re totally into this by now. I told you, heavenly! Like, when I think of heaven, this is what the clouds we’re all walking on look like.

Oh batter! I can't wait to lick you off the spoon!

Now I’ve always wondered what’s truly better: buttered muffin pan or muffin cups? I like the muffin cups at this stage . . .

Paper.

. . . but the boys and I agreed that for eating, for eating specifically these muffins? They need to be au natural.

Butter.

eat me, delicious’s adaptation of Dori Greenspans’s Lemon Poppy Seed Muffins