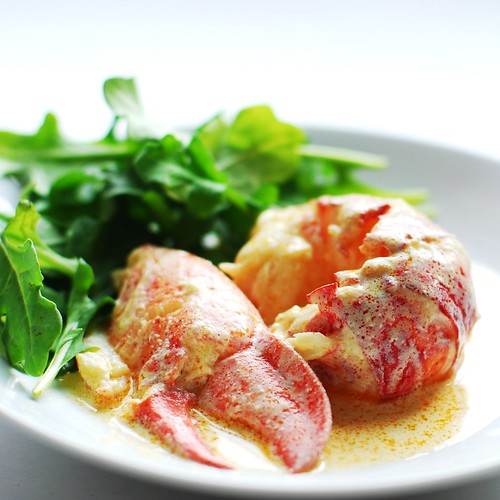
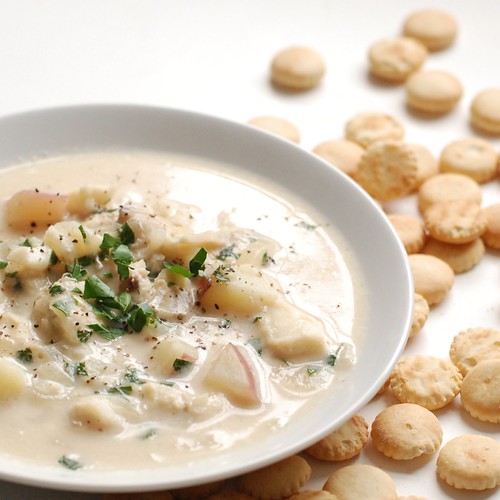
online poker

Omnomicon

say it with me now, “om nom nom”

fish chowder: a milky dish made with fish!

This weekend exemplified the yang and yin of Spring around here. Saturday was a gorgeous, sunny, “drive with the window open and wear flip-flops” kinda day; on Sunday a fog rolled on the pond all day, heavy and thick even at mid-day. Both days were beautiful in their own way, and even though I know we’ll get snow one last time, I sighed with delighted relief every one of those 48 hours.

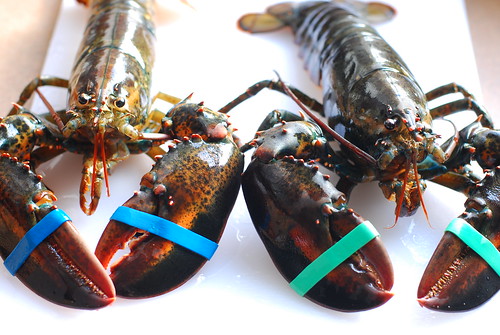
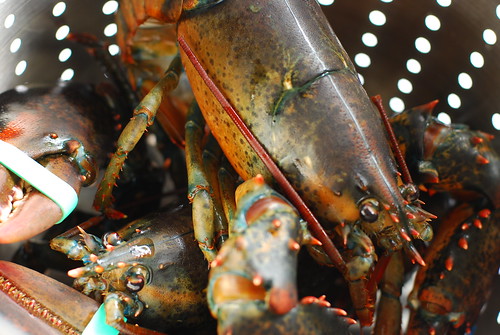
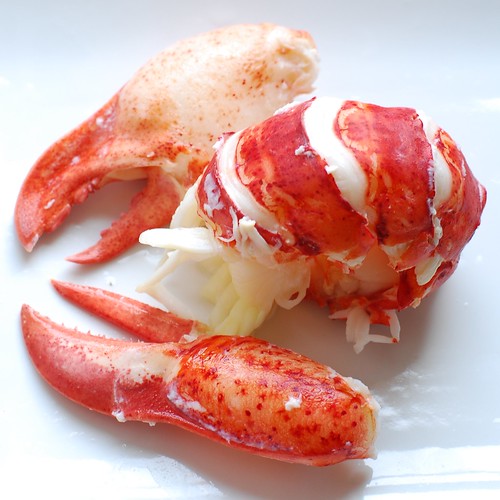
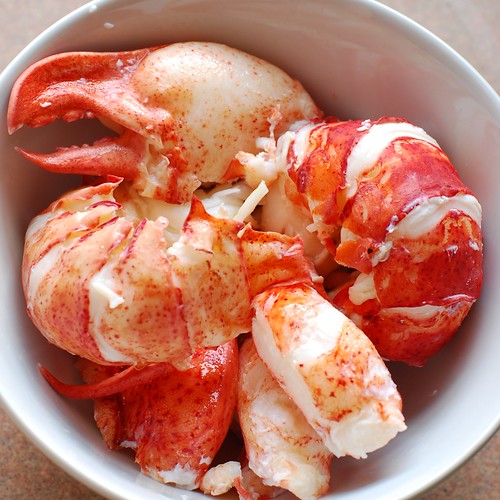
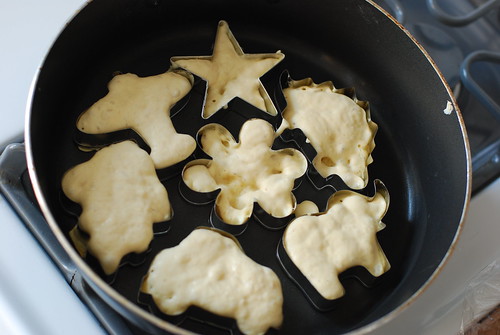
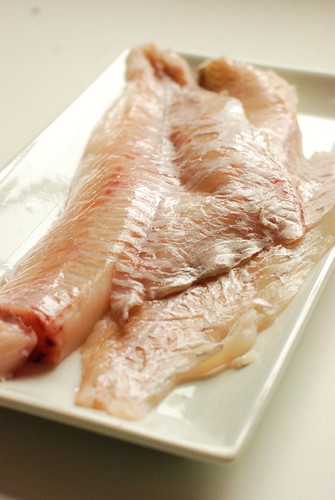
And how convenient is it that Sunday was the perfect day for fish chowder? I used Haddock because it’s cheap, standard, and what 18th-century fisherman’s wife would put in her chowder, but any white fish (or combination of fancy fishes) would work. Salmon would work marvelously, yum!

Haddock.

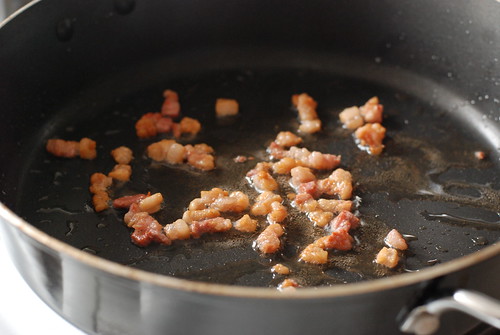
I used salt pork, but please, don’t worry about the gross unhealthiness of this because there’s not much to begin with and it’s spread among 8 servings. Really. It’s mostly for flavour. Bacon would work just as well.

Salt pork.

The bulk of fish chowder is vegetables, assuming you count potatoes, which I only sometimes do. Also, the only other vegetable is onion.

Fish chowder.

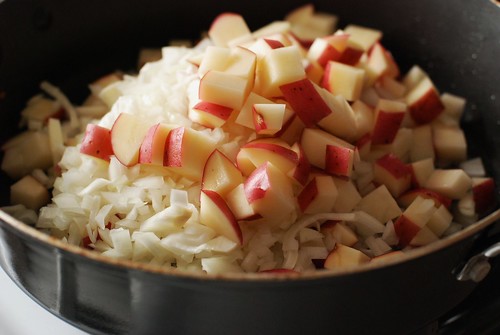
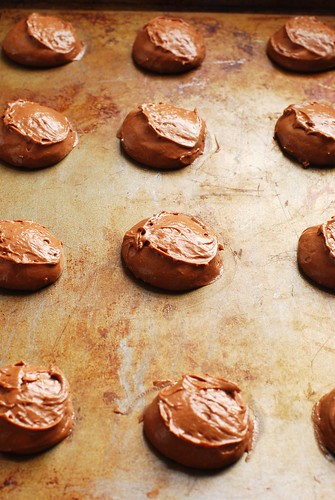
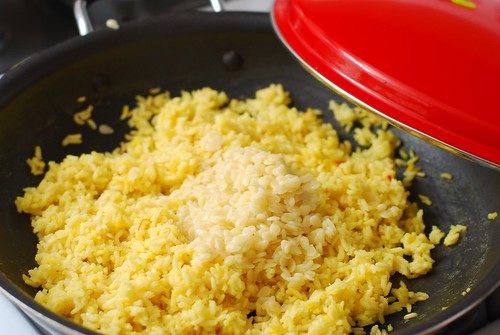
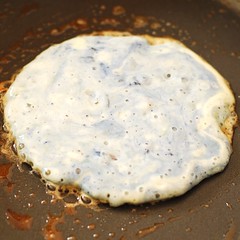
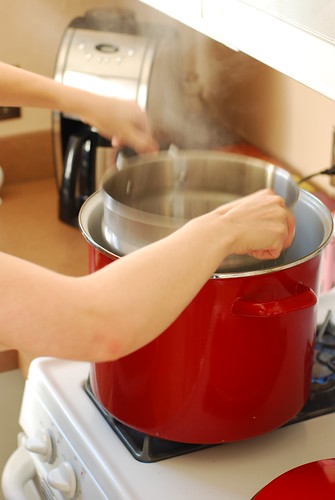
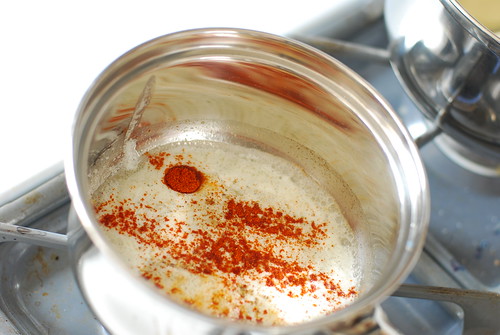
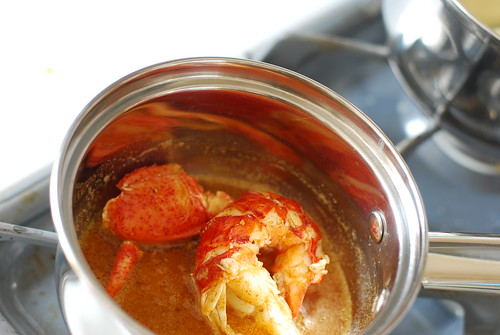
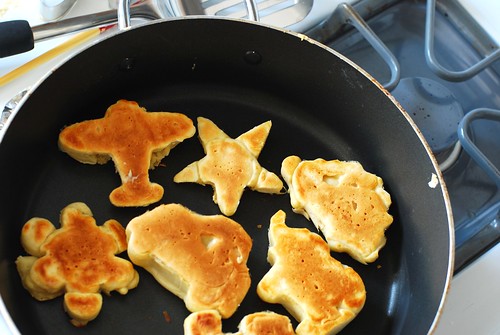
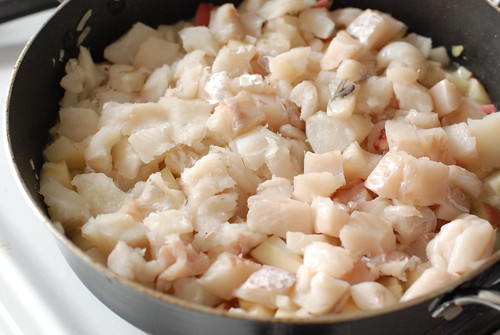
What’s going on here (and you can’t really see, sorry bout that) is that we made a fish broth with some of the fish, poured that into the pan with the veggies, then steamed the fish chunks atop the potatoes and onions, which are submerged in fish broth. It’s a neat way to steam fish and cook potato at the same time.

Steaming the fish!

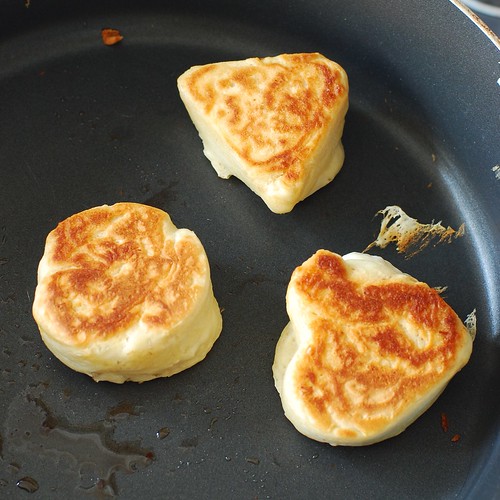
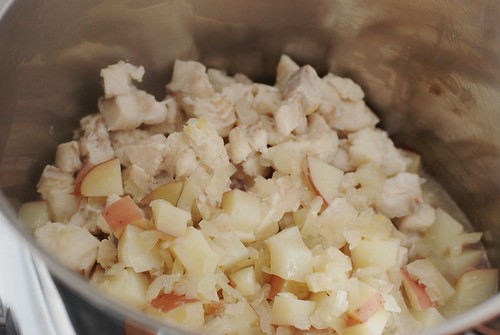
Eventually we need to move the chunky stuff to a pot, though if your skillet can handle the milk on top of this stuff, you can save yourself a pot by keep your chowder in there too.

Edible, but not done.

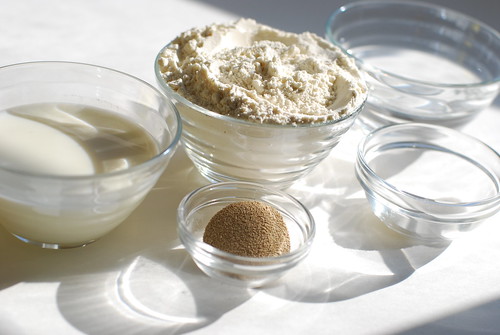
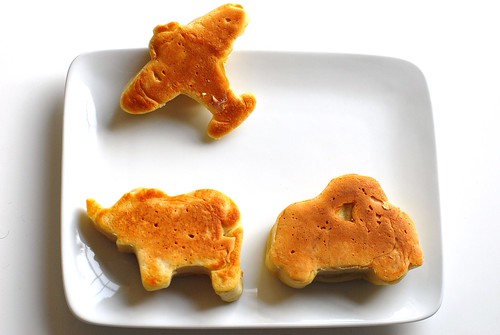
Fish is so low cal that it’s kind of a shame to serve it in a creamy soup, which defeats the purpose, right? But instead of loading up on cream, which is admittedly delicious in a chowder, I used a combination of low fat condensed and regular milk. The result is something creamier than using milk without adding any fat (which accounts for the bulk of calories in cream). I’m assuming it’s because there are more milk solids into the same amount of liquid, but my knowledge of food chemistry is slim, so I’m basing this on logic alone.

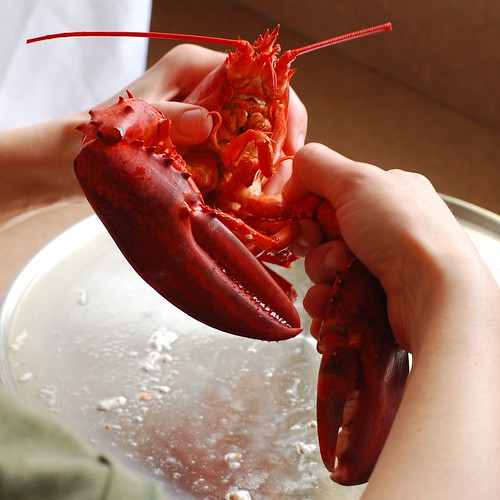
But in the end who cares? It’s a hearty and comforting way to watch the fog rolling around on the water.

Fish chowder.


New England Fish Chowder
adapted from a recipe by Margaret Woodworth D’Arcy of The National Society of The Colonial Dames of America in the State of New Hampshire . . . I’m not even kidding, I found this in the Society’s 1968 Cook Book

1.5 oz salt pork, diced
1 lb potatoes (about 2 medium), chopped into 1/2″ cubes
1 yellow onion, finely diced
1.5 lb haddock, about 2 fish or 4 fillets, cut into 1″ chunks
2 c water
1.5 c milk
12 oz evaporated milk
2 tsp salt
1 tsp pepper
2 tbsp butter
3 tbsp finely diced parsley, optional but quite effective

Place 1/2 lb fish (about 1 fillet) in a pot with 2 c cold water. Bring to boil and boil 10 minutes.

Once that gets going, fry up the salt pork over medium heat to extract all the fatness. Once the bits are crispy and brown, remove them and replace with diced potato and onion. Cook 5 minutes over medium-high, stirring frequently. By now the fish broth is done, so add it (and the fish if you like) to the potato and onion, then spread the cubed fish atop the veggies. Allow to steam (i.e. don’t stir) for 10 minutes, continuing on medium-high.

At this point, if you think your pan can’t comfortably handle an additional 3 cups of liquid, transfer the fish & veggies to a bigger pot. Add milk, condensed milk, salt & pepper. Bring to *almost* a boil (don’t let it bubble up big!) then reduce to medium-low, cover, and simmer about an hour.

Immediately before serving, stir in the butter, then ladle into bowls and garnish with parsley and additional pepper. The official word is that chowder is better the next day. I, however, suspect that old wives tale was created by a Mom Conspiracy way of getting us to look forward to leftovers.


nutrition summary (using 1% milk, fat free evaporated milk): 245 calories, 7g fat, 1g fiber; 5 weight watchers points

Heya recipe holders! Just a status update Blueberry Muffin Recipe Round Robin (details, prize, etc. at that link if the Round-Robin thing doesn’t ring any bells for you).

So far we have 23 25 enthusiastic tastetesters, not counting roommates, girlfriends and other pals who are generously donating their tastebuds! But I’m sad to tell you that it would appear SOME people are hoarding their family secrets and not sharing the baked blueberry love. We do have recipes from some bakers (y’all are the best!), but I’d love to make it more interesting with a few more. Listen guys, and I mean that in a very gender-neutral way, there is a PRIZE for the best recipe. Who could say no to a prize?! I don’t say no to prizes, and neither should you. See, I set good examples.

With this in mind, I’m extending the due date for recipes through tomorrow Saturday March 28th 2009 at 2pm EST. Taste testers will start receiving their assignments immediately after the window closes, but no later than 6 or 7 pm.

Thanks for rolling with the punches, Taste-buds! Yes, I just coined that term there, it means “my taste-testing friends”—write it down, it’ll be used again.

Tags:

Now I’m going to tell you: my mother’s whoopie pie recipe is SO GOOD that I will often tell people that I don’t like whoopie pies at all, because I have yet to find another recipe that I actually like. Other people’s whoopie pies are too cakey, or too cookie-like, or (as is usually the case) the filling is pure frosting, which is WAY too sweet and totally the wrong texture altogether. My mom’s whoopie pies were famous in our circles, and she generously provided them whenever demanded, particularly when visiting my Uncle and Aunt in Maine for Thanksgiving and Christmas. I ate more whoopie pies in my childhood than cupcakes, brownies or cookies combined; they were a true and strong family tradition.

Antonia, a faithful reader, pointed to a NYTimes article about the Whoopie Pie and well hey, I’m not usually up to snuff on anything topical, and since I have an authentic family recipe on hand, I am suddenly compelled to showcase my (rather specialized) expertise!

A proper whoopie pie is not merely some cloying abomination of sugar and fat. No no, it is delicate in its way, the sweetness ever-present and yet subdued. Please do not compare them to a Devil Dog or Moon Pie. Please do not make them with cake mix and tub frosting. A whoopie pie is a very specific delicacy and there are rules.

The proper texture.

A proper whoopie pie “cookie” is a medium-brown shade, fairly dry (not all oily and moist like a Little Debbie’s snack), but still somewhat densely cakelike, maybe a vein or two where the scoop let go of the batter. They crack ever so slightly, but sometimes they don’t and maybe that has something to do with the barometric pressure. I dunno, they still taste right and seem to have the right texture, so aesthetics aside, it’s fine either way.

Okay, so maybe the filling is an abomination of fat and sugar.

The proper whoopie pie filling is made with Crisco (which, apparently, no longer contains trans fats), butter, whole milk, sugar, a tiny smidge of flour and a regular portion of vanilla. Did you notice that it has no Fluff in it? That’s because Fluff is for fluffernutters, not whoopie pies. You will also notice that the filling is not a frosting, but a creme. While eating, one will lose all the filling out the sides and must open the pie, collect up the creme that has splooshed out back onto the bottom piece, then recreate the sandwich, only to do it all again in the next bite or two. This is the proper way to eat a whoopie pie.

This process presented many lovely photo ops. Let’s take a look!

Where the chocolate comes in.

This one reminds me of a dusty construction site.

Cocoa construction site.

Ungreased cookie sheet...

The cookies can be removed from the cookie sheet almost immediately, but you really need to use a metal spatula and carefully scrap them off. I like the texture underneath, it gets a little crispy as it cools and it is so so satisfying to snack on the odd unmatched whoopie pie cookie before they’re frosted.

The underside.

The creme takes a convenient 10 minutes to make, which you can most likely complete between the time the first batch of cookies goes into and comes out of the oven. I’ve found it nearly impossible to make the creme without an electric mixer (stand or hand, your choice), and sometimes it takes longer than others. For the first several minutes of mixing, your creme will look like this: kinda gross.

Porridge?

And then you’ll hear a cherub giggle, and an angel wing will brush against your shoulder as suddenly the creme whips up into this glorious appearance. The texture is extremely creamy, but still looks like this.

As if by magic.

After a little assembly . . .
Mom's perfect whoopie pies.

Since I started making my own food, I’ve lived on these for days at a time. Not particularly healthy nor affluent days, but certainly enjoyable ones.

Well of COURSE I ate some as I went along.


Mom’s Famous Whoopie Pies
makes about 14 after batter & cookie sampling
brought to you by very fortunate family ties.

Blend Add
1/4 c Crisco 2 c flour
1 c milk 1/4 c + 1 tbsp cocoa
1 c sugar 1.5 tsp baking soda
1 egg 1 tsp salt
1 tsp vanilla  

Drop by the small tablespoonful onto an ungreased cookie sheet—a tablespoon-sized bakery scoop works best. Bake exactly 8 minutes at 375o, see if a toothpick comes out clean, and if it doesn’t, bake another 2 minutes (10 total). Upon extraction from the oven, remove from pan immediately to wire rack to cool.


And now the creme filling (reminder: it’s not frosting, guys)

1/2 c margarine or butter (room temp is best)
1/2 c Crisco (my mother is insistent that this MUST be Crisco and CANNOT be generic shortening, nor substituted in any way . . . but if you do get it to work with a substitution, please let me know!)
1 c sugar
1 tbsp  flour
1 tsp vanilla
1/2 c warm whole milk (20 seconds in the microwave should do it)

Beat with a mixer (stand or hand, your choice) for-freakin-ever. It will start out just like, well, lumps of Crisco floating in milk, then bits will get smaller and smaller, then it’ll slosh around for a little bit, and, much like the butter making process, you’ll be wondering if this will ever become anything or if you maybe messed it up somehow. Suddenly, about five minutes later, your mix will look weird for a second, and within moments your slushy mess will turn into a glorious white creme, smooth and perfect in a way rarely seen outside the confines of uber-processed food with chemicals you can’t pronounce that are not even available to the consumer in their pure form.


Assembly

As soon as the whoopie cookies are cool, match each whoopie with its closest brother in size—even if yours didn’t all come out the same size, evenly matched whoopies will look much much nicer. Spread some filling on the flat side of one, then place the second on top. Repeat. This does not need to be done immediately before serving, as the filling tends to maintain its consistency surprisingly well, and some (like my mom) would argue that a day-old whoopie pie is even better than fresh. I like them all.

No need to refrigerate, sealed plastic or plastic wrap will keep them fresh.

. . . and that’s it. Congratulations! You just made the best whoopie pies known to man.


Not like it’s diet food or anything, but these are not quite as totally terrible as I thought they’d be!
Nutrition Summary (for 1 whoopie pie of yield 15): 330 calories, 17g fat, 1g fiber; 8 Weight Watchers Points

This morning I had the most amazing idea ever. Ever. One that excites me SO MUCH that I’ve been squirming in my seat all day and can’t even wait a whole day to post it. I call it THE RECIPE ROUND-ROBIN.

Here’s how it works: I pick a foodstuff, in this case blueberry muffins. You say to yourself, “Lady, everyone knows that *I* have the best blueberry muffin recipe!” Meanwhile I already know that *I* have the best blueberry muffin recipe. Neither of us is going to bother with a new recipe because we already know ours are the bestest. But how would we ever know whose is truly the best?

The answer is we ask everyone we can to test two recipes (half batch each) and just answer which one they like best! I’ll employ my fancy statistics skills to determine which recipe wins the most. Depending on my recall of Partially Balanced Incomplete Block Designs and their analyses, which may not be very much, I might do a legit analysis or perhaps just take a basic “add ’em up” approach. (Mathy types with more recent DOE knowledge, if you’re out there, please contribute your perspective on a proper analysis, kthx).

If you want to put your recipe in the running:
Please email your blueberry muffin recipe to aleta at omnomicon dot com with RRR in the subject line by Friday March 27, 2009 at 6pm EST. Original-ish recipes only—the recipe your grandmother found on a bag of flour 50 years ago is okay, but a recipe featured by a fellow food blogger is a big No-no. No comments with recipes in them, please, we want to keep this nice and anonymous. You will automatically be entered as a taste-tester (hey, only fair), and will receive two recipes to try that are not yours.

If you just want to taste test:
Please leave a comment by Friday March 27th 2009 at 6PM EST saying so any old time, as long as you have some time to bake ’em by Sunday! We need more taste testers than recipes, so even if you have never made blueberry muffins and don’t have your own recipe, we still need you!

Each taste tester and each recipe contributor will be assigned two half-batch recipes to try by Friday at midnight EST and will have until Sunday April 5, 2009 at 5pm to give a thumbs up to one or the other.

And now you’re wondering if there’s a prize, right? Aside from the fame and a link on Omnomicon, I can’t think of anything more appropriate than America’s Test Kitchen Family Baking Book so you can compare your recipe and technique to theirs! Yeah!

For the record: ATK doesn’t even know I exist, and I’m buying this out-of-pocket because I’m personally so very enthusiastic about this project and it’s just the perfect prize. I have ATK’s The New Best Recipe and have been devouring it before bed as though it were a novel. So even though I haven’t perused it, I can’t imagine their Baking Book would be any different.

Okay, Omnometrists, have at it! This experiment will be only as successful as we have participants, and please tell your friends too! Squeee!!!

Tags:

I just checked to make sure, and my posting schedule does not promise anything impressive on Sunday nights (*phew!*). It has been awfully busy in Casa Meadowlark in the last few days, and not much time to photograph all the very pretty foods created within . . . I cannot think of anything more rude than whipping out a camera at your own dinner party and taking pictures of everything. Even with extremely understanding and close friends present, it’s a big nono.

So even though all kinds of lovely foods abounded, all I really shot of Saturday night’s festivities was a bean dip I made on the fly. I had made Recipe Girl’s Chickpea and Spinach Salad with Cumin Dressing as a side, and for an appetizer-like veggie platter had in mind Creamy White Bean Dip from Bon Appétit (via Epicurious), but if you look you’ll notice that they share the majority of the same ingredients: lemon juice, lemon zest, olive oil, garlic, cumin, mint . . . all nice and thematic and essentially hummus, but these two dishes would have been a little too matchy-matchy.

Not to be put out, and still needing a fresh Spring-like veggie dip, I improvised.

Cannellini red pepper dip.

And it went over well.


Red and White Veggie Dip
comfortably serves 6 as an appetizer

1 can of cannellini beans
1/2 to 1 whole roasted red pepper (I had some jarred ones on hand, but you can roast your own if so inclined)
2 small cloves garlic, minced
2 tbsp sesame oil
1 tbsp lemon juice
1 tsp curry
1/2 tsp salt
Sesame seeds to garnish (optional, naturally)

Using a food processor, blend. Garnish with sesame seeds. In addition or as an alternative, consider garnishing with finely diced fresh red pepper (as in not roasted) in addition or as an alternative to the sesame seeds. Serve as follows.

Partial serving suggestion.

Then suddenly remember that you have some baby carrots in the fridge that might still be good. Oh, and you bought those grape tomatoes too because remember how they were on sale?

Official serving suggestion.


nutrition summary (1 serving of 6): 115 calories, 5g fat, 4g fiber; 2 Weight Watchers Points

Hey guys, real quick: Omnomicon now has a Facebook page and is also twittering about on Twitter. I’m not quite sure why, but I thought being better socially-networked might be to the benefit of the site. Okay, back to our regularly scheduled recipes.

The first time I had Chicken Cordon Bleu, I was somewhere around 10 years old and my Memere had taken me out for my birthday. I probably ordered mozzarella sticks as an appetizer, because that was my thing, when extremely Quebecois-accented Memere recommended Chicken Bleu, I think mostly as an educational ploy to teach me more French. “O, da Chicken Cordon Bleu! Do you know what dat means? Blue Ribbon Chicken! Huh?! Huh?! Ha!”

Chicken Cordon Bleu doesn’t seem to have a whole lot in the way of history, but according to the nominal amount of research I did on the subject, what we call Chicken Bleu is wholly American and apparently started getting mentioned in newspapers as an airline food around 1960.

Whatever, it’s really frickin good.

Chicken Bleu is simple, cheap, easy and amazingly satisfying without sitting in your stomach like a lump of lead for the following several hours. After a year of being extremely food-conscious, I was surprised to find that I still absolutely love this dish. I wouldn’t call it subtly-flavoured, but it does taste far more sophisticated than the concept would sound.

The formula is simple: swiss, ham, chicken, treat it kind of like a turducken. Most recipes call for breast, but I thought the boneless skinless thigh meat would be a bit more flavourful and tender. You are, as always, free to use your discretion on the matter.

Ham. Swiss. Chicken.

I just used the cheap deli ham and Swiss because um, it works just fine and there’s no reason to spend a lot of money on fancy ham, if such a thing even exists. That said, I do prefer better deli supplies when I’m eating it cold.

Keep on rollin on.

I used toothpicks like safety pins to keep this thing together and “mend” any holes I made in the meat while I was pounding it out. But I have to point out that you really don’t want to use the coloured ones you see here because they will stain your meat, which in addition to being kind of a culinary faux pas is just grossly unappetizing.

Meat purse.

Next up: flour, egg wash, breadcrumbs.

Assembly line.

Twenty-five minutes is the *perfect* amount of time to bake this—the chicken is cooked but tender and the cheese is melty without being scorching. Also, because of the toothpicks, these come out looking like you fried alive something vicious.

Ovenfresh chicken bleu.

Was Memere right or what? Yum!
Chicken cordon bleu.

Chicken Cordon Bleu
4 servings

4 boneless skinless chicken thighs or 1/2 breasts (chicken breasts are HUGE these days!)
4 slices deli ham (or prosciutto or capicola)
4 slices deli Swiss cheese (or provolone or mozzarella)
1 egg
1/4 c water
1/2 c all purpose flour
1/2 c seasoned bread crumbs
Several plain toothpicks

If your chicken breast is a little thick, you’ll want to butterfly it and tenderize with a mallet. You can try to do the same if you’re going the chicken thigh route, but it’s not likely to help you very much, so you might as well save yourself the frustration.

Cut the Swiss cheese into eight rectangles and stack. Slice the ham in half lengthwise, stack both pieces, then roll around the stack of cheese. Now create a little “meat purse” out of your chicken around the ham and cheese, and tack it up with toothpicks. Remember, no colours here unless you want polka dot chickens! The chicken will be cooked leaky-side up so that the cheese has less of an opportunity of gushing out of your creation all over the pan.

Set up three bowls for breading the chicken. The first holds flour for dusting the chicken balls; the second will have a beaten egg and 1/4 c water whisked together for an egg wash. The last will have some seasoned bread crumbs. Dip the chickens in the flour, the egg wash, then the bread crumbs. Place, toothpick side up, on lightly greased cookie sheet.

Bake 25 minutes exactly in a 350o oven. Serve with rice pilaf.
 
 
Nutrition Summary: 260 calories, 0g fiber, 13.5g fat; 5.5 Weight Watchers Points


BONUS RECIPE


I thought this might be a good opportunity to try out making rice pilaf from scratch. I really like the stuff from the box, and it’s what most restaurants serve for rice pilaf too. Theirs tastes so much “better,” though, because they use twice the butter called for on the box, and while that sounds like complete conspiracy theory conjecture, I did learn it at the restaurant where I waitressed that one time, and have noticed it everywhere I’ve eaten pilaf since.

Turns out that making your own pilaf is pretty easy (it’s mostly just getting the ratio of rice to orzo correct), but way more time consuming and you can just add whatever seasonings you would put in your own version to the box stuff. I’ve included the recipe as a bonus for those interested.

Chicken cordon bleu.

Rice Pilaf

2.5 c water
1 c long grain rice (brown or white, your choice)
1 tbsp chicken base (from what I can tell this is pretty much the only flavouring in boxed pilaf)
1 tbsp butter
saffron (pictured, or whatever other spices you want in your pilaf)
1/4 c orzo

Bring the water to a boil in a deep pan. Doing it this way instead of in a pot makes your pilaf less likely to turn out mushy. Once boiling, add chicken base, butter and seasonings, and stir until fully dissolved. Add the rice, give a stir, then put a lid on the pan. Check the rice for doneness at 20 minutes, 30 minutes and 35 minutes, but it should take about 40-45 minutes overall.

Once you’ve got the rice going, make the 1/4 c orzo according to the box instructions.

Once the rice is tender and fluffy and done, stir in the orzo. Enjoy!

Nutrition Summary: 225 calories, 1g fiber, 8g fat; 4.5 Weight Watchers Points

The one food category I seem to feed more than any other is Saturday Morning Brunch. There’s just something about waking up a little early at the very onset of two days of pure relaxation, heading to the kitchen, and waking up everyone in the house with tantalizing and familiar smells. And I’ve found that breakfast just seems to have the most universal appeal to anyone from anywhere and of any food preference. It brings together picky eaters, the hungover, old folks after church, Norwegians . . . and just minor alterations to the standard fare can accommodate virtually anyone. Even vegans enjoy animal-free bacon and dieters eat egg-white omelets, and those of us who normally shirk breakfast will always take the time to enjoy one on a sunny Saturday morning.

But there is one breakfast delicacy so simple and omnipresent, I’m aghast with myself that I’ve neglected it until now. And that’s pancakes.

In an attempt toward rainbow cake fan service, I envisioned a colourful stack of multi-coloured pancakes sans-food dye, dyed only by the beauty of the fruits therein contained. Unfortunately, berries, with the exception of the blue variety, all seem to impart pancake batter with a dingy grey that is anything but inspiring. However, cheddar cheese makes for bright cheerful pancakes that are not savoury, but instead taste extra-buttery, making for a nice complement to the traditional blueberry. Also, though I’ve mentioned before that buttermilk pancakes are best, my favourite recipe by far is the standard regular old milk-and-all-purpose flour variety.

Anyone reading this has likely made pancakes, and I’ve included a recipe at the bottom for reference’s sake, but I think I’ll let the pictures, largely, speak for themselves. Except I need to tell you a secret, and you’re going to hate me for telling you because it’s such a guilty little secret, but . . . the best way to make your pancakes with crispy edges and fluffy insides is . . . shortening. Yes, a smidge of trans-fat-laden shortening in the pan does the trick admirably.

Blueberries.

Sharp cheddar.

I’ll interrupt the silence here for just a moment: I’ve read a few places the best way to make blueberry pancakes is to put the blueberries on top of the batter once it’s in the pan to keep the whole batter from turning blue. I have no idea why anybody could look at this and not find it absolutely beautiful.

Blueberry batter.

Moving along . . .

Bubbly blueberry.Blueberry flip.

Cheddar in the pan.

Sunny sunny cheddar.

Repeat as desired.
A stack of delight.

And finally, the shot that made it all worth it. Aren’t these stripes giddily Dr. Seuss-like?

Dr. Seuss stripes.

If you don’t want pancakes right now, I just plain don’t understand you (or you just ate, which is possible).

Blueberry & Cheddar Pancakes
adapted from The JOY of Cooking

1.5 c all-purpose flour
4 tbsp sugar
1.75 tbsp baking powder
1 tsp salt
1.5 c milk (whole, lowfat, skim, it’s your call)
3 tbsp melted butter
2 eggs
1 tsp vanilla extract
1 c shredded sharp cheddar OR 3/4 c frozen blueberries, thawed, pressed, with juice.

Whisk or sift together the flour, sugar, baking powder and salt. Whisk the milk, butter, eggs and vanilla, then add to the dry ingredients. Mix just until the flour is all moistened, then stir in cheddar or blueberries; let sit for 10-15 minutes if you can spare the time . . . it seems to make the pancakes a little fluffier.

Back to that deep dark secret, shortening, which, to reiterate, makes crispy edges whilst preserving the fluffy insides. You put a smidge, about a knifetip, in the pan between each batch and you won’t regret it. However, butter or cooking spray still does the job, though not as well.

Once the pan is hot from sitting on medium-high heat (7 for fellow gas-stovers out there), drop 1/4 c of batter for each cake. Flip when the bottom is toasty and the bubbles on top aren’t popping quite as much, then remove once the new bottom is toasty.

Serve with a smile on a sunny Saturday morning.

Every winter when I feel like I’m particularly broke and miserable and I just want it to end, I head to the local fishmonger and blow a bunch of money on a lobster that is completely out of season. This entire practice is just so indicative of someone who is a complete New Englander, what with our long snowy winters and delicious lobsters.

Lobsters aren’t seasonal per se, but they are much cheaper between Memorial Day and the Fourth of July. The truth is, however, that hard shell lobsters are most easily found in the Spring. There is lots of information all over the internet as to why this is, but all you need to know is that a hard shell lobster feels firm when you squeeze slightly and makes for less chewy meat. Armed with this information, I figured that making these in early March isn’t the worst time.

The only fresh lobsters are live lobsters, and the best ones are spritely and healthy with an ardent will to break as you steam them alive. So let’s meet the couple we’re having for dinner, bwahaha. And yes, I mean that in a creepy Vincent Price sort of way.

This is Roberta.

Roberta, (aka Bobster)

We nicknamed her Bobster.

This is Shelly, for obvious reasons.

Shelly.

They became great friends when they were roommates in that tank.

Best buds.

Alright ladies, get comfortable in that strainer.

Lobstahs!

We don’t boil lobsters around here, we steam them, because boiling a huge pot of water takes for-freakin-ever, and steaming results in a less water-logged shell. Just an inch of water in a huge pot does the trick. Then steam for awhile depending on the pounds of lobster—for two 1.25 lb lobsters this amounts to about 12 minutes. You’ll need an unnaturally large pot.

Big pot.Top the pot.

And look! One of the prettiest colours in New England.

Lobstahs!

As with all delicacies, there is a catch. If you aren’t disgusted by the spiderlike appearance of these ocean bottom dwellers, you probably still understand that disassembling a lobster can be quite the undertaking without a good plan of attack, but it’s actually easier than it would seem with some handy instructions. First, twist off both claws.

Claw twist
Ta da!

Now twist off the tail.

What a twist!
Ignore the gross part.

Tail meat is a cinch, you just pull off the flippers at the end of the tail and insert your finger there to push out the meat from the top. This picture doesn’t illustrate it very well, but that’s the deal.

Lobstahs!

The claws are the real tough part here. They require a lobster cracker and I use a pair of kitchen scissors (ones I don’t mind putting in the dishwasher after the fact) to help myself out.

Action shot!
Lobstahs!

Lobster meat is much more lovely away from all that mess, and after being rinsed in room-temperature water.

Red meat.

Lobstahs!

Every time I’ve had lobster at home I’ve pulled it apart and tossed the meat into a bowl of melted butter as I went. By the time I was done the corn on the cob had cooled and soon my chin was dripping with butter as I sighed satisfied with eyes closed and a crustacean appendage entering my mouth. I understand that this scenario is only appealing to people who have experienced it, and I apologize for grossing out everyone else.

This time around I thought I’d actually *make* something with my lobster and treat it like the delicacy it is. Turns out that a particularly delicious use is Lobster Newburg, which is essentially a sherry-cream sauce that elegantly replaces the traditional serving suggestion of “float all this shit in bowl of melted butter.”

Here we go.

The beginnings of the newburg part.

Before the cream is added, we coat our lobster bits with spices and butter.

Buttering with paprika.

Finally, the cream part comes into play and we serve the Lobster Newburg with arugula, which has a peppery taste that complements the sauce SO WELL. In fact, I ate this a lot like a salad. But the traditional garnish is watercress and baby spinach would work as well.

Lobster newburg. Done.

Lobster Newburg

The meat from 2 x 1-1.5 lb lobsters, rinsed with lukewarm water (about 6 oz)
1 c light cream, half and half, or fat free half and half
2 egg yolks
1/4 tsp salt
1/3 c dry sherry
3 tbsp butter
1/4 tsp ground black or white pepper
1/4 tsp paprika
Arugula for garnish and eating (my highest preference, but watercress is more traditional and even baby spinach makes a nice substitute)

To steam the lobsters
Fill your largest pot with about an inch of water and bring to a boil. Using either a rack that fits in over the water line or a steaming basket, place the lobsters in the pot, tail down first, and lid immediately. Continue to boil over high heat for 12-15 minutes.

If you don’t have a rack or steam basket, you can put the lobster right in the water, but keep an eye on those claws and make sure they don’t get black, which means they’re overcooked (yes, one of my lobsters in the picture was overcooked, it was the one on the bottom).

To make the newburg part
Heat the half and half in pan over medium heat, making sure not to scald it. Meanwhile, whisk the egg yolks with salt and sherry. Add the egged-sherry to the half and half, whisk, and cook over low heat until thickened enough to coat a spoon. This should take 6-8 minutes.

In another saucepan, melt the butter over low heat and add paprika and pepper. Add lobster meat to coat, then pour the cream/sherry mixture and heat thoroughly.

Serve with arugula, watercress or baby spinach. Melt into a puddle of satisfaction.

Hello friends!

Being an American, at least in my case, means wondering about the lifestyles of our elegant cousins overseas—you know, the British. Whenever an American does an impression of a Briton, they typically involve some mention of “tea and croompets!” and overexaggerate the accent with pursed lips. This makes me feel like a jerk for even mentioning, but I’m sure the British have some classic impressions of a Southern drawl that I am just dying to hear. More interesting would be an impression of an accent-neutral American reading a news report or talking about their SUV.

So when choos & chews featured some particularly lovely looking crumpets, I thought I’d give them a try.

Immediately, I ran into a problem: crumpet rings. Apparently this is something common in other areas, but not readily available in New England. I found some egg rings that would do the trick, but for $2 apiece. And then, brilliance struck: cookie cutters. Multi-functional, cheap, and way more fun than an egg ring.

But first, the batter.

Ingredients.

Just add yeast.

Yeasty.

. . . and wait awhile until it becomes a bubbly, thick batter.

Bubbly.

Okay, and NOW the fun begins. Because the batter is so thick, the rings are really there just to keep them from spreading too much. Butter in your shapes is pivotal.

Crumpets for fun.

As with all things, however, there’s a catch: the more intricate shapes really just don’t cut it. Some worked out great, but it seemed to be a coincidence. I’m sad my little stegosaurus didn’t work out (he’s the one to the right there).

Crumpets!

Simpler shapes worked out better.

Crumpets!

Fortunately some of my favourites stayed intact enough for a crumpet diorama.

Crumpet diorama.

This is the childlike story being illustrated: a car fell in a ditch and an airplane flew by, so the pilot called a tow truck but they were all picking up other cars, so then an elephant walked by and said he would pull the car out. The airplane stayed in case they needed any more help.

The end.

I liked the car the best.

Car crumpets.

Speaking from experience, these are FANTASTIC with some homemade butter. And also, just a smidge of apricot preserves, which I have recently come to embrace.

Be-apricotted car crumpets.

Crumpets!
brought to me by choos & chews, but adjusted for American audiences

1.25 c flour
1/2 c milk
1 tsp instant yeast (referred to as bread machine yeast at my grocery store)
1/2 tsp sugar
1/2 tsp salt
3 tbsp water, room temperature, divided
1/4 tsp baking soda
1 tsp butter

Mix up the flour, milk, yeast, sugar and salt. Add 1 tbsp water; beat slowly for a bit, then on medium until totally smooth. Cover and let sit for an hour.

Dissolve the baking soda with the 2 tbsp water and add to batter, stirring to combine. Put the batter aside, again, for a half hour. At this juncture, it will be poofy and bubbly and thick.

Butter your crumpet rings/cookie cutters WELL, especially if you are using shapier cookie cutters. Heat pan to medium, grease with butter, place the cookie cutters in and spread batter into them about 2/3 of the way in. Don’t waste too much time trying to account for the little details of the cookie cutters, as those things are cooking and you want to be able to flip them all about the same time.

Once the bottom is browned, pop the crumpets out of their shapes and flip. Continue to cook until the new bottom is browned and cool on a rack.

Toast. Butter. Top. Eat with tea and a nod across the pond.

Hey guys, just a quick post to let you know how the Mama Zuma’s giveaway panned out. As promised, there were two winners:

#32
Cassidy Said,

Hmmm, I just made a creamy broccoli soup yesterday that these would probably be lovely crumbled into instead of bread or crackers. Yummy!

I might also take the tuna/potato chip idea and incorporate some chip crumbs into a spicy tuna sushi roll…

Cassidy, how creative! I think the spicy tuna roll would pretty much be the coolest fusion idea ever, but I have an unnecessary amount of appreciation for sushi.

#2

Josh K Said,

Knowing me, I’d probably do something reaaally stupid… like make really spicy chicken wings and coat them with the chips like in your recipe.

What? Josh, what is this?! I give you something for free and you call me stupid? Psh.

Jk, I dig it man. But that’s what the cucumber sauce is all about, silly.

Many thanks to everyone for participating! I was so super excited all week about this giveaway, as empirically proven by the abundance of exclamation points positively littering this post. But for the 46 of you who didn’t win, here is where you can find Mama Zuma’s in your state, and on the off-chance you’re not near any (this was my issue) here is where you can order a box online. Don’t worry if you didn’t win, there will be plenty of giveaways in the future.

Here’s one particularly awesome comments that caught my eye:

Melanie Said

Could you use any other flavored chips for this? How would “salt & vinegar” chicken taste, or “sour cream & chives”…… maybe I’ll do some experimenting. I don’t know if I can find the RT 11 chips to try this one, but my husband would try it. I’d try the sauce.

Dude, what an awesome idea! Route 11 (in addition to your favourite gourmet potato chip company) has like, a ton of different kinds of chips. How cool would it be to have a sampler platter of all chip types you want to try? Also, the sauce is a great complement to the dish, but in isolation…well, you’ll be happier with plain yogurt.

. . . and then a bunch of people talked about sneaking hot chips into their unsuspecting friends’/significant other’s meals. Well at least I’m not dating any of you, sheesh!

Tags:
Subscribe to Omnomicon