online poker

Omnomicon

say it with me now, “om nom nom”

I am pleased to announce Omnomicon’s very first giveaway! And not bad for a first, if I say so myself.

It all started with a dear reader, noinamg, sending me the following email.

i would like to pose you a challenge if i may

i would like something to do with my Route 11 Mama Zuma’s Habanero (the red bag ones)
they are so spicy that even one chip is like hell in your mouth. since i cannot actually eat these, do you have a suggestion for a dish to use them in somehow?

Well, man, I do believe I can oblige, courtesy of the fine folks at Route 11.

Mama Zuma's Revenge.

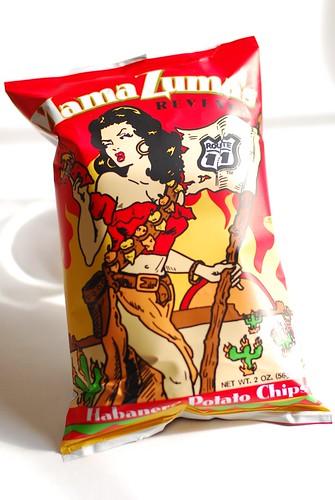
This chick is badass. Wickedly badass. Also, a total babe.

Mama zuma herself.

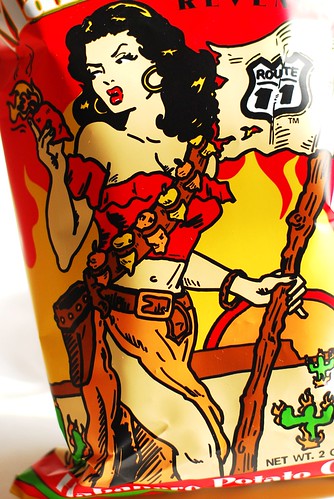
I guess the word they’re going for here is really “hot,” and though hot chicks rarely have anything to do with habaneros, they certainly can’t hurt sales, right? These are like really good bbq chips, except particularly tongue-burning. They’re almost diet friendly in that you have to take a little bit of break between chips.

Mama zuma's.

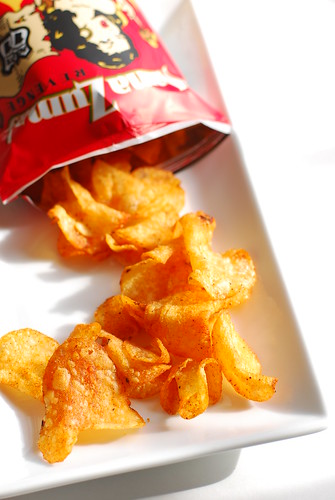
Really hot potato chips with an actual flavour to boot. It’s a good thing.

So here’s the giveaway: I will be sending out two bags of Mama Zuma’s Habanero Chips to two randomly-chosen readers. Would you like to win some? Leave a comment before 6pm EST Friday, March 6th describing what you would do with your Mama Zuma’s. (American readers only–apologies to my foreign friends, but I’m sending these out on my own dollar and funds are low).

Will you be enjoying them crunched into your tuna fish sammich? I can’t be the only one who does that. Perhaps slipping some to your Indian friend who keeps bragging about how white people don’t know what truly spicy food is. Or maybe even giving my recipe below a polite little shot. At the very least, it has a topical and interesting title.

Noinmang, you’re on. We’re making Mama Zuma’s Red Hot Gams.

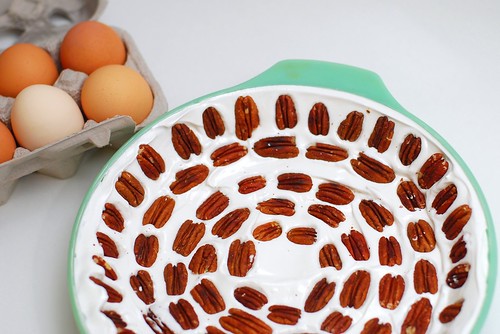
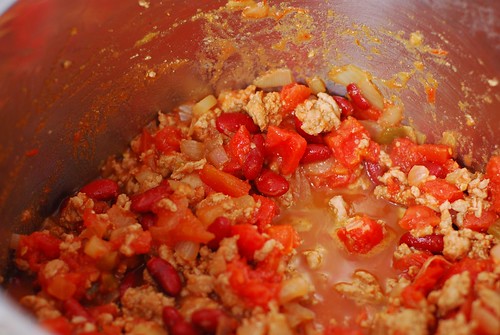
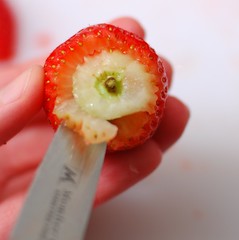
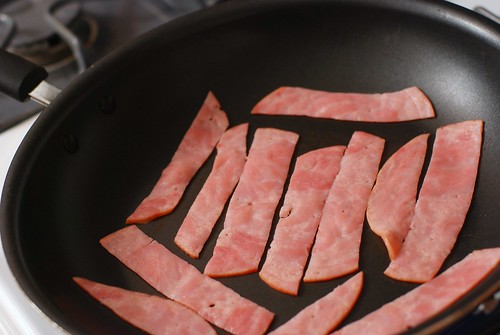
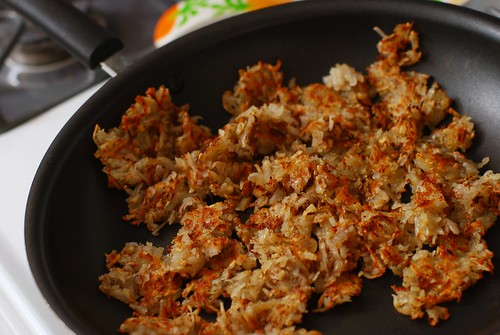
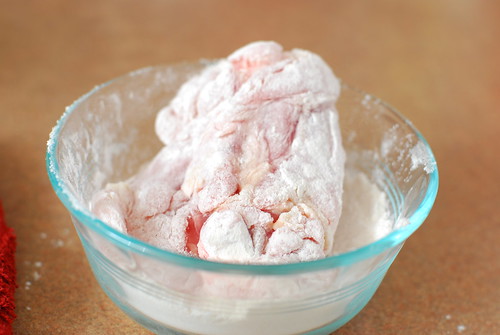
First de-skin, de-fat, rinse and pat dry some chicken thighs to give yourself a nice fresh non-slimy surface. As I happen to be in possession of a veritable plethora of kitchen towels, I reserve one specifically for these kinds of things.

The gams.

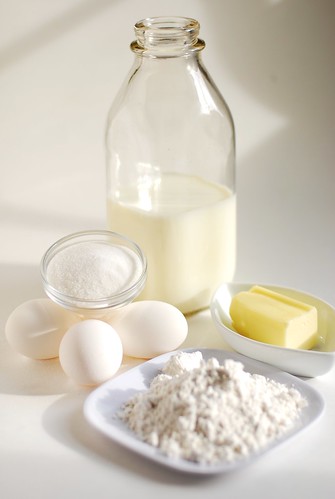
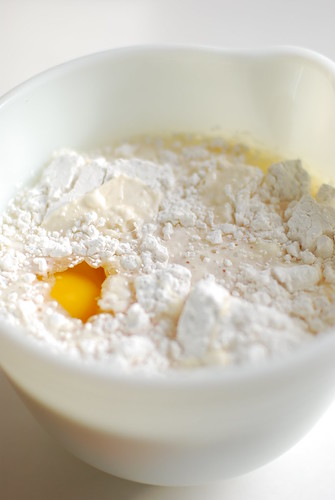
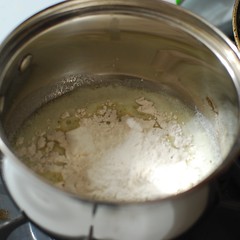
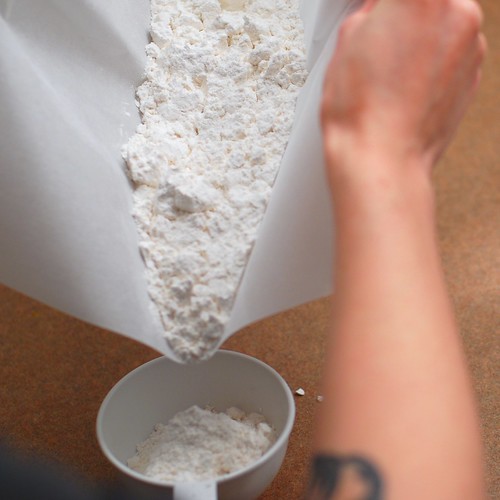
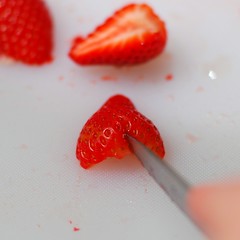
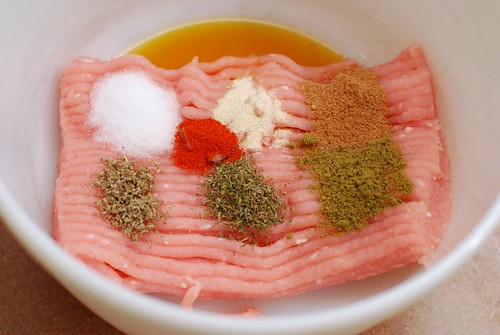
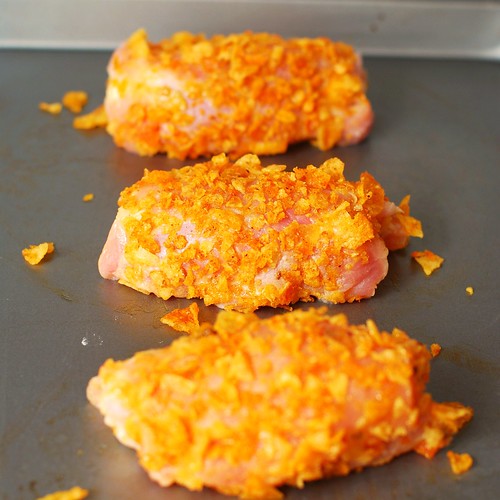
Next we’re going to flour, butter, then chippy the thighs and in that order. It helps conserve resources by using bowls that just barely fit a single thigh, particularly the chips. I found that one 2 oz bag of Mama Zuma’s crumbled up to *just* enough for four thighs.

Floured thighs.

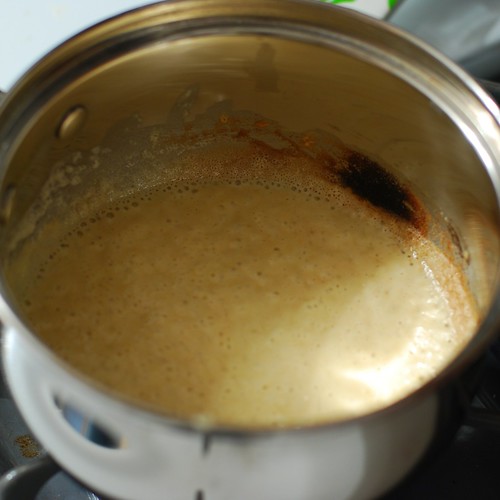
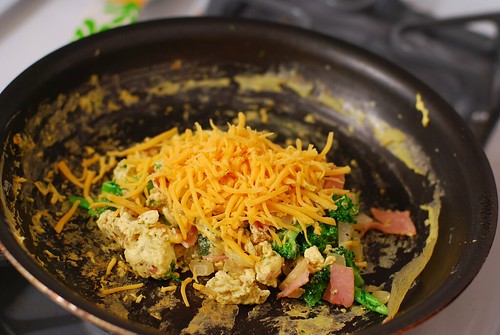
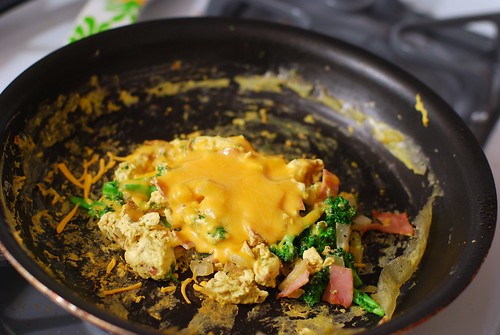
Next is a dunk in butter to make the chips stick, and then the crumbled chips.

Chippy!

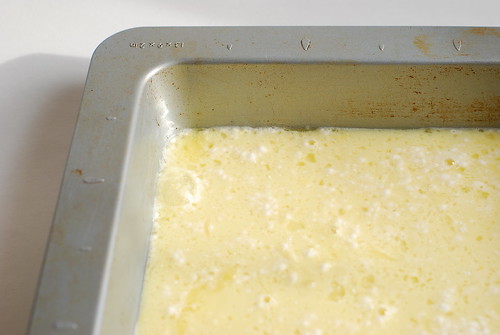
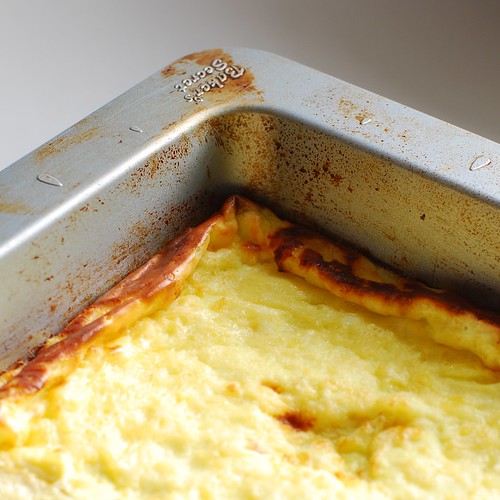
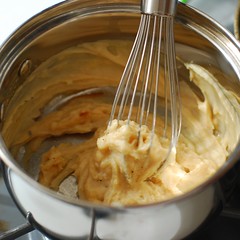
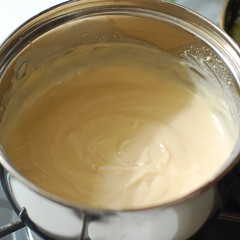
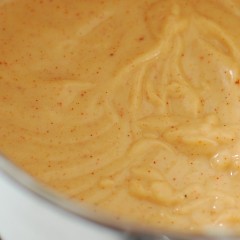
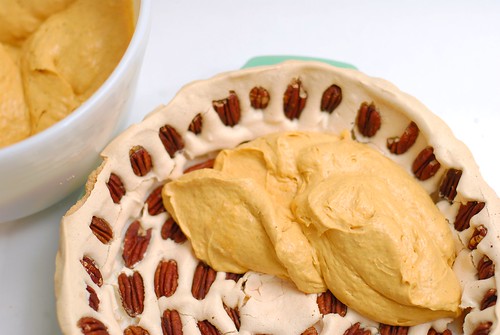
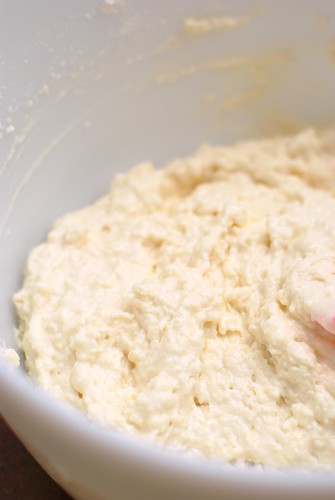
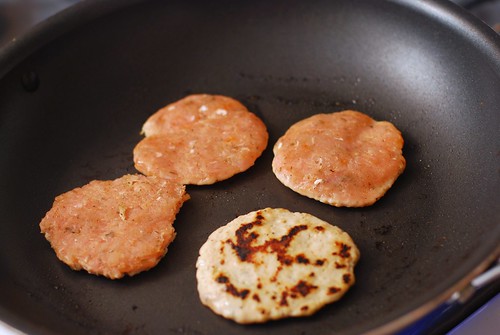
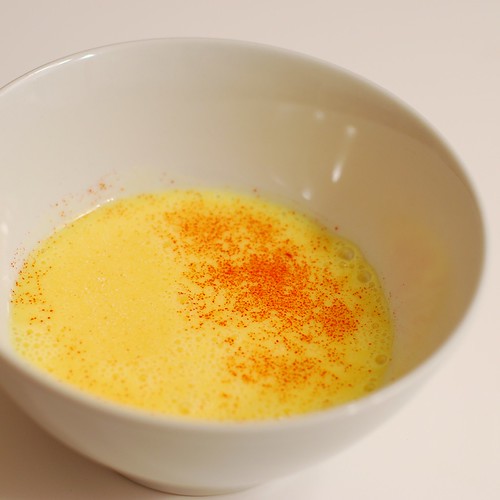
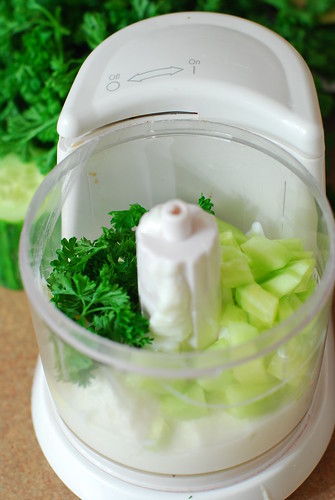
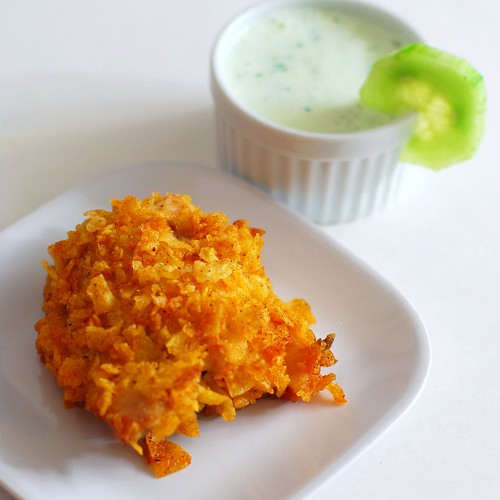
Now we bake for a bit. In the meantime, let’s prepare a little something in case the chicken’s still too much. It’s a pretty simple yogurt/cucumber/parsley concoction that might also work well as a lighter alternative to blue cheese dressing for your buffalo wings. Essentially, the only prep here is in a food processor.

Parsley, cucumber.

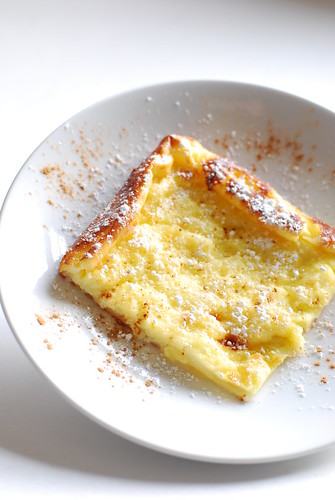
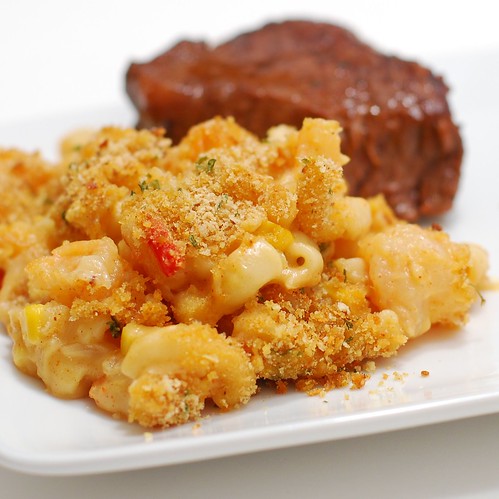
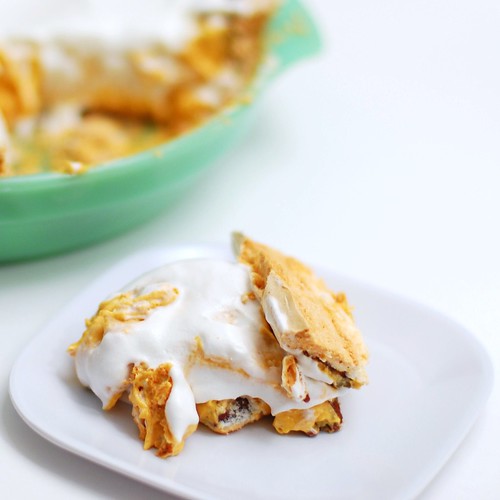
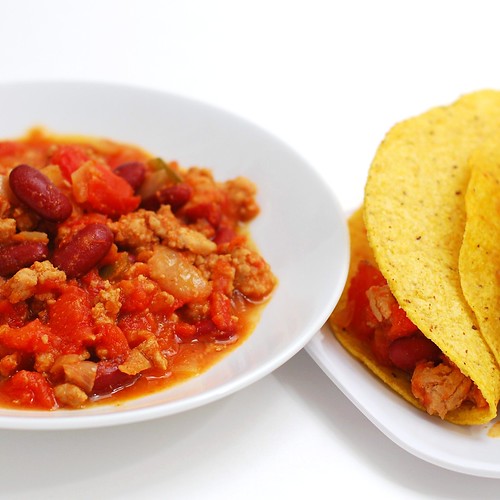
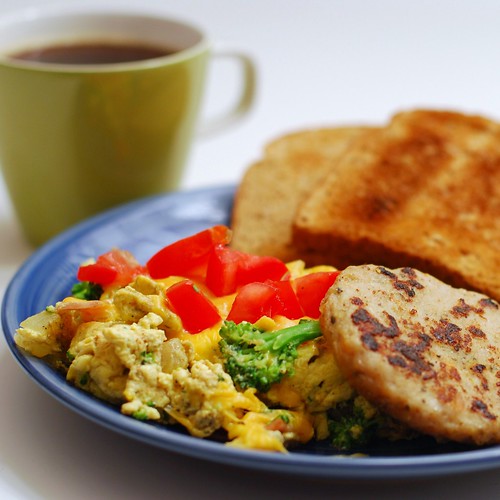
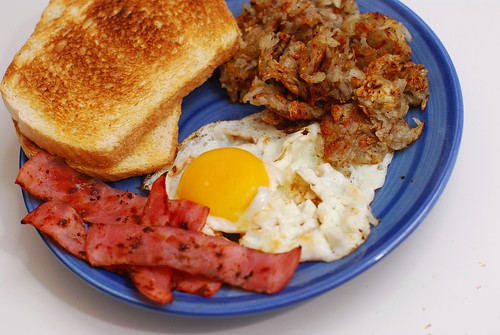
And ohhhhh man. What a meal this made.

Mama zuma's red hot gams.

Mama Zuma’s Red Hot Gams

4 chicken thighs (bone in our out, your choice)
2 oz Mama Zuma’s Revenge Habanero Potato Chips (one bag) [in a real pinch you can use your favourite brand of hot potato chips, or even plain ones if you’re not into the spicy thing]
3 tbsp butter, melted (no worries, you won’t be using all of it)
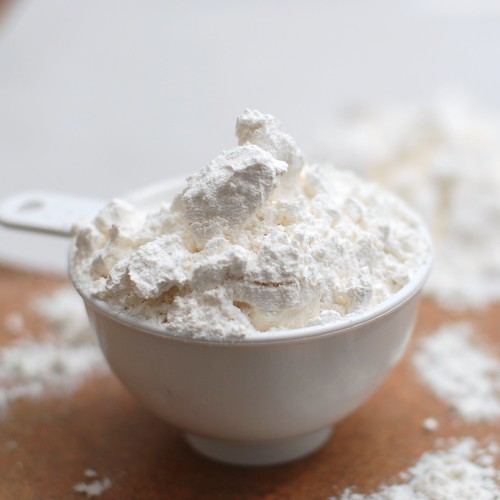
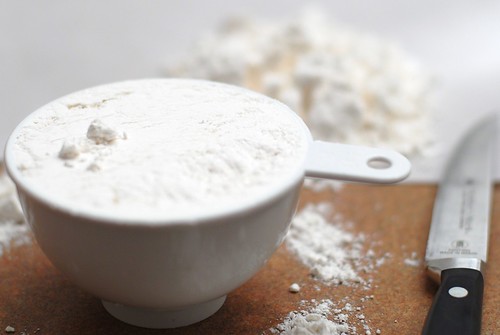
1/4 c flour

Preheat oven to 375o.

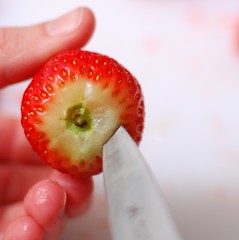
Remove the skin and trim the fat from the chicken thighs, unless they came skinned and boneless. Now rinse the thighs and pat dry.

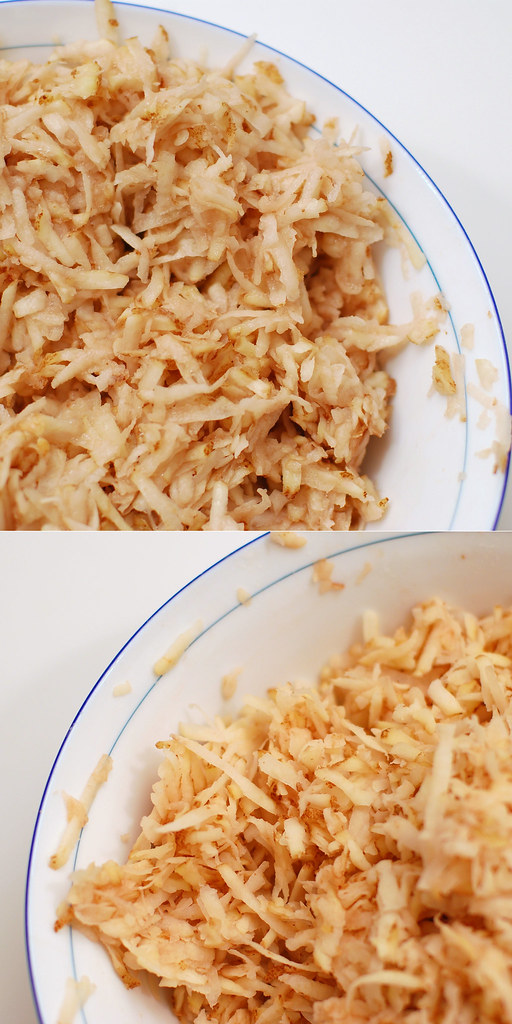
Crumble the Mama Zuma’s in the bag until a rough but not fine consistency.

For “breading” the chicken, using the smallest bowls you have that will fit the thighs is the best way to economize your ingredients. First flour the chicken on both sides, dip quickly in butter and let drip dry a few moments before grinding the chicken into the chip crumbles. Really grind it in there, and on both sides; you want the chips to be all pokey into the surface, as they’ll stay better that way.

Place chicken on a cookie sheet and pat in any remaining chip crumbs, since they’re already contaminated and preciously delicious.

Bake for 35-40 minutes, or until the meat reaches an internal temperature of 165. Serve with . . .

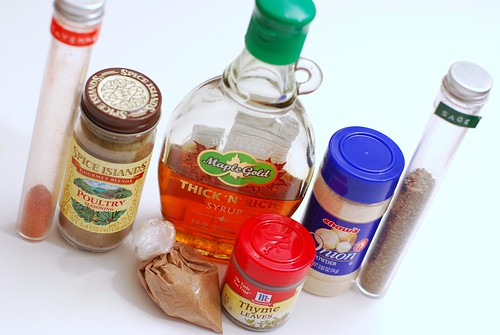
Aleta’s Mama Zuma Antidote: Cucumber Chill-Out Sauce

1/2 c yogurt
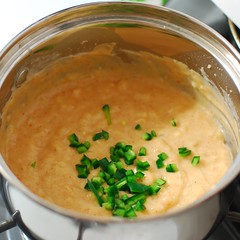
about 2 tbsp loosely packed parsley leaves
1″ of cucumber, peeled and chopped
1 tsp lemon juice
pinch of salt

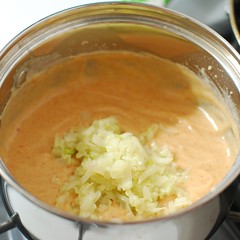
Put all that stuff up there into a food processor and process for a minute or so, until the cucumber is ground. Add an extra 1″ of cucumber, dice, to the finished sauce, if desired.

Don’t forget to leave your comment if’n you’d like to give Mama Zuma’s a try! Contest closes Friday at 6pm EST.

Hola! Como esta? Bueno!

My Spanish isn’t what it never used to be, but guess who has two thumbs and just celebrated a 25th birthday.

->this gal<-, that’s who!

I received so many wonderful gifts from my closest pals, and I include among them the gift of everyone’s presence at my karaoke bash, which is all I really wanted anyway. But SOME people (yes, I am talking about you, Erin) are apparently way the hell too cool and just had to go out and make my birthday extra-special—and I guess I can’t complain because you guys,

Check

This

Out.

Absurdly awesome birthday gift.Absurdly awesome birthday gift.

Are you frickin kidding?! Totally adorable, funky, completely vintage and all mine. So I prefer family items because what’s vintage really without a good story, right? OH WELL HEY IT CAME WITH ONE OF THOSE TOO.

Absurdly awesome birthday gift.

This lovely oven proof cassarole [sic] was a Christmas gift from Billy to his Nana Mary Nicotera in 1971. Nana cherished it and never used it except to display on the kitchen counter. A lovely family heirloom which could be used as a cookie jar.

Billy purchased it at a fine quality gift shop in Marblehead. Unfortunately the ID card of the manufacturer went astray but it is of fine quality.
Bea Cannata
Billy’s mom 4/15/78

I can’t even believe that I have come to own a 40-year-old piece that may or may not have ever been used, but if it has, it certainly doesn’t show. So until I find a suitable cherry-popping recipe, I will cherish it and admire the class it brings to my kitchen counter.

Thank you, Erin, for sharing the most fantastic taste of anyone I know.

So this is completely unrelated to my birthday, other than I made it the morning of receiving The Great Gift. Finnish pancakes! There’s not too much in the way of ingredients, but they all pull their weight in a crescendo of souffle-like tastiness.

finnish pancakes

Man, that ingredient set is as white as Rhode Island.

In the mix.

I love the egg yolk peeking out from under there. Hello, little egg yolk!

What makes pancakes Finnish is, apparently, that they are pancaked in the oven rather than the stove top. This is a great way to serve a large number of people piping hot pancakes all at once.

PSA: Finnish pancakes are baked, not pan-fried.

Nice edges, *catcall*

Serving suggestions (2).

Elevation.

Sugar high.

Serve with love.

Finnish Pancakes
Courtesy of Massachusetts Poultry Association, Inc.
Buy lots of eggs!!!

4 tbsp butter, melted
4 eggs
2 c milk
1/2 c flour
2 tbsp sugar
1/2 tsp salt

Preheat oven to 450o, and pour the melted butter into a 9″x16″ baking pan.

Beat eggs until foamy but not whippy, until well-blended. Beat with milk, flour, sugar and salt. Pour into pan with butter and bake 20-23 minutes.

Serve any way you like! Serving suggestions pictured include powdered sugar & cinnamon and real Massachusetts maple syrup.


nutrition summary: (for 1 of 8 servings, made with fat free egg substitute & skim milk) 115 calories, 6g fat, <1g fiber; 3 weight watchers points

I decided that our household was long overdue for a good old fashioned surf and turf. Well I guess *kind of*. Our meal was old fashioned in that there was shrimp and there was steak, but I came upon a neat idea in this old 4-H fundraiser cookbook I found in a second hand store.

Heya good lookin.

The problem with vintage recipes is that they’re always bland and more often than not, they’re unapologetically gross as well. The shrimp bake recipe, upon inspection, is not a gross one (create a roux, add some milk, sprinkle some sparse spices in there, pair shrimp with macaroni), but it was . . . lacking. So I did a little magic in terms of additions and here’s what I came up with.

First, we make a roux. While the word is definitely a fancy-pants French one, it’s actually quite simple: melt some butter, pop in a bit o’ flour, whisk until nice and golden and yummy-smelling. For something so very simple, butter and flour smells awfully nice simmering on your stove.

Melty buttery.Roux step two! Flour.
Golden flour.
Don’t mind that scald mark, it was there to begin with. Ugh. My stupid dirty pans strike again!

The original recipe called for milk alone, but since I had buttermilk leftover from making butter, I substituted buttermilk for half of the milk. This added a zingy tang to the flavour, that coupled with a little bit of mustard powder, quite well imitates the cheese flavour in macaroni and cheese, without actually incorporating any cheese. I don’t know that the butter and flour method is exactly healthier, it’s just an interesting coincidence, probably heightened by the fact that basically macaroni + creaminess is always associated in my mind with mac n cheese (or “mackin’ cheese,” if you’re pimp enough).

Buttermilking it up.And now some milk.

And now, one by one, we add the flavourful parts. I won’t make you scroll for the next five minutes; here’s the consolidated view. I trust you all, as adults, to understand how to add one ingredient at a time here. [Editor’s aside: Apologies to the kiddos, here’s an explanation: add these ingredients one at a time. Thereyago!]

The spicy little detailsThis is what those onions were for.
Jalapeno!Corn!
And what is a macaroni casserole without macaroni?Shrimp time!

They are, in order: spices (paprika, mustard, salt), onions & garlic (sauteed lightly in butter first), jalapenos (1/2, diced finely, no seeds), corn (from a can, hey I like it that way best), macaroni (cooked), shrimp (explanation below).

Spice fearers, have no fear! There is very little jalapeno here relative to all else, and this dish is definitely not spicy, it just has this mild and comforting warmth to it. Spice lovers may wish to kick it up the proverbial notch by including the entirety of a jalapeno.

Now if you are fluent in italics, you saw the part about the onion and garlic being sauteed, no? Well obviously I did that first. And then in the same pan, while the macaroni was patiently taking in its first few minutes in the mix, I just added my raw, thawed, shelled, drained shrimp to whatever fat was left in the pan and lightly sauteed them. I’m talking like, *a* minutes here. I toyed with the idea of putting the shrimp in raw, since I knew fully cooked shrimp would get very tough after 35 minutes in the oven, but compromised on this consistency.

Lightly sauteing the shrimps.

Following my lead should result in the same delectable results I enjoyed.

Now it’s casserolin’ time! Use a glass or ceramic baking dish with about 64 square inches. In this case, I used an 8×8.

Shrimp and macaroni "Surf Bake"

At some point of the mixing of things, I included a tablespoon of jarred pimientos. It gives the dish a little bit of a Southwestern-looking flair, but didn’t add much taste, and it’s a little deceitful since this isn’t at all Southwestern, so I’ll be leaving them out in the future. The few sprigs of fresh parsley, however, did fresh things to my casserole (it’s okay, the casserole liked it).

Add some breadcrumbs, a little baking time, and voila! Surf and turf. This dish is really really REALLY good, but its unphotogenicness will probably scare some of you away, and Tastespotting probably won’t accept my submission. And I’m okay with that. Because if one, even one of you makes and enjoys this incredible dish, my foodie missionary work is done, and I shall surely dream of angels.

Shrimp and macaroni "Surf Bake"

Shrimp and Macaroni “Surf Bake”
serves 4 as a side

1 c cooked macaroni, just underdone (2 oz pre-cook)
1/2 finely diced onion
4 cloves minced or pressed garlic (less to taste)
4 tbsp flour (1/2 stick total, divided: 1 tbsp for sauteeing onions, 3 tbsp for roux)
3 tbsp butter
1/2 c buttermilk (substituting milk will be a-ok)
1/2 c milk
1/2 tsp paprika
1/2 tsp dry, powdered mustard
1/2 tsp salt
2 tbsp finely chopped parsley
1/2 finely diced jalapeno (seeded, whole jalapeno for the brave)
1/2 c corn (canned, frozen, fresh, you pick! I used canned)
8 oz small shrimp, thawed, raw, shelled, drained
2 tbsp breadcrumbs

First thing’s first: cook your macaroni a minute or two shy of the al dente recommendation on the package. While that’s on, sautee the onion and garlic in 1 tbsp butter. Dice the 1/2 jalapeno, finely chop the parsley, shell the shrimp and cut each in half.

Preheat oven to 375o.

Melt 3 tbsp butter in a medium saucepan over medium/high heat. Add flour, and whisk, continuously, until the mixture is a nice warm tan. If, at any point, this begins to smell like it’s burning, immediately turn down the heat, and you should be fine.

Take the roux off the burner. Add the buttermilk and milk (again, you can just use 1 cup of milk if you forgot the buttermilk) and whisk vigorously until smooth and unlumpy. Add paprika, mustard, salt, parsley, diced jalapeno, corn and mix thoroughly (the burner’s still off right here).

In the same pan you used to saute the onions and garlic, saute the shrimps for just a minute or two, until they have a little bit of colour, but before they’re fully cooked. Add to concoction.

Spread in an 8×8 casserole dish (glass or ceramic) and sprinkle the breadcrumbs atop it all. Bake for about 35 minutes. Serve with turf.

nutrition information for 1/4 batch: 325 calories, 3g fiber, 13g fat; 7 WW points

Feb-23-2009

how to make butter

Posted by aleta under how to make...

butter

Homemade butter is easy, relatively quick to make and amazingly delicious. If it cost less than buying butter at the grocery store, it would be too good to be true, which is why this is not the case. All things considered, though, I still think it’s well worth it.

This stuff is precious, so I think the best use of it is not in baking, but rather, on top of freshly baked, still warm, bread, muffins or crumpets.

Are you ready for this? It’s intense.

buttercream on the edge

We begin with cream. I used superfresh local stuff, but the carton at the grocery store will do just as well. The important thing is to use cream at room temperature. The difference between doing this with cold cream and room temperature cream is the difference between an hour of churning and ten minutes.

Next, get a container with a tight-fitting screw-on lid that will not spurt cream all over your kitchen when you shake it vigorously. It also needs to hold at least twice the volume of the amount of cream you’re using.

butter

Begin shaking the container up and down in a rhythmic pattern. After 3 minutes, it’ll start feeling less like you’re shaking a jar of liquid and more like you’re shaking a jar of whipped cream, because essentially, you are.

3 minutes.

The next 3 minutes will feel like you’re shaking a brick. This is the hardest part. You will wonder “is this doing anything?” Just keep at it.

6 minutes.

All of a sudden, within just a few shakes, the jar will begin going “shuk shuk shuk” and you’ll be able to feel the butter separating from the buttermilk. Keep doing that for about four minutes until you have lots of buttermilk in there.

10 minutes.

Next (not pictured), cover the top of the jar with cheesecloth and pour off the buttermilk, which can be used for a great many delicious items, but most notably, all the best pancake recipes call for buttermilk. It’s a truth.

After that, let the faucet water get as cold as it gets, then fill the jar to just under the top of the butter. The water needs to be very cold, or else the butter will melt as you replace the cheesecloth and pour the water out into the sink. Repeat 7-10 times until the water drains completely clear. This cleans the butter and keeps it from going rancid as quickly as it will otherwise.

Also important is to drain the butter. I have pictures of this part.

the birth of butter.

All that water puddling under the butter needs to come out. The best way is with a marble cutting board, but since I don’t have one of those, I used a wooden one. Simply squeeze the water out of the butter with a wooden spoon or spatula. The latter will double as a scraper to regroup between squeezings. To do away with the drained water, tilt the cutting board and/or use paper towels to absorb it.

butter

If you feel like the butter is getting melty at all, just stick it in the fridge for a few minutes before going back at it.

If you want to salt your butter, add about 1/4 tsp salt and stir into your finished butter. I think the reason to do this last is that it doesn’t interfere with the draining process by absorbing water and embedding it in the butter.

And that’s it! Beautiful, beautiful butter.

butter

Notes
I used one pint of cream to make just under 6.5 oz of butter and almost a cup of buttermilk. These amounts will vary from batch to batch, but is a decent estimate.

Tags: ,
Feb-21-2009

Omnomicon.com is live!

Posted by aleta under an aside

So if you have an rss feed to my site, you may have (?) noticed some test posts in there. This is because I have officially migrated my entire site to Omnomicon.com! This is very exciting for me, as it marks my very first domain, and I’m a nerd like that. If you wish to continue receiving updates to Omnomicon by rss feed, please update yours by going to www.omnomicon.com and clicking on this button:

The content at omnomicon.blogspot.com is being abandoned, so this is the only way to keep getting Omnomicon updates. All my old posts will redirect to the new site. If you experience any issues, would you please let me know? I also have a new email address, for this and all other issues/questions/love letters:

aleta at omnomicon dot com.

If you keep me on your feed, that’s so awesome, thanks a zillion bunches for the extra effort! If not, maybe we’ll cross paths again soon.

Either way, big hugs and many thanks.

-Aleta

Tags:
Feb-19-2009

fail: pie

Posted by aleta under recipe fail

A pumpkin cream pie served in a pecan-studded meringue crust.

That, right there, was supposed to be my masterpiece. This was going to be a winner recipe, and I imagined the food blog equivalent of everyone hoisting me on their shoulders and carrying me away to a raucous victory party where everyone brought something they made from a recipe on my blog and we all drank and hugged and had merry times until five the next morning.

fail pie

How very, very wrong was I.

This mish-mash of ideas I found in various places come from individually neat ideas unto themselves, but plain silly when put together. For one thing, beginning to end, this stupid thing took me about seven hours. Seven freakin hours, can you believe that? On a weeknight, no less, so after getting home before five, I collapsed in bed around 1am (I know that’s more than seven hours, but I take a little while to wind down).

The meringue takes about 30-45 minutes to whip up, then bakes for an hour. During which time there is nothing to fill the void, because we don’t want to do anything with the pudding mix so it won’t set anywhere but on that crust. The crust that bakes for an hour. Then cools for two hours.

fail pie

Making the filling is easy enough. Except that after you put it in said crust it needs to chill for an hour.

fail pie

fail pie

On top of all that, I put too much sugar in my first meringue, so add about 45 minutes before I realized that this potion was never going to get stiff peaks. Then, just at the end of the final cooling, I started a caramel sauce from the Joy, but of course, this was not the kind of sauce I meant it to be, so after burning my finger with sticky hot sugar, I tried another batch. And then added too much water at the end. We’ll only count the last half hour of that, since the first half was spent waiting.

Then I cut into the pie to take a nice picture.

fail pie

Look at that friggin thing! What a mess! It is so pathetic that it looks like it’s hanging its head in shame, and it’s a slice of pie, how could it even do that? I don’t know, but it is.

The meringue crust is not the worst idea in a world full of crusts made out of Crisco, but you can’t make this more than 24 hours before it needs to be done, or else all the moisture from the pie will turn it into a gummy mess. And I don’t know why it stuck so fervently to the bottom of the pie plate, I oiled that sucker and everything! The flavour combination was pretty great, though, and this idea may be salvageable. But right now . . . I’m too tired to salvage.

I’m sure I’m not alone in this. What’s the biggest kitchen disappointment you’ve been on the receiving end of? Did you manage to salvage anything from it?

Hai guise!

So even though it’s not a breakfast food, guess what: I’m making chili with you today. It most certainly is a diner dish, and therefore not entirely out of line with that little theme I have going. A theme, I might add, that is probably only two weeks from expiry, as I’m not entirely sure I have clever little recipe tricks for the really good stuff on the menu, other than to buy the Heart Healthy variation of the usual pancake mix, which seems to amount to a smaller serving size on the label and some cellulose gum to add fake fiber. (Well, I guess the fiber is real, but it’s not exactly whole-anything).

Alright, first you need your BEP. What’s a BEP? Why, I’m so glad you asked!

BEP: Big Effin Pot

It’s a BIG EFFIN POT! I was going to name it something a little more literal (think BFP), but I have been linked from other blogs with the caveat that the LANGUAGE on this WEBSITE is NOT AMUSING, and I’d hate to piss off anyone who has such kind and thoughtful things to say about my website. The more faint-of-heart might wish to refer to their BEP as a BOP, or BIG OLE POT. In addition to making for a far superior acronym, it’s also something you can share with your loving children. On a side note, BEPs are one of the most useful things you can have, if you don’t already. Verily, they are the LBDs of the kitchen.

In this case, the BEP is somehwat pivotal, as we have a fairly large amount of stuff that really wants to stain your walls/stovetop/white blouse/microwave, bubbling up as it simmers and you lean over to give it the occasional stir. So please, do yourself a favour and bust it out.

Alright, recipe time! I made generic labels for my canned goods because I always thought it was kind of stupid and funny and obvious when they did that in kids’ shows back in the day.

Totally generic ingredients.

Also, you sadly can’t read it, but that salsa jar says “The party’s on, Wayne, I brought the SALSA!” That one was my favourite. =(

Now chop an onion. Press some garlic. Sautee in some oil. It took me a long time to learn this, so I offer this PSA for anyone who doesn’t already know: don’t press your garlic into the pan before you add the onion. You are begging for burnt, bitter-ass garlic that really does nothing good for your food. Press the garlic into your pile o’onions, and add both at the same time.

And knowing’s half the battle.

Onions. Garlic. In a pan.

I swear, I could take a thousand pictures of onions and garlic sauteeing in a pan, and I would love every single one as though it were my own, real live baby. Nothing in the world smells better.

NEXT! Add some meat n stuff in there.

Is this even appetizing?

Unlike cooking onions and garlic, I have a feeling that providing a picture of raw ground meat is a lot like letting someone watch you put on pantyhose . . . it’s only sexy after it’s done, and only in the context of other *stuff*.

I remain unappetized.

See now, that there, is totally like, after you’ve put on the pantyhose, but before your svelte little dress is on. BUT

Turkey Taco Chili

There we go. We’re getting somewhere.

So this is a wonderful chili in its own right. It’s downright edible even if you have no intention of losing a single ounce, and, rather than being just low-calorie, is actually good for you! Loads of veggies, protein and fiber in there, nothing at all fake . . . and so completely undeniably filling. Seriously, a cup of this stuff is probably the most gut-busting cup of anything you can eat.

The recipe makes about 7 servings, but if you wanna bump it up to 8 for no detectable increase in calories, throw in a chopped pepper or another onion or something. These servings freeze well, but if you don’t have room in there for your entire Gladware collection, break up the monotony of leftovers by enjoying 2 Point Tacos! That’s right, this already-incredible chili makes one heckuva taco. Just add one regular taco shell to 1/4c of this stuff. Cheese and lettuce might be nice, but not necessary.

Chili. And bonus taco.

Mmmmm.

Turkey Taco Chili

1 tbsp olive oil
1 onion, chopped
4 cloves garlic, minced or pressed
1.25 lbs ground turkey (93/7 works best)
1 tbsp chili powder
1 tbsp cumin (this is the secret to making the chili taste taco-like)
2 tsp salt
28oz can of diced or stewed tomatoes
14oz can of dark red kidney beans, rinsed (or any other red bean you have on hand)
3/4 c hot salsa

Heat up the oil over medium heat, then add onions, then garlic, and saute for a couple minutes. Add the turkey, chili powder, cumin and salt and break up the turkey with a scoop, until it is no longer pink. Add tomatoes, kidney beans and salsa, and bring to a boil over high heat. Let boil a minute, then reduce heat to medium/low and simmer for 10-15 minutes.

Nutrition info: 235 calories, 5g fiber, 8g fat; 4.5 Weight Watchers Points

Two Point Tacos
a subtle variation

Scoop 1/4c of the chili into a taco shell. Eat.

Nutrition info: 120 calories, 2g fiber, 5g fat; 2 Weight Watchers Points

So I know diet diner food isn’t a great sell for everybody, and frankly, I think baking takes far prettier pictures. That said, I have, for Valentine’s Day, a visual gift for all y’all. Strawberry shortcake is a beautiful thing all on its own, but for dessert for two, it can be improved upon.

Generally, in place of shortcake, I make some sweet biscuits, slice ’em open and throw some sugary strawberries and whipped topping on there. However, I’ve been reading aaalllll about different flours and decided to try out the theory that the low protein levels in cake flour makes for a more perfect crumb.

OH MY GOD, I will never go back to all-purpose flour. All-purpose flour varies from region to region and season to season, so while in theory it can make for a seasonal flair, there’s something to be said for fabulous consistency. This recipe makes a tender, delicious, and all-around omnommy shortcake biscuit.

Enter strawberries.

Strawberries.

They’re out of season, but available in most stores. Do yourself a favour and throw out any that aren’t red inside. White strawberries are blech, ugh, and above all else, yucky.

Here’s how to measure your flour perfectly. First, sift onto a flexible cutting board or, as seen here, parchment paper.

Flour!

Funnel the flour into the measuring cup. Oh hey, bitch has tattoos, check that out.

Measuring . . .

Overfill the cup with flour, and DO NOT shake to level it off–this repacks the flour and undoes all your fancy sifting.

Abundance.

Instead, kinda slice off the top with a knife into the sink, or back into your flour bag/box if you can manage it. It’s messy, but it’s the best way.

Cut!

Use a pastry blender or two knives to blend the butter into the flour until it kinda disappears in there. Then add some heavy cream, light cream, or fat free half and half. This is a batter rather than a dough, so no folding out is required, and it will be goopy.

Pre-shortcake.

And hey, back to the strawberries! Except this time they’re seasonally-themed.

I <3 strawberries.

Select the pointiest berries to create the hearts. Then remove the stem and carve out the little stem-pit there. Also, this berry was a poor example, as there was a lot of white under that stem.

Pointy berry.Shink!Scrooch!

Cut the strawberries in half length-wise, then carve a little V out of the top. To further carve out the heart-shape, slice from the already-sliced side and round out the edges. This takes a little bit of practice, and I really didn’t know how to show it in photos (sorry!). Really, though, the strawberries are going to be pushed into the batter anyway, so the edges really don’t have to be all that perfect. They just take better pre-baked photos that way. And that’s how to make strawberry hearts.

V . . . not consummate, sadly.<3.

Scoop two heaving tablespoons of batter into each spot of your muffin pan, then press one of the strawberry hearts into each.

Oh look, it's all my love.

Then bake to perfection. And hey, don’t serve yours this way . . . you need to serve it with sugared strawberries. Really. Trust me. This just took the best picture.

Much love.

Strawberry Heart Shortcake Cupcakes
makes 8 cakes

1 lb fresh strawberries.
2c sifted cake flour (if using all-purpose flour, which is not recommended, reduce to 1.75c sifted)
1 tbsp baking powder
3 tbsp sugar (1 tbsp for the shortcake, 2 for the strawberry topping)
1/2 tsp salt
6 tbsp cold butter
3/4 c light or heavy cream, half and half, or fat-free half and half
Whipped cream, whipped topping, or cream-in-a-can

Rinse the berries, reserving 8-10 small to medium ones with pointy tips. These will be your hearts. Heat the oven to 450.

Slice remaining strawberries into quarters and toss with 2 tbsp sugar to coat. Set aside.

Sift flour on a flexible cutting board or parchment paper. Gently pour into measuring cup, then level off with a knife. I’ll repeat it again just in case you missed it the first time: do not level off by shaking or tapping the measuring cup. You’ll get dry nasty muffins, and nobody wants that.

Sift the sifted flour AGAIN, this time with baking powder, salt and sugar. Cut up the butter, which should have been in your fridge all this time, a little bit to get the blending going. Dump into the flour, then use a pastry blender or two knives to blend together. You’re done when there are no remaining chunks of butter in there. Add in the cream or half and half all at once, then mix until all ingredients are moistened.

Let that sit a bit while you create your strawberry hearts. Pull off stems, carve out the pit with a paring knife, then slice in half. Shape each half into a heart by carving a V at the notch (where the stem used to be). Since the berries will be pushed into the dough, the edges don’t need to make a perfect heart, but the V at the top is pivotal.

Bake for 12 minutes. Remove from oven, let cool a minute or two in the pan, then transfer to wire rack to cool. Serve to your dearest love with the sugared strawberries and whipped cream.

Love, Aleta.

Love,
Aleta

Woo! More diner food. Get excited.

What I mean to say is “Get excited, you’re going to be one skinny bitch or dude!”

(Hey! Some of those menu items are clickable.)

Yum! The sausage is a *mite* time-consuming, but it’s delicious and easy to freezey. Here, lemme show you.

diet diner dinner: scramble & sausage

This called for a number of spices I don’t normally use, hence the unappealing array of unsightly jars. It even looks better on raw meat, somehow.

diet diner dinner: scramble & sausage

Since turkey comes in 1.25 lb packages, and since I haven’t tested the spice blend with that much turkey (I saved the extra quarter pound for a chili), I would say to use generous 1/2 tsps of the spices. Because we’re talking an extra 1/8 tsp, and my measuring spoons don’t even get that small. It’s about a pinch.

Now weigh out 1.1 oz patties. I know that’s kind of a weird size, but they were just the right size. If you don’t have a scale, divide your meat into about 12 parts. Ball up the meat, then pat it down, and stack between little squares of wax paper.

diet diner dinner: scramble & sausage

Now chill it for an hour. After the hour’s gone by, wrap whatever you aren’t going to use in saran wrap, then throw them in a freezer-safe bag in the freezer. To thaw later, microwave on high in two 10 second intervals, allowing a minute or so between nukings.

After the hour’s up, get a pan hot, then lay down a patty. Let it sit for a couple minutes, then flip. Let sit another couple minutes. Cut into one to be sure you’ve cooked all the way through (these should be rather thin, so if both sides look white, you’re probably all set).

diet diner dinner: scramble & sausage

And there you are! Money shot in a bit.

Now for the eggs. I love love LOVE egg substitute, and I use it anywhere I can get away with it. I don’t care what anyone says, for a scramble, these are fantastic. And oh so low calorie. I put a pinch of cayenne and probably a 1/4 tsp of garlic powder. Garlic powder is this amazing thing that you can put in fat free food to make it a thousand times more satisfying. You may have heard of it.

diet diner dinner: scramble & sausage

Next, some stuff to add a little fiber to your meal.

diet diner dinner: scramble & sausage

In addition to being delicious, these are lovely additions to your eggs. First you want to salt and pepper these . . . because they are particularly low-fat, the salt helps bring out a lot of otherwise neglected flavour. Sautee on medium-high for a few minutes, then set the burner to medium and lid it for another few minutes to let the broccoli get nice and tender.

diet diner dinner: scramble & sausage

Aaaaahhh!! Egg substunami!

diet diner dinner: scramble & sausage

Scramble it up in your awful pan that sticks to everything even when you use cooking spray.

diet diner dinner: scramble & sausage

You are perhaps thinking “But Aleta, I only like broccoli when its flavour is completely masked by cheese!” Have no fear, cheese-lover . . . there is such a thing as fat free shredded cheddar, and it goes on top of these eggs.

diet diner dinner: scramble & sausage

Now turn off the burner and, without moving your pan, lid it again to melt the cheese without burning the shit out of your eggs.

Mmmmmelty.

diet diner dinner: scramble & sausage

And that’s dinner.

DSC_0343

Maple Turkey Sausage
adapted from a recipe by A Taste of Home

1.25 lbs ground light turkey
1 tbsp maple syrup
One generous half-teaspoon each:
salt
onion powder
dried sage
dried thyme
poultry seasoning
nutmeg
1/4 tsp cayenne powder (plus a pinch for the adventurous)

Mix the turkey with the spices and maple syrup. Pat into tight 1.1 oz patties (about 14 total). You want these pretty thin so they don’t have to cook for very long. Layer between squares of wax paper and chill in the fridge one hour.

No no, the turkey patties, not you. Get out of there.

Heat a nonstick pan to HOT, then cook each side of the patty 2-3 minutes. Cut into one to be sure that there’s no pink in the middle.

These freeze and reheat fantastically, and I highly recommend making a month’s supply at a time. To do so, wrap each patty individually with plastic wrap, then store in a freezer bag in your freezer. They should last a good few months that way.

Easy Fo-cheesey Egg Scramble

1/2 c egg substitute

pinch of cayenne
pinch of garlic powder
1/3 c (or more) chopped broccoli
1/4 c chopped onion
1 slice packaged ham, chopped
1/4 c fat free shredded cheddar cheese
1/4 medium tomato, chopped, with the gutsy part left out, for garnish

Spray your pan with cooking spray, and heat to medium-high. Sautee the veggies until the onions start to look translucent (a few minutes), then cover the pan with a lid to help the broccoli cool.

Meanwhile, whisk the egg with the cayenne and garlic powder.

Remove the lid, turn heat to medium, and add the egg. Scramble it up. These cook pretty quickly. When the egg is no longer runny, sprinkle the cheese on top, turn off the burner, and lid the pan again to melt the cheese without burning the egg. About two minutes later, you, my friend have a cheesey egg scramble.

ATTENTION SAFARI USERS: perhaps you went to my blogspot and were redirected here? I’m not sure why that’s happening, but I do know the reason is because of my recent move to Omnomicon.com. Since I lack the technical abilities to fix this right now, please update your bookmark/links and you should be able to see all my recent posts. Thanks for your patience!


So I’ve been back on Weight Watchers to lose my last little bit of weight there, and unfortunately this limits the number of lovely baked goods I can feature. But rather than cook/bake items of which I can only enjoy half a portion, I’ve decided to pass my cheap little diet secrets onto anyone who’s interested.

I’ll tell you something, in case you didn’t know already: eating out SUCKS when you’re essentially counting every calorie. Diner food is easy because it’s so simple, but every time I go out for diner food, I sit there thinking about how easy it would be to slim down the same dishes. We decided to institute Diet Diner Dinners once weekly to make eating things like egg substitute and light Italian bread a special meal. This also gives me a focus for the blog, which it so desperately needs.

We’ll start with the basics. Here, have a menu. Take a look.

Omnomicon's diet diner dinner series

Bacon is a diner food STAPLE. Sometimes I feel guilty ordering a diner plate without it because shit, the smell of bacon grease is what Sunday morning hangover food is all about. I’ve tried turkey bacon, and while I’m not afraid of food colouring nor fake diet food, that stuff is remarkably unappetizing. Those stripes and that awful off-taste don’t convince me at all. What is a surprisingly good substitute is frying up some ham and kinda just pretending it’s bacon. Goes well with a fried egg.

diet diner dinner

No pan greasing required! And a single 30-calorie slice of ham makes four slices of fakin bacon. Just the right amount for a single egg.

diet diner dinner

Now because I’m completely unoriginal (and also because I’ve never made hash browns before), I followed Simply Recipe’s Crispy Hash Browns Recipe. I cut the oil down to 2 tbsp to achieve that delicious crispy hash brown taste without all the calories.

I should write commercials.

I started with a pound of potatoes. This is what they looked like.

diet diner dinner

There was a lonely potato as I was shredding ’em. Dano took a picture. It’s my new desktop background. Grab the large size on Flickr if’n ya want yer own.

DSC_0201

Alrighty. Elise was so right about draining the potatoes. In the absence of a potato ricer, I annihilated about half a roll of paper towels drying these out. It was worth it.

diet diner dinner

I guess it’s a little subtle in the photos . . .

I threw on some salt, pepper, paprika, garlic powder, a pinch of cayenne, and probably other spices from my standard fare.

diet diner dinner

Then I ruined the photo by mixing it all up. This stuff is not terribly photogenic, not gonna lie.

diet diner dinner

But in the end? Best diet food ever.

diet diner dinner

Next week there will be more diner food. Stay tuned, cats ‘n kittens!!
Subscribe to Omnomicon